Braising is a long, slow, moist method of cooking used for cuts of meat, poultry, and game that are too tough to roast. Braising utilizes the combination of heat, time, and moisture to break down the tough connective tissue collagen in meat. Many classic braised dishes such as coq au vin are highly evolved methods of cooking tough and otherwise unpalatable foods. Pressure cooking and slow cooking (as in a crockpot) are other forms of braising.
Braised meats are usually cooked in one piece which are first seared in oil and then cooked with vegetables in a tightly covered pot with a close-fitting lid. The dish is then cooked in a low-temp oven or simmered on the stove top with a surprising small amount of braising liquid.
Braised Pot Roast
1 beef roast, lean chuck, bottom round, or rump, about 3 to 4 pounds
1 teaspoon salt
1/2 teaspoon ground black pepper
3 tablespoons olive oil
1 medium onion, coarsely chopped
1 rib celery, coarsely chopped
½ cup carrots, cut into ½” chunks
4 cloves garlic, smashed and minced
1 teaspoon crushed red pepper (optional)
1/2 teaspoon dried oregano
1 small bay leaf
1 cup beef broth
1 can (13 ounces) diced tomatoes (can substitute crushed)
8 ounces baby portabella mushrooms, washed and sliced (optional)
In a large pot or Dutch oven, heat olive oil over high heat. Do not begin to sear meat until pan is quite hot. Salt and pepper the meat on both sides and brown the roast on all sides in the hot oil. Add the onions, celery, carrots and mushrooms; reduce heat to medium and sauté, stirring frequently, for about 2 minutes. Add the garlic and cook for 1 minute longer. Add the oregano, bay leaf, beef broth, and tomatoes and then bring to a boil.
Reduce the heat to low; cover and simmer for 2 to 2 1/2 hours, or until the beef is very tender. You can also place the Dutch oven in a 325oF oven for the same length of time. We serve this pot roast with mashed potatoes or egg noodles and a tossed green salad.
Dried porcini mushrooms can be used in lieu of the baby portabella mushrooms. Put ¼ cup of dried porcini in a cup or small bowl and add enough boiling water to just cover them. Steep them for 20 minutes or until they've expanded. Drain them, reserving the liquid, and mince them. You can use the reserved mushroom liquid in lieu of some of the beef broth.
Tuesday, November 29, 2011
Saturday, November 26, 2011
Back to the Roots Golden Borscht
In response to a post by Archana Potdar of The Mad Scientist's Kitchen, we are going “Back to the Roots.” We started this blog several years ago, as a way to record all our family recipes, traditions and tricks for our boys to have when they grow up. Along the way, we have tried new ingredients and created new recipes that have shaped new traditions.
When considering an older post for a new twist (and never being able to resist a play-on-words), the obvious choice for a recipe redux had to be roasted beets. These root vegetables are even more appropriate given that Archana asked for vegetarian options for included recipes.
The first thing that leaps to mind when we think of beets is a traditional Ukrainian borscht; beet soup. So, for a makeover with a new twist, we decided to use golden beets instead of the typical magenta-colored roots. We used chicken (or vegetable) broth instead of beef broth and orange juice instead of red wine or vinegar which seemed to better complement the flavor of these yellow-fleshed beets. We also used yogurt instead of sour cream for an added tang.
Place the beets in a small roasting or baking dish in one layer. Drizzle with the olive oil, salt and pepper. Toss to coat. Roast until tender and easily pierced with a knife, about 45-60 minutes. Remove from the oven and let cool.
When the beets are cool enough to handle, peel using a paring knife or by pushing the skin with your fingers. Slice the beets and place in a food processor or blender. Add stock, orange juice, roasted garlic, salt and pepper and puree to desired consistency.
Refrigerate until cold. (While borscht is occasionally served hot, it is most often served cold.) Taste the soup and adjust seasonings before serving with a dollop of yogurt and chopped chives.
As part of the Foodbuzz Featured Publisher program, I have been entered for the chance to win a trip to Greece courtesy of FAGE. You too can enter to win one of three trips to Greece by entering the FAGE Plain Extraordinary Greek Getaway here: http://www.fageusa.com/community/fage-greek-getaway.
When considering an older post for a new twist (and never being able to resist a play-on-words), the obvious choice for a recipe redux had to be roasted beets. These root vegetables are even more appropriate given that Archana asked for vegetarian options for included recipes.
The first thing that leaps to mind when we think of beets is a traditional Ukrainian borscht; beet soup. So, for a makeover with a new twist, we decided to use golden beets instead of the typical magenta-colored roots. We used chicken (or vegetable) broth instead of beef broth and orange juice instead of red wine or vinegar which seemed to better complement the flavor of these yellow-fleshed beets. We also used yogurt instead of sour cream for an added tang.
- 1 cup roasted beets, peeled and sliced
- 1 cup chicken broth or vegetable stock
- ¼ cup orange juice
- 2-3 cloves of roasted garlic
- ½ teaspoon salt
- ¼ teaspoon ground white pepper
- Yogurt (we used FAGE Total Greek-style)*
- Fresh chives, chopped for garnish
Place the beets in a small roasting or baking dish in one layer. Drizzle with the olive oil, salt and pepper. Toss to coat. Roast until tender and easily pierced with a knife, about 45-60 minutes. Remove from the oven and let cool.
When the beets are cool enough to handle, peel using a paring knife or by pushing the skin with your fingers. Slice the beets and place in a food processor or blender. Add stock, orange juice, roasted garlic, salt and pepper and puree to desired consistency.
Refrigerate until cold. (While borscht is occasionally served hot, it is most often served cold.) Taste the soup and adjust seasonings before serving with a dollop of yogurt and chopped chives.
As part of the Foodbuzz Featured Publisher program, I have been entered for the chance to win a trip to Greece courtesy of FAGE. You too can enter to win one of three trips to Greece by entering the FAGE Plain Extraordinary Greek Getaway here: http://www.fageusa.com/community/fage-greek-getaway.
Yum
Thursday, November 24, 2011
Black Friday Bobbie
The dishes are clean and put away, the table linens are in the washing machine and the house seems empty after the controlled chaos that is Thanksgiving. After an early morning of Black Friday bargain hunting and back home for scouring, you have worked up an appetite; it’s time to break out the leftovers [insert eye roll here.]
Okay, for some us, the thought of eating more turkey is repugnant, but for the “bona fide golly turkicanis freak,” there is no such thing as too much turkey. The sandwich, made famous by Capriotti’s Sandwich Shop, was voted the Greatest Sandwich in America by AOL’s Lemondrop.com in 2009. “The Bobbie” (Thanksgiving dinner in a sandwich) is a year-round favorite in Las Vegas where it is reputed to be the best way to recharge after a late night out on the town.
Split the sub roll lengthwise and spread a light coating of mayonnaise on each half. On the bottom half of the roll, layer the turkey, stuffing, and cranberry sauce, and salt and pepper to taste. Cover with top of roll, slice in half, and serve immediately.
You can almost imagine the glow of neon and Tom Jones singing in the background as you bite into this refrigerator-cleaning snack. Now, full refreshed, it is time to go get the Christmas tree and decorations...
Okay, for some us, the thought of eating more turkey is repugnant, but for the “bona fide golly turkicanis freak,” there is no such thing as too much turkey. The sandwich, made famous by Capriotti’s Sandwich Shop, was voted the Greatest Sandwich in America by AOL’s Lemondrop.com in 2009. “The Bobbie” (Thanksgiving dinner in a sandwich) is a year-round favorite in Las Vegas where it is reputed to be the best way to recharge after a late night out on the town.
- 1 (9-inch) hoagie or submarine roll
- 4 ounces roasted turkey, thinly sliced
- 4 ounces turkey stuffing
- ¼ cup cranberry sauce
- Mayonnaise
- Salt and pepper to taste
Split the sub roll lengthwise and spread a light coating of mayonnaise on each half. On the bottom half of the roll, layer the turkey, stuffing, and cranberry sauce, and salt and pepper to taste. Cover with top of roll, slice in half, and serve immediately.
You can almost imagine the glow of neon and Tom Jones singing in the background as you bite into this refrigerator-cleaning snack. Now, full refreshed, it is time to go get the Christmas tree and decorations...
Yum
Cranberry Sauce - Two Ways
The botanical name for the North American large-berry variety of cranberry, vaccinium macrocarpon, comes from the Latin words vacca, meaning cow (since cows seem to be fond of them) and macro meaning means large, with oval leaves. The English term “cranberry” derives from "craneberry" named because the plant's flowers that dip down and resemble the head of a crane (which grow in bogs where cranes make their home and the bird’s seem to like them as well.)
The Pilgrims learned about cranberries from the Native Americans, who discovered the usefulness of the berry’s benzoic acid as a natural preservative. Cranberry sauce became commonplace when General Ulysses S. Grant ordered it to be served to the troops during the Civil War in 1864.
In 1912, "Ocean Spray Cape Cod Cranberry Sauce" became the first commercially canned cranberry sauce. Cranberry sauce is incredibly easy to make at home. There are differences in flavor preference depending on where the sauce is made. European prefer a slightly sour-tasting sauce, while in Americas prefer a more sweetened mixture.
The most basic cranberry sauce consists of cranberries boiled in sugar water until the berries pop and the mixture thickens. Some recipes include other ingredients such as slivered almonds, orange juice, zest, ginger, maple syrup, port, or cinnamon.
Basic Cranberry Sauce
1 (12 oz.) bag of cranberries
1 cup sugar
1 cup orange juice
Rinse cranberries in cold water and remove any damaged or soft berries. In a medium-sized saucepan dissolve the sugar in the orange juice over medium heat. Stir in the cranberries and cook until the cranberries start to pop (about 10 minutes). Remove from heat and place sauce in a bowl. The natural pectin in the cranberries will cause the sauce to continue to thicken as it cools.
Easy Cranberry Relish
1 (12 oz.) bag of cranberries
1 whole orange
½ cup sugar
Rinse cranberries in cold water and remove any damaged or soft berries. Wash the orange (yes, the whole orange) and cut the whole orange into quarters. Place berries and orange quarters in a food processor and pulse until pieces are minced to your desired consistency. You may need to do this in batches depending on the size of your food processor.
Pour mixture into a bowl and add sugar stirring to mix. Place in the refrigerator and allow to rest for 30 minutes. Stir relish again just before serving.
Lifestyle Feature Article on November 30, 2011 |
Yum
Saturday, November 19, 2011
No-Place-Like-Home Oatmeal Cookies
Dorothy had it right when she clicked her heels and wished her away out of Oz and back to her Kansas farm by repeating the mantra “There’s no place like home, there’s no place like home, there’s no place like home…“
We are blessed with the gift of warm and cozy home and though I like to complain about doing mundane chores, I am rarely happier than when doing those routine tasks amidst the drone of domestic machinery and a background of football commentary on a chilly Saturday afternoon.
You can imagine then that there is a ripple in the time-space continuum when hubby is out of town especially on a weekend. Having the opportunity to go quail hunting with his buddies, he skedaddled on a Friday with plans to return on Sunday. In an attempt to express that he would be missed (and to remind him of what he would be missing), I made a batch of his favorite cookies for the long drive to his destination to be shared with his travel-mates.
In a medium bowl, combine flour, oatmeal, salt, cinnamon, and baking soda and set aside. In the bowl of an electric mixer, mix together butter and sugar, beating until light and fluffy. Add vanilla, milk, and eggs, and mix well to the mixer, and then add flour mixture. Beat ingredients until just combined; do not over mix. Remove the bowl from the mixer and stir in raisins. Place cookie dough in the refrigerator until firm, about 2 hours or overnight.
Pre-heat oven to 350oF. Line several baking sheets with parchment paper. Scoop out dough using a tablespoon and place on one of the prepared cookie sheets. Repeat with remaining dough, spacing balls 3 inches apart. You can press the dough down with the back of a spoon to flatten into 2-inch diameters if you prefer flatter cookies.
Bake in the pre-heated oven until golden but still soft in center which should take about 16 to 18 minutes. Rotate the pans between oven shelves halfway through baking. When nicely browned, remove from the oven and place on a wire rack to cool completely.
Store in an airtight container at room temperature for up to 1 week. This recipe makes a manageable batch of about 2 dozen small cookies. My family is spoiled and prefers fresh cookies over those that have been frozen thus giving me an excuse to bake more often and them an excuse to stay home because, in the end, there really is no place like it.
We are blessed with the gift of warm and cozy home and though I like to complain about doing mundane chores, I am rarely happier than when doing those routine tasks amidst the drone of domestic machinery and a background of football commentary on a chilly Saturday afternoon.
You can imagine then that there is a ripple in the time-space continuum when hubby is out of town especially on a weekend. Having the opportunity to go quail hunting with his buddies, he skedaddled on a Friday with plans to return on Sunday. In an attempt to express that he would be missed (and to remind him of what he would be missing), I made a batch of his favorite cookies for the long drive to his destination to be shared with his travel-mates.
- 3/4 cup all-purpose flour
- 1 ½ cups old-fashioned oats
- 1/4 teaspoon salt
- 1/4 teaspoon ground cinnamon
- 1/2 teaspoon baking soda
- 1/2 cup (1 stick) unsalted butter, room temperature
- 3/4 cup packed light-brown sugar
- 1 teaspoon pure vanilla extract
- 1 tablespoon milk
- 1 large egg
- ½ cup raisins
In a medium bowl, combine flour, oatmeal, salt, cinnamon, and baking soda and set aside. In the bowl of an electric mixer, mix together butter and sugar, beating until light and fluffy. Add vanilla, milk, and eggs, and mix well to the mixer, and then add flour mixture. Beat ingredients until just combined; do not over mix. Remove the bowl from the mixer and stir in raisins. Place cookie dough in the refrigerator until firm, about 2 hours or overnight.
Pre-heat oven to 350oF. Line several baking sheets with parchment paper. Scoop out dough using a tablespoon and place on one of the prepared cookie sheets. Repeat with remaining dough, spacing balls 3 inches apart. You can press the dough down with the back of a spoon to flatten into 2-inch diameters if you prefer flatter cookies.
Bake in the pre-heated oven until golden but still soft in center which should take about 16 to 18 minutes. Rotate the pans between oven shelves halfway through baking. When nicely browned, remove from the oven and place on a wire rack to cool completely.
Store in an airtight container at room temperature for up to 1 week. This recipe makes a manageable batch of about 2 dozen small cookies. My family is spoiled and prefers fresh cookies over those that have been frozen thus giving me an excuse to bake more often and them an excuse to stay home because, in the end, there really is no place like it.
Yum
Tuesday, November 15, 2011
Technique of the Week: Trussing
Trussing is a technique used for birds and roasts to keep the meat in a uniform shape to ensure even cooking. Trussing helps the meat keep its shape and holds in natural juices while cooking.
Trussing a bird:
Trussing a turkey means tying the legs and wings together and closings all cavities to give the bird a nicer and much more presentable appearance. While trussing isn't necessary for cooking, it can actually make the legs and thighs take longer to cook, since the bird is pressed against itself. Trussing also makes the bird easier to carve.
Remove the bird from its packaging. If giblets are available, remove them (they will be wrapped separately and placed in the body cavity) and set them aside to make gravy. Thoroughly wash the bird inside and out under running tap water. Pat skin dry with paper towels and place the bird breast side down on a clean surface.
Fold the wing tips over and secure them behind the shoulder, tucking them neatly under the bird in doing so. This keeps them from cooking too quickly.
Using a trussing needle (or large embroidery needle) and fine cotton string, pull the skin of the neck flap over the neck opening and sew the cavity closed. A toothpick can be used if necessary.
If you are stuffing the bird, fill the body and neck cavities loosely with dressing just before roasting; being careful not to overfill. Pull the skin taut from the breast and fold over stuffing, tucking in the Pope’s nose (fatty tail flap) and sewing the cavity closed with the trussing needle and cotton twine.
Use kitchen string to tie the bird's legs together, pressing the legs close to the turkey body. To secure the legs, press them firmly into the breast, tucking any excess skin between the legs and the breast. Cross the ends of the drumsticks together and tie several loops of string around the drumstick ends and then knot the string.
Trussing a Roast:
The technique is for tying a roast is the same whether you're working with pork, beef, or lamb. Begin with a long piece of standard butcher's twine and bring the string up and around to the top of the roast, forming the letter 'A' with the string being the cross, then pull gently but firmly.
Slowly wrap the string around the feed side again to make another tie, and then pull the string, holding your fingers against the knots to tighten lightly. You want a slight indentation in the meat, but the meat should not be squeezed too tightly. To finish the tie, make the letter 'C', pulling the end of the string through to make another knot. Repeat this process every few inches along the roast.
Yum
Saturday, November 12, 2011
Stuffed Acorn Squash with Moroccan-Style Candy Cap Filling
I have lived on the East Coast my entire life with few regrets until I tried the Candy Cap mushrooms I received from Marx Foods. My introduction started at my mailbox. When I opened it, I was bombarded by the heady aroma of … butterscotch? With startled curiosity, I opened the package and the aroma erupted, filling the whole room with a wonderful nutty-maple scent. Imagine my surprise to find that a small plastic bag filled with dried mushrooms was imparting such an abundance of fragrance! Perhaps the potpourri industry should consider using these little gems.
Candy cap mushrooms (Lactarius rubidus) which are indigenous the West Coast, primarily coastal California, can be used fresh, however, they are primarily harvested for use in dry form because they are far more flavorful when dried, and can keep their flavor for years.
Visions of sugar plums danced through my head while considering a recipe in which to highlight the candy caps. While strolling through the market, my gaze fell upon two gorgeous acorn squash and I knew exactly how I would use the unusual and unique fungi to underscore their unequaled soft, honeyed flavor.
Moroccan Stuffed Acorn Squash
Preheat oven to 400oF. Wash acorn squash to remove waxy exterior coating and cut them in half horizontally. Using a tablespoon or ice cream scoop, remove seeds and make a nicely shaped hole in each half. If the squash halves will not stand steadily on their bottoms, then cut a small portion of the bottom off to make an even surface. Season the four cavities with salt and pepper, then brush with olive oil before placing them cut side down on a parchment lined cookie sheet or shallow pan. Bake squash until tender which should take about 35 to 40 minutes.
Meanwhile, rehydrate the Candy Cap mushrooms by placing them in a ½ cup of boiling water and allow them to sit until the water is cool. Strain the mushrooms and use the reserved mushroom water to cook the rice according the package instructions. Chop the mushrooms and them set aside.
Heat olive oil in a heavy skillet over medium heat. Add onion, and cook until slightly translucent, about 5 minutes. Then add ground beef, chopped Candy Caps, a pinch of cinnamon and nutmeg, and 1 teaspoon salt. Cook, stirring frequently, until meat is browned and cooked through which should take about 5 to 7 minutes. If there is an excess amount of fat, drain before adding rice. Add rice and sauté until rice is fully coated with pan juices.
Once squash halves are done (a knife inserted through the flesh meets no resistance,) turn upwards and add the rice mixture to the empty cavities, then drizzle the tops with pure maple syrup and place back in the oven for 10 minutes until warmed through and the tops are browned. Allow to cool slightly (they retain heat) and serve with a spoon. Scoop spoonfuls of tender squash with the aromatic filling and prepare your tastebuds for an amazing taste sensation.
As the filling was cooking the whole house smelled of maple and cinnamon! It was like a warm comforting cloud which enveloped us, making us crave the finished creation. We all dove into dinner with reckless abandon. (Even our oldest, who is not a big fan of squash, decimated his portion down to the skin!) The intensity of the candy caps shone through and truly complemented and accentuated the flavors of the filling and squash. I may be willing to consider a move to the West Coast!
Candy cap mushrooms (Lactarius rubidus) which are indigenous the West Coast, primarily coastal California, can be used fresh, however, they are primarily harvested for use in dry form because they are far more flavorful when dried, and can keep their flavor for years.
Visions of sugar plums danced through my head while considering a recipe in which to highlight the candy caps. While strolling through the market, my gaze fell upon two gorgeous acorn squash and I knew exactly how I would use the unusual and unique fungi to underscore their unequaled soft, honeyed flavor.
Moroccan Stuffed Acorn Squash
- 2 medium acorn squashes, halved and seeded
- 2 teaspoons extra-virgin olive oil
- ½ ounce dried Candy Cap mushrooms, chopped
- ½ medium onion, finely chopped
- ½ lb. ground beef (or lamb)
- 1-2 teaspoons freshly ground black pepper
- 1-2 teaspoons Kosher salt, to taste
- Pinch of ground cinnamon
- Pinch of ground nutmeg
- 1 cup white or brown rice, cooked
- 3 tablespoons pure maple syrup
Preheat oven to 400oF. Wash acorn squash to remove waxy exterior coating and cut them in half horizontally. Using a tablespoon or ice cream scoop, remove seeds and make a nicely shaped hole in each half. If the squash halves will not stand steadily on their bottoms, then cut a small portion of the bottom off to make an even surface. Season the four cavities with salt and pepper, then brush with olive oil before placing them cut side down on a parchment lined cookie sheet or shallow pan. Bake squash until tender which should take about 35 to 40 minutes.
Meanwhile, rehydrate the Candy Cap mushrooms by placing them in a ½ cup of boiling water and allow them to sit until the water is cool. Strain the mushrooms and use the reserved mushroom water to cook the rice according the package instructions. Chop the mushrooms and them set aside.
Heat olive oil in a heavy skillet over medium heat. Add onion, and cook until slightly translucent, about 5 minutes. Then add ground beef, chopped Candy Caps, a pinch of cinnamon and nutmeg, and 1 teaspoon salt. Cook, stirring frequently, until meat is browned and cooked through which should take about 5 to 7 minutes. If there is an excess amount of fat, drain before adding rice. Add rice and sauté until rice is fully coated with pan juices.
Once squash halves are done (a knife inserted through the flesh meets no resistance,) turn upwards and add the rice mixture to the empty cavities, then drizzle the tops with pure maple syrup and place back in the oven for 10 minutes until warmed through and the tops are browned. Allow to cool slightly (they retain heat) and serve with a spoon. Scoop spoonfuls of tender squash with the aromatic filling and prepare your tastebuds for an amazing taste sensation.
As the filling was cooking the whole house smelled of maple and cinnamon! It was like a warm comforting cloud which enveloped us, making us crave the finished creation. We all dove into dinner with reckless abandon. (Even our oldest, who is not a big fan of squash, decimated his portion down to the skin!) The intensity of the candy caps shone through and truly complemented and accentuated the flavors of the filling and squash. I may be willing to consider a move to the West Coast!
Yum
Thursday, November 10, 2011
Simple Satisfying Split Pea Soup
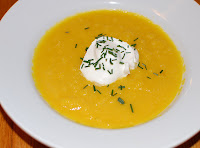
During this Split Pea Soup Week, I am reminded of my first welcoming bowl of this sort of nourishment on a foggy, clammy day in London. You can ask me the name of the pub where I consumed this scrummy sustenance; I have no idea. The creamy, hammy potage served with a piece of dry toast and a shandy* were all that were needed to chase the dampness from my tour-weary bones.
There is a neighborhood pub on every corner, most of which have split pea soup on the luncheon menu alongside ever-present plates of bangers and mash. As a peckish 16-year-old from rural North Georgia, I was so busy absorbing all the sites and scenes I had experienced that morning, that it never occurred to me to look at the sign hanging outside before pushing through the door to immediate warmth and comfort.
Pea soup is highly under-rated and an utter doddle to make. In fact, I chuckle when I walk down the aisle at the grocery and see “instant pea soup” sold in packets. It is an absolutely brilliant dish for a rainy and dank day.
Pick over the peas and remove any stone and soak overnight (if you remember.) Drain and place in a large stock pot with water and bring to a boil. Skim the scum off the top of the soup for several minutes, until the scum ceases to rise, then reduce the heat and allow peas to simmer.
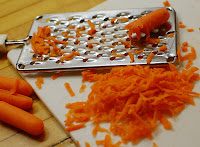
Add grated carrots (you can use a food processor, but a grater is faster and easier to clean), ham, garlic, and bay leaf and cover loosely. Simmer until vegetables are tender, about 1 to 1 ½ hour (less if soaked overnight.) Stir occasionally to prevent peas from sticking to the bottom of the pan.
First, remove the bay leaf. The soup should be fairly smooth with small bits of ham, but if you want a super smooth, you may want to use a blender. An immersion blender works stonking well for this. If you are using a regular blender, take care to work in batches and only fill the blender halfway if the soup is still hot, and hold down the lid while blending.
Return the purée to the pot and heat to serve. Add salt and pepper to taste. Ladle the luvvly-jubbly draught into warm bowls and drizzle with olive oil and garnish with easy-peasy croutons.
Easy-Peasy Crouton Hack:
I love this short cut (probably because I choose to believe that I came up with it myself.) Toast a few slices of day-old bread and rub with a clove of garlic and brush with olive oil (or if you REALLY need them in a jiffy, spray them with cooking spray.) Cut the toasted bread into cubes and Tally-Ho!
*A shandy is beer mixed with “lemonade” which in Great Britain another name for citrus-flavored soda akin to Sprite or 7-Up (just like potato chips are called “crisps” and French fries are called “chips”). The proportion of beer to lemonade is normally half-and-half, but can be adjusted to taste. You should also be aware that European beverages are a tad dodgy in the refrigeration department and are not served icy cold as they are in America, as a result I preferred a greater ratio of lemonade to beer!
There is a neighborhood pub on every corner, most of which have split pea soup on the luncheon menu alongside ever-present plates of bangers and mash. As a peckish 16-year-old from rural North Georgia, I was so busy absorbing all the sites and scenes I had experienced that morning, that it never occurred to me to look at the sign hanging outside before pushing through the door to immediate warmth and comfort.
Pea soup is highly under-rated and an utter doddle to make. In fact, I chuckle when I walk down the aisle at the grocery and see “instant pea soup” sold in packets. It is an absolutely brilliant dish for a rainy and dank day.
- 1 lb. (2 1/4 cups) green split peas (soaked overnight)
- 2 1/2 quarts of water
- 2-3 tablespoons ham, chopped
- 1 large carrot, grated
- 1 large clove of garlic, minced
- 1 bay leaf
- Salt and pepper, to taste
- Oregano-infused olive oil, for drizzling
- Croutons for garnish
Pick over the peas and remove any stone and soak overnight (if you remember.) Drain and place in a large stock pot with water and bring to a boil. Skim the scum off the top of the soup for several minutes, until the scum ceases to rise, then reduce the heat and allow peas to simmer.
Add grated carrots (you can use a food processor, but a grater is faster and easier to clean), ham, garlic, and bay leaf and cover loosely. Simmer until vegetables are tender, about 1 to 1 ½ hour (less if soaked overnight.) Stir occasionally to prevent peas from sticking to the bottom of the pan.
First, remove the bay leaf. The soup should be fairly smooth with small bits of ham, but if you want a super smooth, you may want to use a blender. An immersion blender works stonking well for this. If you are using a regular blender, take care to work in batches and only fill the blender halfway if the soup is still hot, and hold down the lid while blending.
Return the purée to the pot and heat to serve. Add salt and pepper to taste. Ladle the luvvly-jubbly draught into warm bowls and drizzle with olive oil and garnish with easy-peasy croutons.
Easy-Peasy Crouton Hack:
I love this short cut (probably because I choose to believe that I came up with it myself.) Toast a few slices of day-old bread and rub with a clove of garlic and brush with olive oil (or if you REALLY need them in a jiffy, spray them with cooking spray.) Cut the toasted bread into cubes and Tally-Ho!
*A shandy is beer mixed with “lemonade” which in Great Britain another name for citrus-flavored soda akin to Sprite or 7-Up (just like potato chips are called “crisps” and French fries are called “chips”). The proportion of beer to lemonade is normally half-and-half, but can be adjusted to taste. You should also be aware that European beverages are a tad dodgy in the refrigeration department and are not served icy cold as they are in America, as a result I preferred a greater ratio of lemonade to beer!
Yum
Tuesday, November 8, 2011
Technique of the Week: Stuffing
In cooking, stuffing or filling is an edible concoction used to fill a cavity in another food item. Many foods may be stuffed, including meats, vegetables, egg, and fruits. In addition to stuffing the body cavity of animals, including mammals, birds, and fish, various cuts of meat may be stuffed after they have been deboned or a pouch has been cut into them. Many types of vegetables are also suitable for stuffing after their seeds or flesh has been removed; tomatoes, peppers, and mushrooms are common items for stuffing.
The term stuffing usually refers to the mixture placed into a turkey for the traditional Thanksgiving meal, while dressing denotes the same mixture cooked outside the bird. Turkey stuffing usually consists of bread crumbs or cubed, dried bread, with onion, celery, salt, pepper, and other spices and herbs such as oregano, sage and thyme.
Almost any ingredient may serve as stuffing such as contain bread, rice, vegetables, fruits, nuts, herbs cheese and even tofu. Oysters are a traditional stuffing component for Thanksgiving. In England, a popular stuffing is sausage seasoned with sage, onion and apple. Other types of fruits and dried fruits are often added to stuffing including prunes, apricots and raisins.
The Roman cookbook "De Re Coquinaria" (c. 1498) includes the earliest documented recipes for stuffing for chicken, hare, pig, and even dormouse. Most of the stuffing mixtures described used vegetables, herbs and spices, nuts, and stale bread, and frequently include organ meats such as chopped liver or sweetbreads. Stuffing has been known been several names throughout history including “farce,” “stuffing,” “forcemeat,” and “dressing.”
It should be noted that the United States Department of Agriculture (USDA) cautions that cooking animals with a body cavity that is filled with stuffing can present potential food safety issues. Even when the cooked meat reaches a safe temperature, the stuffing inside may still contain bacteria (and if the meat is cooked until the stuffing reaches a safe temperature, the meat may be overcooked). The USDA recommends cooking stuffing /dressing separately from the bird and not buying pre-stuffed birds. Of course, stuffing is not recommended for turkeys that are to be fried, grilled or smoked.
Recipes using the technique of stuffing:
Yum
Sunday, November 6, 2011
Steaming Hot Bowl of Watergate Reminiscences
Last week, we had the distinct pleasure of attending the lecture of two of the most respected and well known journalists in the country, Robert Woodward and Carl Bernstein. With Election Day this week and the 40th Anniversary of the Watergate Scandal rapidly approaching, the session held at Emory University was quite timely.
These two former Washington Post reporters were the first to uncover information suggesting that knowledge of the Watergate break-in, and attempts to cover it up, led deep into the Justice Department, the FBI, the CIA, and even the White House.
The lecture setting was informal with both journalists cajoling and openly interrupting each other (with previous permission granted). The two waxed nostalgic about the good ‘ole days of typewriter ribbons and old-school, gum-shoe sleuthing. Not surprisingly, they are still bitter about the level of arrogance demonstrated by all involved with the scandal. They encouraged young journalists to always use integrity in seeking the truth and to confirm leads and tips, and cautioned against being drawn in by the immediacy that is created by gossip-driven, internet-based media.
In preparation for this post, I had planned to post the recipe for the ever popular Watergate Salad to add to the above paragraphs, but found (just as Woodward and Bernstein did all those years ago,) that there was more to the story. As it turns out, the two most popular recipes attributed to the Watergate scandal (Watergate salad and Watergate cake) did not appear in any of the original Watergate cookbooks printed in the early 1970s. Both were publicized by Kraft Foods and Standard Brands (respectively) well after the Watergate scandal occurred.
In 1973, seven Bostonians referring to themselves as "The Committee to Write the Cookbook" turned a parlor game into a cookbook. The idea for The Watergate Cookbook (subtitled Or Who’s in the Soup?) began when the hostess served chicken in peaches to her dinner guests and one of them dubbed it “Cox’s In-peach Chicken” and others took up the pursuit.
While the cookbook contains real recipes, it is also an interesting read when taken in context. This compilation was just one way for frustrated voter’s to express their anger and shock over the antics of Washington politics during this period of time and is certainly more intriguing when compared with decades of Junior League-esque spiral-bound collections of senators' wives’ recipes for hot crab dip, easy beef burgundy and, yes, Kraft’s Pistachio Delight also known as Watergate salad.
"Nixon's Perfectly Clear Consomme" is the first among the 108 recipes in this tongue-in-cheek cookbook. The recipe for "Ervin’s (referring to Chairman of the Senate Watergate Committee’s Senator Sam J. Ervin, Jr.) Bouillabaisse" says “put a kettle of fish on the front burner and keep the pot boiling; do not put a lid on it.”
Other recipes bring back memories of the Watergate scandal and its players including Ellsberg's Leek Soup, Ehrlichman's Cover-Up Casserole, Kennedy's Contented Sole, McCord's Spilled Beans, Billy Graham's Eggs Benedictine, Hunt's Hush Puppies, Republican Peeking Duck, Mitchell's Cooked Goose with Stuffing, Cox's In-Peach Chicken, Martha's Sweet and Sour Tongue, Liddy's Clam-up Chowder, Magruder's Dandy Ly'in Salad, Sauteed Slippery Eels a la Deanoise, and GOP Cookie Crumbles.
This easy recipe commemorating Judge John Sirica, who presided over the trial of the Watergate burglars and did not believe the claim that they had acted alone (and was named TIME magazine's Man of the Year in 1973,) makes a quick dinner or appetizer similar to our Linguine with Clam Sauce:
Sirica’s Steamed Clams
4 pounds clams, scrubbed
1 cup water
1 cup dry (inexpensive) white wine
Bring water and wine to a boil in a stockpot. Add clams; cover and return to a boil.
"Keep the heat on them until they open up" which should take about five minutes. Immediately remove open clams with a slotted spoon. Continue cooking remaining the clams for an additional 2 to 3 minutes; they may open. Discard any remaining unopened clams and serve the clams immediately with the clam broth.
Yum
Wednesday, November 2, 2011
Pumpkin Spice Latte Bark
Pumpkin Spice Lattes, the ever-popular caffeinated beverage of the season, have a cult following similar to that of the McRib sandwich. So when I received a sample of Godiva’s new Pumpkin Spice ground coffee as a member of the Foodbuzz Tastemaker program, I couldn’t wait to make my own PSL. What could be better than coffee, milk and pumpkin pie spice topped with whipped cream? Wait, I know – chocolate! Then I had an “Aha” moment. Another seasonal food item popped in my mind and an inspiration was born: Pumpkin Spice Latte Bark! So without further ado, here’s how to make the PSL ultimate treat:
Line a cookie sheet with parchment paper or silicone mat.
Place the white chocolate chips in the top pan of a double boiler or in a heatproof bowl. Place over simmering water in the lower pan. Turn off the heat and let stand, without stirring, until the chocolate begins to melt. Then stir until just melted and smooth.
In a separate bowl, combine unwrapped caramels and pumpkin puree. Stir in the Godiva Pumpkin Spice coffee and stir until smooth. Then, swirl the caramel pumpkin mixture into the white chocolate, and spread onto the parchment-lined baking sheet and sprinkle with hand-crushed pepitas and an extra pinch of pumpkin spice if desired. Refrigerate, uncovered, until the bark is set.
Gently peel the candy from the waxed paper. Break or cut into pieces. Store in an airtight container in the refrigerator for up to 2 weeks (if it lasts that long.) Try adding a piece to your morning cup of joe for a sumptuous start to your day!
Oh, if you are like us, you never have pumpkin pie spice in the cabinet so here’s how to make your own:
Pumpkin Pie Spice Mix:
Keep any extra in an airtight container to keep on hand for the mandatory pumpkin pie for Thanksgiving!
- 12 ounces white chocolate chips, melted
- 2 tablespoons pumpkin puree
- 6 caramel squares, unwrapped and melted
- 2 teaspoons Godiva Pumpkin Spice coffee
- (or 2 teaspoons freshly ground regular coffee and 1/4 teaspoon pumpkin pie spice)
- 2 teaspoons pepitas (pumpkin seeds), toasted, salted and hand crushed
Line a cookie sheet with parchment paper or silicone mat.
White chocolate & pumpkin swirl |
Place the white chocolate chips in the top pan of a double boiler or in a heatproof bowl. Place over simmering water in the lower pan. Turn off the heat and let stand, without stirring, until the chocolate begins to melt. Then stir until just melted and smooth.
In a separate bowl, combine unwrapped caramels and pumpkin puree. Stir in the Godiva Pumpkin Spice coffee and stir until smooth. Then, swirl the caramel pumpkin mixture into the white chocolate, and spread onto the parchment-lined baking sheet and sprinkle with hand-crushed pepitas and an extra pinch of pumpkin spice if desired. Refrigerate, uncovered, until the bark is set.
Gently peel the candy from the waxed paper. Break or cut into pieces. Store in an airtight container in the refrigerator for up to 2 weeks (if it lasts that long.) Try adding a piece to your morning cup of joe for a sumptuous start to your day!
Oh, if you are like us, you never have pumpkin pie spice in the cabinet so here’s how to make your own:
Pumpkin Pie Spice Mix:
- 1 teaspoon ground cinnamon
- ½ teaspoon ground ginger
- ½ teaspoon ground nutmeg
- ¼ teaspoon ground allspice
- ¼ teaspoon ground cloves
Keep any extra in an airtight container to keep on hand for the mandatory pumpkin pie for Thanksgiving!
Yum
Tuesday, November 1, 2011
Technique of the Week: Brining
Meats soaked in a brine solution prior to storage last longer without spoilage which is why brining was a method used to preserve meats for prolonged periods of time prior to the introduction of refrigeration. Brining is no longer used to preserve food but rather to tenderize and flavor it. Lean and often mildly flavored meats with a tendency to overcook losing much of their natural moisture like chicken, turkey, and pork making them good candidates for brining. Many types of seafood also take well to brining, especially when they are subjected to cooking methods that cause extreme moisture loss as is the case with most recipes for shrimp and other fleshy crustaceans.
Soaking meat in a salt-saturated solution causes the muscle tissues of the meat to absorb water through osmosis. Once the water is absorbed, denaturation causes a sticky matrix which forms a moisture barrier that captures and prevents the water from leaking out as the meat cooks. These two processes yield tenderness and a unique flavor.
Some cheeses are also washed in brine to enhance the ripening process. Not only does the brine carry flavor into the cheese, but the salty environment nurtures the growth of the specific bacteria, which impart pronounced odors (Limburger) and unique flavors. The same bacteria can also have some effect on cheeses that are simply ripened in humid conditions, like Camembert. Accumulations of these "smear bacteria" show up as a sticky orange-red layer on some brine-washed cheeses.
Both table salt and kosher salt can be used to make a brine solution. We prefer kosher salt because it dissolves more readily and has a cleaner flavor than table salt. Table Salt contains iodine and anti-caking agents that can affect flavor. Generally, table salt is more “salty” than kosher salt which is why you should use less table salt in a brine than kosher salt.
Basic Brine Solution
½ cup kosher salt or ¼ cup iodized table salt
¼ cup sugar
1 quart cold water
Plan for about 1 quart of brine for each pound of meat. If using a 5-gallon bucket, you will not need more than 4 gallons (16 quarts) of brine.
Combine the salt, sugar, and COLD water in the 5-gallon bucket. We recommend that you line our bucket with a kitchen garbage bag for easy clean-up. Place thawed meat (with any innards removed) in the brine solution. If necessary, weigh down meat (a plate works well) to ensure it is fully immersed. Cover the container set in cool area for up 1 hour per pound (for not less than 30 minutes) up to 8 hours or overnight. Remove meat from brine and pat dry and discard brining solution.
The classic French way to cure pork is to brine it. Typically, brine for curing contains salt, sugar, herbs, and spices. It acts as a marinade and a cure at the same time, producing pork a bit like a mild ham. Flavored brines can be made from fruit extracts, various herbs, and even alcohol including beer and liquor. One of the most appealing aspects of flavor brining is the freedom to create your very own flavor using the ingredients of your choosing. Examples include: black peppercorns (1 tablespoon); allspice berries (1 teaspoon); fresh rosemary or sage (2 sprigs); or, bay leaf (2 whole) to name a few.
Recipes using the brining technique:
Yum
Subscribe to:
Posts (Atom)
Powered by Blogger.