Thursday, March 31, 2011

Super Simple Roasted Red Pepper Spread

This spread is extremely simple and versatile. Try using different types of red peppers to achieve the flavor you like best. This spread can be served as part of an antipasti platter, used on sandwiches, ladled over grilled fish, or eaten alone on toasted rustic bread!

  • 3 large red peppers, roasted (instructions below)
  • 2 cloves of garlic, roasted
  • 2 small anchovy fillets
  • 1 tablespoon extra-virgin olive oil
  • 1/2 teaspoon sea salt

Rinse the peppers and roast them whole, charring the skin. I use the burner on my stove top, but grill them as well. The skin of the peppers should be fully charred but the peppers should still be a little firm. The peppers can also be roasted under the broiler. Place charred peppers in a plastic bag to steam and cool. Peel the charred skin off the peppers discarding the seeds and membranes, but reserving all the juice as you go. Garlic can also be roasted at the same time by holding the cloves with tongs over the flame.


Mix all ingredients in a food processor and puree all ingredients by pulsing until desired texture is achieved. Use the spread immediately and refrigerate any extra (if there is any!)

Yum

Tuesday, March 29, 2011

Sisterhood of the World Bloggers Award!

Thank you so much to Chris at Hye Thyme Cafe for awarding me the Sisterhood of the World Bloggers Award! Chris knows that while we cook as a family, that I am the “keeper” of the blog. I am very honored to be a part of this growing list of amazing sister bloggers from around the world. Please head on over and check out some of Chris’ recipes!!

In accepting this award, I agreed to complete the following tasks:
  • Recognize (and Thank!) the “sister” who presented you the award, and link to their blog in your post.
  • Copy and paste the award image.
  • Share seven interesting things about yourself.
  • Choose 15 other sister bloggers to receive the award, and let them know that they have received the award.
Seven interesting things about myself (this task is far more difficult than it sounds):
1.    There are few things I enjoy more in life than a ripe tomato fresh from the garden.
2.    I don’t like green beans. I want to, but I just don’t.
3.    While our front yard looks landscaped, it is peppered with many various herb plants: oregano, thyme, sage and lemon balm to name a few.
4.    Duke’s is my favorite brand of mayonnaise. 
5.    I have an insatiable sweet tooth.
6.    It is incredibly hard for me to pass a yard sale without stopping for a peek.
7.    I once dined on Sciurus Carolinensis as a young girl.

I am so thrilled to pay the award forward to my favorite blogger “sisters”! All of these ladies have impressed me with their writing, recipes, photographs and humor. Please take a few minutes to visit their sites as I am sure you will enjoy them as much as I do!

Recipe Girl

P. S. Since the Sisterhood Award is for my Blogging girlfriends, I am awarding a "Big Brother of the World Blogger Award" to Christo at  Chez What? for his creative recipes, great writing and especially for his dry wit!

Yum

Sunday, March 27, 2011

The Little Red Hen, Rumpelstiltskin and Mrs. Butterworth

Artistic expression goes beyond fine arts. Everyone has an outlet to express their artistic creativity. Dom’s art is his cooking; the main ingredient is the canvas while vegetables, herbs, and spices are his paint palette. While I enjoy cooking, writing is my creative outlet. I find that my best ideas come from a stream of consciousness: the continuous flow of thoughts that combine to make a good story.

Several days ago, as members of the Foodbuzz Tastemaster’s program, we received a loaf of Nature's Pride Hearty Wheat with Flax bread. We sampled the bread in sandwiches and then toast. The bread is dense and nutty with only 100 calories per slice. One of the ingredients that gives the bread a unique flavor and texture is flax seed. So in preparing to write this post, my mind wandered from the Little Red Hen who grows the wheat and makes her own bread, to Rumpelstiltskin who spun flax into gold.

Also, this past weekend Dominic (our oldest) and I attended the Mrs. Butterworth's Family Breakfast Ball held at Piedmont Park in Atlanta. Colorful tables with spring flowers and balloons were set-up for a huge pancake breakfast to introduce Mrs. Butterworth’s Spring Collection of decorated syrup bottles that kids can dress up with downloadable outfits to make meal time more fun. 

So, now you are asking yourself, what do the Little Red Hen, Rumpelstiltskin, and Mrs. Butterworth have to do with one another! Well, the answer is easy: 


French Toast

3 eggs, slightly beaten
½ teaspoon salt
1 tablespoon sugar
1 cup milk
Dash of nutmeg or cinnamon
6 slices Nature's Pride Hearty Wheat with Flax bread
4 tablespoons butter
Mrs. Butterworth’s Original Pancake syrup

Mix the eggs, salt, sugar, milk, and nutmeg in a shallow dish or pie pan. Soak the bread in the mixture until soft and saturated, turning once. In a heavy skillet melt 1-2 tablespoons of butter  and cook 3 pieces of toast at a time, flipping each piece of French toast over after the bottom reaches a very light, golden brown. Continue frying until the second side turns a pale golden brown as well.

Keep cooked pieces of French toast warm in a 250 degree F oven while you cook the remaining pieces of French toast. Serve warm with your favorite pancake syrup and enjoy!

Yum

Saturday, March 26, 2011

Sashimi Tuna Salad with Daruma Wasabi-Ginger Dressing

As a family, we celebrate the beginning of the weekend with cocktails and “Chef’s Table.” During Lent we usually have seafood, so what better way to use our fresh Daruma Wasabi rhizomes for Round 4 of the Ridiculously Delicious Challenge (sponsored by Marx Foods) than a Sashimi Tuna salad with Wasabi Ginger dressing! While we worked on the salad, we sipped on:


Wasabi Martinis
½  oz. dry Vermouth
2 oz. Extra Dry Gin
½ teaspoon Daruma Wasabi rhizome, freshly grated

Combine ingredients in a shaker half-filled with ice. Strain into a chilled cocktail glass, and finish with your favorite martini garnish. We used pickled cauliflower for an extra zing. (The guys had gingerale with a pinch of wasabi for their zing.)

Sashimi Tuna Salad
½ pound sashimi-grade Bluefin tuna, thinly sliced
1 large container of baby field greens
1 teaspoon sesame seeds, toasted


To prepare the salad we removed the sashimi from the freezer where it had been chilling for about 30 minutes to make it easier to slice and sliced it thinly. We rinsed the salad greens and dried them with a salad spinner and placed the greens in a large salad mixing bowl.


Wasabi-Ginger dressing
2 tablespoons rice vinegar
1 tablespoon extra-virgin olive oil
1 teaspoon Daruma wasabi rhizome, freshly grated
1/2 teaspoon ginger root, freshly grated
2 teaspoons lime juice (or Japanese Sudachi juice also available from Marx Foods)
2 teaspoons sesame oil
2 teaspoons soy sauce

In a separate bowl, we mixed the dressing ingredients and whisked them together until they were well mixed and gently tossed the field greens with enough dressing to lightly coat the salad. The salad was plated on a serving platter and slices of sashimi were laid over the greens, garnished with toasted sesame seeds and served with chopsticks.

And to cleanse our palates we had Lime Wasabi Sorbet for dessert:
1 cup water
1 cup sugar
1 cup fresh lime juice (or Japanese Kabuso juice also available from Marx Foods)
1 teaspoon lime zest
1 teaspoon Daruma wasabi rhizome, freshly grated
2 teaspoons vodka

In medium saucepan over medium heat, we brought the water, sugar, and lime juice to a simmer, then covered the pan and lowered the heat slightly to cook for about 3 minutes, until all of the sugar was dissolved. Remove from the heat and cool the mixture to room temperature. Stir in the lime zest, freshly grated Daruma wasabi and vodka. The vodka keeps the sorbet from freezing too hard. We used our Krups ice cream maker to chill the sorbet for about 30 minutes. The sorbet was a zesty ending to a wonderful evening at home!

Yum

Wednesday, March 23, 2011

Fried Fritter Frenzy!

While the vegetable oil was hot from preparing the lemon fritters for the Tea Party for a Cause, I decided to make two other fried delights. Fritters are tremendously popular in the South and have more variations than a centipede has legs. A fritter is basically a doughnut with other ingredients added to the batter. The quintessential Southern fritter is the “Hush Puppy” which was originally cornmeal fish batter that was quickly fried to keep the kids quiet and happy while the fish dinner was being cooked.

Calas, the traditional New Orleans treat, are deep-fried rice balls that were a popular breakfast food sold by Creole street vendors in the late 19th century. Another Lowcountry favorite, grit fritters, are cold grits mixed with savory ingredients like bacon or cheese and fried in small balls and served as a side dish. Here are my two favorite (and incredibly easy!) recipes:

Calas
  • 2 cups cooked, cold rice
  • ½ cup flour
  • 3 tablespoons sugar
  • 2 teaspoons baking powder
  • 1/4 teaspoon salt
  • Dash nutmeg
  • 2 eggs
  • 1/4 teaspoon vanilla
  • Vegetable oil (for deep frying)
  • Powdered sugar, for dusting

Make sure the rice is cold or at least room temperature because if the rice is too hot, the sugar will dissolve into it, and the Calas won't hold together properly. We normally use leftover rice for this recipe. For this post, I actually used leftover saffron rice. The saffron gave the Calas a gorgeous yellow color and a subtle flavor that complimented the nutmeg!

Stir the rice to remove clumps and then add all the dry ingredients. Mix together with the rice. Then using a smearing motion with the back of the spoon, blend in the eggs and vanilla so there are no dry spots.

Preheat your oven to 200 degrees Fahrenheit and line a cookie sheet in paper towels. Pour enough oil into a large saucepan to come halfway up the sides of the pan and heat over high heat until oil reaches 360 degrees Fahrenheit.

Form the Calas into quenelles with two large tablespoons and drop them in by tipping the head of the spoon toward the oil and pushing the batter off from the back, rounding it into a cute egg shape. When the Calas go in the hot oil, they should float and be surrounded by sizzling bubbles.

Work in batches, being sure to give them plenty of room to float around. Don’t put too many in at a time or they may stick together. Cook the Calas for about 3 minutes each, turning once to ensure that they are nicely browned on all sides. Fry them until they are the color of good donuts, barely past golden brown, but not much darker.

Remove them with a slotted spoon or wire skimmer, drain them well on several sheets of paper towel, and dust them generously with powdered sugar. For authenticity be sure to call out "Belle Calas, tout chaud!" which means “beautiful Calas, very hot!”


Herbed Grit Fritters
2 cups Water
¼ teaspoon salt
½ cup stone-ground grits
5.2 oz. Boursin Cheese (we used garlic-herb flavor)
Flour for coating
Vegetable oil for frying

In small saucepan, bring water and salt to a boil, slowly stir in grits and cook for 6-8 minutes until very thick. Remove the pan from the heat and let cool, about 5 minutes. Fold Boursin cheese into the grits and mix thoroughly and then place mixture in refrigerator until cold.

Preheat your oven and heat your oil as directed above. Roll the cheese grits mixture into 1” balls, and then roll each ball in flour. Use a slotted spoon or wire skimmer to gently lower grit fritters in the hot oil. Don’t put too many in at a time because they may stick together if crowded. Cook the fritters for 2-3 minutes each, turning once to ensure that they are nicely browned on all sides.

Again using a wire skimmer or slotted spoon, remove fritters from the oil and place on the paper towels and place in the preheated oven to stay warm while you make the remaining fritters. Serve hot as a side dish, that is if they make it to the table.

Yum

Tuesday, March 22, 2011

Tea & Lemon Ricotta Fritters for a Cause

Television hostess, Kelly Ripa is hosting a virtual “Tea Party for a Cause” which supports the Ovarian Cancer Research Fund whose mission is to fund research to find a method of early detection and ultimately a cure for Ovarian Cancer*. When you join Kelly's virtual tea party and select a perfect tea party outfit, Electrolux will donate $1 to the Ovarian Cancer Research Fund, and you'll be entered for a chance to win an Electrolux Perfect Steam™ washer and dryer.

In conjunction with Kelly Ripa’s “Tea Party for a Cause,” Foodbuzz and Electrolux are partnering to host a “Top 9 Tea Party Takeover” this Friday, March 25th.  To celebrate, we are having our own tea party! The crisp Spring air is perfect for the bright bold flavors of citrus, so what better to go with a hot pot of Orange Pekoe than some lemon fritters?

While “fritter” is a generic term that refers to fried batter or dough, there is nothing generic about these tangy and succulent nibbles. These make a very beautiful treat, but they are so delicate and scrumptious that they will likely disappear before anyone notices how pretty they are!!


  • 1 pound whole milk ricotta cheese
  • 4 large eggs
  • 2/3 cup all-purpose four
  • 1 tablespoon sugar
  • 3 tablespoons unsalted butter, melted
  • ¼ teaspoon salt
  • 1 tablespoon fresh-squeezed lemon juice
  • Zest of one lemon
  • Vegetable oil for frying
  • Confectioner’s sugar for dusting

Whisk ricotta and eggs together until well mixed and slowly incorporate flour and sugar then fold in butter, lemon extract and zest and salt. Cover the batter and let it sit for up to an hour before frying.

Preheat your oven to 200 degrees Fahrenheit and line a cookie sheet in paper towels. Pour enough oil into a large saucepan to come halfway up the sides of the pan and heat over high heat until oil reaches 365 degrees Fahrenheit.

Using a tablespoon, gently drop spoonfuls of batter into the hot oil. Don’t put too many in at a time because they will stick together if crowded. Cook the fritters for about 3 minutes each, turning once to ensure that they are nicely browned on all sides. Using a wire skimmer or slotted spoon, remove fritters from the oil and place on the paper towels and place in the preheated oven to stay warm while you make the remaining fritters.


When all the fritters are done, plate the fritters and dust with plenty of confectioner’s sugar. I use a small sieve to sift the sugar over the plate. We have plenty of lemon balm growing in the garden, so I add some to the plate as a garnish to enhance the lemony fragrance. These make a very beautiful treat, but they are so delicate and scrumptious that they will likely disappear before anyone notices how pretty they are!!

*Ovarian cancer is the leading cause of death from gynecologic cancers in the United States and is the fifth leading cause of cancer death among American women.  


Yum

Monday, March 21, 2011

HSN Cooks Spring Weekend Event & Giveaway!

Yes, we know that March Madness continues this weekend, but the one event that might get you to change the channel is Home Shopping Networks’ HSN Cooks Spring Weekend Event presented by Bon Appétit magazine taking place THIS Saturday, March 26th and Sunday, March 27th.

This LIVE Epicurean event promises to be the kitchen and food shopping experience of the season with celebrity chefs and culinary experts presenting high-quality kitchenware, time-saving appliances and tasty cuisine. Add mouthwatering ideas to the menu as HSN & Bon Appétit bring you world-renowned chefs, including Wolfgang Puck, Emeril Lagasse, Padma Lakshmi, Ken Hom, The Lee Brothers, and Jacques "Mr. Chocolate" Torres.

Bon Appétit will offer subscription savings, plus tips and solutions from Editor Dede Wilson. Special event pricing, select free shipping, value-packed bundles and HSN Card offers will be available for a limited time to HSN shoppers. For more information, please visit, http://hsncooksspringweekendevent.com.

Thanks to our friends at HSN, when you leave a comment below you're entered to win a $10 HSN gift card good towards anything on HSN. Here's how you can win:

Mandatory Entry:
(1) Leave a comment on this post telling us which one of the featured Chefs you plan to watch and why (if you get control of the remote) during the HSN Cooks Spring Weekend Event. Make sure to include your email address, if not linked to your profile.

Additional Entry:
“Like” us on the We Like To Cook facebook page, and "Share" this giveaway on Facebook leaving a comment letting me know that you posted it on Facebook for one additional entry.

Winners will be chosen using Random.org and will be contacted via email. The winner will have 24 hours to respond before another winner will be chosen.

Giveaway is open from Monday March 21st until Sunday March 27, 2011 at midnight (EDT).

Yum

Friday, March 18, 2011

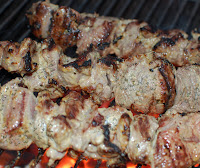
Mediterranean Marinated Lamb Kebabs

The earliest known element of Mediterranean cuisine is olive oil. Homer referred to it as "liquid gold." Peoples of the Mediterranean region have revered olive oil for centuries for its medicinal and culinary supremacy. Olive trees are infinitely hardy tolerating droughts and thriving close to the oceans where salt leaches into the water table.

In addition, early civilizations of the Mediterranean region relied on sheep as their primary source of meat. Mediterranean cuisine also takes advantage of the many herbs and spices of the area including oregano, mint, garlic, dill and bay laurel leaves. When all these components are combined, a splendid traditional Mediterranean dish is created!

  • 3 pounds boneless leg of lamb, trimmed and cubed
  • 2/3 cup extra-virgin olive oil*
  • 3 cloves garlic, crushed
  • 1/3 cup fresh lemon juice
  • 2 tablespoons Dijon mustard
  • 1 teaspoon sugar
  • 2 tablespoons fresh oregano, chopped
  • 1 teaspoon salt
  • 1/4 teaspoon fresh ground pepper
  • Additional extra-virgin olive oil for drizzling

Mix all ingredients together and stir well to create your marinade. Rinse and pat cubes of lamb dry with a paper towel. Place lamb kebabs in a large bowl and toss with the marinade. Lamb can sit in the marinade while you prepare the grill.

Place marinated kebabs on skewers and place over hot coals. Depending on the temperature of your grill, cook the lamb for 5 -10 minutes, turning once to cook on both sides. The kebabs should turn a beautiful brown and the marinade should char just slightly as the sugar caramelizes. Check to see that the kebabs are fully cooked by piercing with a fork. The meat should be firm and the juices should run pink, not red.

Remove from heat and let stand covered with aluminum foil while you plate your side dishes. Roasted potatoes with olives or saffron rice would be wonderful accompaniments to the kebabs. Add lamb to the plates and drizzle lightly with more Crisco Extra Virgin 100% Olive Oil* before serving.

* This was our entry in the Crisco® Mediterranean Inspirations Recipe and Essay Contest.

Yum

Monday, March 14, 2011

Very Cherry Rhubarb Cobbler

Happy Pi Day – one of Dom’s favorite days of the year! Not only is he quite good with numbers, but he loves pie! Any kind of pie: apple, blueberry, pumpkin, but cherry is his absolute favorite. So when it came time to remake one of the winning entries from Round 2 of Marx Food's Ridiculously Delicious Challenge, we made the obvious choice given the deadline was March 14th.

We had toyed with the idea of remaking Azmina’s fish tacos with fried calamari, Tepin chili chimichurri and jicama slaw, but Dom’s woeful reply was “Oh sigh, I guess that means no pie” and I caved. (For the record, he really was quite pitiful!)

We decided to redo Shannon’s Blueberry Cherry Crisp with Grains of Paradise Ice Cream. In the spirit of PI Day, it seemed only appropriate to incorporate the World’s favorite pie plant; rhubarb.* Rhubarb is a perennial that grows from rhizomes which has stalks (similar to celery) with a strong tart taste.  While rhubarb is considered to be a vegetable, a New York court decided in 1947 that since it was used as a fruit, it was to be counted as a fruit for the purposes of regulations and taxes.

The tart dried cherries combined with rhubarb and dark sweet pitted cherries made a tantalizingly tangy filling. We used the coconut sugar which is naturally low on the Glycemic Index (GI), in the cobbler crust which gave it a lovely toasted brown color. With its citrusy nuance, finely grated Szechuan peppercorns (really dried berries of the prickly ash tree) dusted on the top added the perfect finish.

Filling:
  • 1 cup dried tart cherries
  • 2 cups pitted dark sweet cherries
  • 4 cups rhubarb, finely chopped
  • 1 cup brown sugar
  • 1 tablespoon cornstarch
  • ¼ cup cherry schnapps
  • 2 tablespoons butter, cut into pieces


  • Crust:
  • 1/2 cup Crisco shortening (or butter)
  • 2/3 cup coconut sugar
  • 1 egg
  • 1 cup flour
  • 1 teaspoon baking powder
  • 1/2 cup milk
  • ½ teaspoon Szechuan peppercorns, finely ground

Preheat oven to 350 degrees Fahrenheit. If you are using fresh rhubarb, trim the ribs and chop them into 12” pieces. Blanch the ribs in a large pot of boiling water for 6-10 minutes (time depends on the thickness of the stalks.) and then shock the stalks in cold water to stop cooking.

Chop the rhubarb into ¼ inch pieces and place in a sauce pan with all the cherries. In a separate cup mix together schnapps and cornstarch until the cornstarch is completely dissolved, and add to the fruit and sugar in the pan. Bring the filling to a boil on medium heat to thicken. Spread the filling into an 11” x 7” baking dish, and dot with butter.

For the crust, cream together shortening and sugar, and then add the egg and milk and beat well. In a separate bowl, mix dry ingredients together. Slowly incorporate dry ingredients into the egg mixture until a smooth batter is formed. Pour (spoon) batter onto the filling.

Sprinkle finely ground Szechuan peppercorns lightly over the top of the crust. Bake for 45 minutes to one hour until the crust is brown and glossy looking. Serve with whipped cream (or vanilla ice cream) dusted with more finely groung Szechuan peppercorns for a dessert that is truly “uppercrust!”


*In the late nineteenth century, Laura Ingalls Wilder referred to rhubarb as "pie plant" in her novella The First Four Years.

Yum

Friday, March 11, 2011

Pleasantly Plump Polish Pierogi!

During the Lenten season, many Christians abstain from meat (mammal or fowl) on Ash Wednesday and all Fridays during Lent to honor Christ’s ultimate sacrifice. Pierogi (plural of pieróg) are a very popular dish during Lent especially in areas of the Midwest where Slavic immigrants originally settled. They are so popular in areas of Pennsylvania that between innings of Pittsburgh Pirates’ baseball games they hold “The Great Pierogi Race,” a promotion that features contestants racing in giant pierogi costumes named Cheese Chester, Jalapeño Hannah, Oliver Onion, and Sauerkraut Saul.

Though the origins of pierogi are difficult to trace, “dumplings” of varying types can be found in many Eurasian countries. Italy has ravioli, China has pot stickers, and Turkey has samosas; all are dough-filled dumplings. The first use of the word “pierogi” appears in Polish literature in the latter half of the 17th century. There are several traditional fillings for pierogi which include braised beef or lamb, sauerkraut and mushroom, potato and cheese, and prune. While the meat-filled are the most popular variety in Poland, potato and cheese filled pierogi (also known as Ruskie pierogi,) are the most popular in the U. S.Here are the instructions for making them from scratch, but you can wait until you have leftover mashed potatoes to make a batch!

Pierogi Dough
1 egg
1/4 cup milk
1/2 cup water
1/2 teaspoon kosher salt
2 1/2 cups flour

Beat egg, milk, water and salt in a mixing bowl, and add the flour, 1 cup at a time, until fully blended. Turn dough out onto a floured surface and knead until smooth and firm. The dough should not be too sticky. Allow dough to rest under the overturned mixing bowl for 20 minutes.

Using a rolling pin, roll dough as thinly as you would pasta dough use can even use a pasta machine if you wish. Cut the dough into circles using a biscuit cutter or an empty can.

Potato & Cheese Filling
  • 3-4 russet potatoes (1 ½ to 2 pounds), mashed
  • 2 large onions, finely chopped
  • ¼ cup milk
  • 3 tablespoons butter
  • 1/3 cup grated cheddar cheese
  • Kosher salt and pepper

Peel and cut potatoes into 3-4” cubes and place them into a saucepan. Add water until potatoes are covered. Bring to boil, reduce heat to medium and cook covered for 20 minutes or until a fork can easily be poked through their center.

Meanwhile heat a sauté pan on medium heat and add 2 tablespoons of butter to the pan. Once butter has melted add finely chopped onions and cook stirring occasionally for about 10 minutes until the onions are tender and begin to brown. Once browning begins, lower the heat and cook for an additional 2-5 minutes. As the sugar in the onions caramelizes, they will begin to brown more quickly. Transfer to a plate when they are golden brown.

Drain water from the potatoes and add the remaining butter and milk to the pot. Using a potato masher, mash potatoes to the desired texture, (more details here). Mix in salt, pepper and half of the caramelized onions and allow to cool before adding the grated cheese or filling pierogi.

Stretch the dough to the desired size and place a spoon of filling on one side of the circle. Fold the other side over the filling and pinch or crimp to seal. The pierogi will be a crescent (half circle shape) shape. If pierogi are not sealing well, paint the edges with water or beaten egg white. You can use a fork or your fingers to make a fancy edge if you choose.

To cook pierogi, bring a large pot of salted water to a boil and gently place pierogi in the boiling water. Allow to cook for 8-10 minutes. Carefully drain the pierogi and place them in a sauté pan that has been heated with 1 tablespoon of olive oil and 1 tablespoon of butter. Add the remaining caramelized onions to the pan and stir gently, cooking until the pierogi are lightly browned. Serve with sour cream on the side for a cultural and delicious meatless meal!

Pierogi also freeze wonderfully well. I place them in a single layer on parchment or a silicone mat in the freezer. Once frozen, I then place them in a zip-lock bag and save for another meal. You can boil them right out of the freezer bag by adding 5 or so minutes to the boiling time.

Yum

Tuesday, March 8, 2011

Baby Bird's Crawfish Étouffée

Dom and I first visited New Orleans in 1991 and immediately fell in love with K-Paul’s Louisiana Kitchen. It was our first stop upon arrival into the French Quarter. During that trip, we ate there every day for lunch and Dom even got to help cook his own meal in the kitchen. We visited New Orleans many more times and always re-visited K-Paul’s even after one of its namesakes had passed away. We took Nic with us as a toddler and we (and the wait staff) were wildly impressed when he devoured my entire plate of (very spicy) crawfish étouffée. He started off just tasting from my plate and then sat like a baby bird with his mouth wide-open as we fed him bite after bite until the plate was empty. Good thing we learned to make it at home!

This is the perfect dish to celebrate Mardi Gras as it embodies all the elements of classic Cajun cuisine: roux, crawfish, cayenne pepper, and Cajun mirepoix (also known as “Trinity”); a dish as unique as the city that made it famous!

Spice Mix: (Make ahead)
  • 2 teaspoons of salt
  • 2 teaspoons of cayenne pepper
  • 1 teaspoon of white pepper
  • 1 teaspoon of black pepper
  • 1 teaspoon of dried basil
  • 1/2 teaspoon of dried thyme

  • 1/3 cup vegetable oil
  • 3/4 cup all-purpose flour
  • spice mix (above)
  • ¼ cup chopped onions
  • ¼ cup chopped green bell pepper
  • ¼ cup chopped celery
  • 3 cups chicken or fish stock
  • 1 cup (2 sticks) unsalted butter, in total
  • 2 pounds crawfish tails
  • 1 cup green onion, chopped for garnish
  • Steamed or cooked rice

In a large heavy-bottomed pot, heat the oil until smoking hot, add the flour and stir continually until the mixture (called a roux) reaches a dark reddish brown color.  This can take up to 5 minutes.  Chef Paul Prudhomme used to call this “Cajun napalm” because the steam burns if inhaled directly. It is also very hot and can cause serious burns, so be careful not to allow to splatter.

Reduce heat to medium-low heat and add the chopped onions, bell pepper and celery (known as Cajun trinity) and 1 tablespoon of the spice mix into the roux. Cook until the vegetables are soft and translucent and then allow to cool in the pan while you prepare your rice. Add the stock and bring to a simmer.

In a separate sauté pan, heat 1 stick of butter and lightly sauté the crawfish tails. Add another tablespoon of the spice, remaining stock and second stick of butter and simmer until the butter is melted; swirling pan to combine. Add the remaining seasoning mix, stir well and remove from the heat.

Plate your rice (we use an ice cream scoop) and then ladle the crawfish sauce around the mounds of rice. Garnish with the chopped green onion or chopped parsley and serve with your favorite hot sauces like McIlhenny’s Tabasco or Louisiana Hot Sauce.

Return of the Baby Bird:
We again visited New Orleans in July 2011. While the restaurant has undergone several renovations, it is still very popular. The lunch service is now deli-style with a varying fare of soups, salads and po'boys. Dinner entrees include standards such as jambalaya and blackened fish along with new creations by Executive Chef, Paul Miller. Of course, Dominic ordered the Crawfish Étouffée which he immediately proceeded to devour.We also sampled gumbo, soft-shelled crabs, jambalaya and fried, stuffed flounder. All dishes were perfectly prepared and portions were very generous. We still highly recommend this iconic culinary destination.

Yum

Friday, March 4, 2011

Gizmos, gadgets and whatsits - Oh My!

Everyone has one - the mystery drawer with gizmos and gadgets like the strange thing-a-ma-bobs inherited from your grandmother’s kitchen, the odd doodad that you bought at a yard sale, or the weird whatchamacallit you’ve been using as a hammer for years. On a whim, I gathered some of these items out of the drawer in our own kitchen. I even found an “inside-the-egg” egg beater! We would love to hear your ideas on what some of these hoohaws might be!

Yum
Powered by Blogger.

footer social

ShareThis