Saturday, December 28, 2013

To Bean or Not To Bean Vanilla Extract

Somewhere between the second batch of pizzelles and the panetonne, the last drop of vanilla trickled sadly from the little brown bottle sending me rummaging for more. I came across some vanilla beans received as a gift a month or so earlier, however, these were not entirely helpful because they were not liquid in form and I had no idea how to use them in a recipe. Then I remembered that Dom’s Aunt Rose always substituted bourbon in a pinch. So I finished the recipe with a dribble of bourbon.

Later I did a little research and found that vanilla beans can be substituted for extract by using one whole bean (split and scraped) in place of one tablespoon of pure vanilla extract. For those of you who can do simple math, I think you can see where this post is heading… You guessed it: homemade vanilla extract. Pure vanilla extract is made by macerating vanilla beans in alcohol. Clearly I had the two key ingredients needed to make extract and with the four beans in the pantry and a cup of bourbon, I could make 16 tablespoons of extract – quadrupling the utility of my beans. Since there are ONLY two essential ingredients, they should be of the best quality you can get.

Pure vanilla extract is made by macerating vanilla beans in alcohol. Natural vanilla beans come from a beautiful species of yellow orchid native to Mexico but is also grown In Madagascar, Tahiti, and other tropical regions. After pollination the orchid’s flowers die, and long, green seed pods grow in their place. The pods are picked when they're 6" to 9" long at which time a six-month curing process begins. Cured vanilla beans are dark brown, fragrant, and have a thin white coating of vanillin crystals. Vanilla beans should be plump and supple and smell -  well, like vanilla.

The choice of steeping alcohol is a matter of preference, but here too, it is better to use a high quality selection. If you wouldn't drink it, you probably would not want to cook with it either. We find the warm, honeyed flavor of bourbon to be the most complimentary option, but vodka, scotch or even rum would make excellent extracts as well.

It takes about 6 weeks for the alcohol to be fully infused with the flavor of the vanilla beans. If you are thinking about it, you might give it a healthy shake every week or so. Now, if like me, you just cannot resist tasting it after the first week, I can tell you that it still smells and tastes mostly like bourbon. The longer you let your vanilla steep, the better it will be.

4 good vanilla beans
1 cup high-quality bourbon (our favorite is Four Roses Bourbon)
½ teaspoon brown sugar (optional)

Clean and sterilize bottle(s.) Carefully slice the vanilla beans in half lengthwise to expose seeds inside.  Scrape out the moist seeds and place them in a clean bottle.  Add the scraped vanilla bean pod to the bottle as well.  Fill the bottle with the bourbon (or vodka, rum or brandy) making sure that liquid is covering beans. Add the sugar if desired.

Place the lid on the bottle and give it a good shake.  Allow the beans to steep for at least 6 weeks before using the resulting extract.  Vanilla extract can be stored indefinitely if kept airtight in a cool dark place.

It should be noted, too, that you can also make vanilla sugar by putting a split vanilla bean into a jar of white, granulated sugar. Vanilla sugar works well in any cookie recipe, but is best in a cup of cappuccino.


Yum

Sunday, December 22, 2013

Crazy-Moist Gingerbread Cake

The mention of gingerbread typically evokes images of little men with appendages begging to be bitten, but in our house it meant my grandmother’s gingerbread cake. Understated and straight-forward, this outrageously flavorful cake is by no means the prettiest cake you'll ever make, but is by far the tastiest. The top forms a burnt-caramel crust while the cake is dark and dense with a bit of attitude.

The heavenly scent of aromatic spices signaled a dessert of super-moist fragrant cake with big plops of whipped cream. This bold and zesty cake seemed a perfect choice for Dom’s birthday especially given his well-known aversion to ordinary, innocuous birthday cake, and it got the best compliment he has ever given to any cake ever; “it tastes like pumpkin pie.” And, we ALL know how much Dom loves pie!

  • 3/4 cup light brown sugar 
  • 3/4 cup melted shortening
  • 2 eggs
  • 3/4 cup dark molasses
  • 2 ½ cups flour 
  • ½ teaspoon baking powder 
  • 2 teaspoons baking soda
  • 1/8 teaspoon salt
  • 2 teaspoons ground ginger
  • 1 ½ teaspoons cinnamon
  • ½ teaspoon ground cloves
  • ½ teaspoon ground nutmeg
  • 1 cup boiling water

Preheat oven to 350 degrees F. Cream together shortening and sugar, then add eggs and molasses.

In a separate mixing bowl, combine dry ingredients and slowly add to creamed mixture. Once all the ingredients are incorporated, add boiling water. The water will make the batter quite thin.

Pour the batter into a greased 9 x 13 inch baking pan. Bake for approximately 30 minutes until a straw poked into the middle comes out clean.

Cut cake in large squares and serve with freshly whipped cream. You can also add a fruit topping like candied cranberries or poached pears.


Yum

Saturday, December 14, 2013

Stout and Spicy Brown Mustard

You know all know we hate to waste ingredients in our house, so when we opened a can of Guinness stout for our holiday pub cheese recipe and only used a quarter of the can, we looked for another use (because 9:00am seemed a bit early to just drink the remainder.)

We are big fans of mustard, but are somewhat picky about the flavor. As a point of reference, Dom recently tossed a bottle of Creole mustard because it was “just hot with no depth.” So, like many (or perhaps I should say most) of the condiments we use are homemade to suit our taste. Why should mustard be any different? An added bonus is the cost savings. Not sure if you have been shopping for a coarse, German-style mustard lately, but yowza, it’s expensive.

We found (inexpensive) brown and yellow mustard seeds at an ethnic market. Mustard seeds are the small round seeds of various mustard plants. Mustard seeds have been mentioned in a variety of religious parables throughout history. The 1-2 mm seeds may be colored from stark black to pale yellow and are a rich source of protein and oil. Interestingly, mustard seed production exceeds the demand for cooking oil in South Asia, so the surplus mustard oil is being used experimentally as an alternative to diesel fuel. The leftover pressed meal has been found to be a very effective pesticide ensuring that nothing goes to waste.

This homemade version has a nutty, vaguely sweet flavor and a nice mouth feel. It is surprisingly easy to make and it was fascinating to watch the seeds expand as they absorbed the liquid.

  • 1 cup Stout
  • 3/4 cup brown mustard seeds
  • 1/4 cup yellow mustard seeds
  • 3/4 cup white balsamic vinegar
  • 2 teaspoons kosher salt
  • 1/2 teaspoon black pepper
  • Pinch ground cinnamon
  • Pinch ground cloves
  • Pinch ground allspice
  • Pinch ground allspice

Combine ingredients in a nonreactive mixing bowl. Cover and set aside at room temperature for 2 days to allow flavors to meld and seeds to soften.

Pour contents into the bowl of a food processor or blender. Process until seeds are coarsely ground and the mixture thickens, stopping occasionally to scrape down the sides.

This step requires patience. The mixture will look loose and you will wonder if you made a mistake along the way, but continue to let the mustard mixture puree until emulsified. The mustard should be set after about 3 minutes of blitzing.

Transfer the mustard to a jar (or jars) with a tight fitting lid. Refrigerate for 24 hours again to let flavors completely develop and the mustard to fully thicken. The mustard should keep up to 6 months in the refrigerator, if it lasts that long.


Yum

Wednesday, December 11, 2013

Happy Holiday Pub Cheese

The holiday season at our house is incredibly chaotic and we wouldn't have it any other way! With friends and neighbors dropping in for impromptu parties, it is imperative to have quick go-to noshes for guests to nibble. In these instances, it is easy to follow the examples of restaurants and bars by putting out nuts, popcorn, chips and dip. Unfortunately, most dip options are the same-old-same-old recipes that have been offered many times in the past.

So taking a custom from British taverns, this year we've opted for a traditional pub cheese; a cheese spread commonly set out in ramekins alongside some “crisps” on the bar for thirsty patrons to encourage them to stay longer. It is a spicy, creamy concoction that goes well with chips, crackers or crudités, and even makes an amazing addition to a hamburger.

The best thing about this cheese blend is that it improves with age, thus making it in advance is not only an option, but a recommendation. Using pre-shredded cheddar cheese from Kraft simplifies this recipe markedly, so that it is fabulously easy to prepare, and Kraft is making it easy to save money this holiday season by offering $20 in coupons available at Target.com.

  • 1 (8 oz.) package of Kraft Sharp Cheddar
  • 1 (8 oz.) package cream cheese (Philadelphia brand)
  • 1/3 cup stout
  • 3 teaspoons dry mustard 2 teaspoons Worcestershire sauce
  • ½ teaspoon Kosher salt
  • ¼ teaspoon cayenne pepper
  • ¼ teaspoon paprika
  • Freshly ground pepper to taste


Place all ingredients in the bowl of a food processor and blend until smooth. Season with additional salt and pepper as desired. Place the spread in a serving bowl or crock, cover and chill for at least 4 hours. Do not worry if the spread seems a little loose as it will thicken a bit as it rests in the refrigerator. Sprinkle with a little more paprika or freshly chopped chives and serve with crackers and crudités.


From shopping for gifts to planning family dinners, it’s hard to keep up with all your holiday to-do’s. This year, Kraft is helping out with great weeknight meals and entertaining ideas to make the season a little bit easier. Plus, Kraft is offering up to $20 in coupons, redeemable exclusively at Target, to make food shopping easier and to help you have a happy holiday season.

This is a sponsored conversation written by me on behalf of Kraft. The opinions and text are all mine.


Yum

Sunday, December 8, 2013

Mulled Cranberry Zinfandel Conserve

Cranberry sauce can be so banal. Guests at your holiday table might be surprised to see a homemade variation because they are so accustomed to the tubular, semi-opaque, gelatinous mass with a flavor far from that of actual cranberries.

Pairing cranberries with currants amplifies their sweetness. A full-bodied red wine adds depth and toasted hazelnuts add an unexpected crunch that will surprise and please your guests.

The recipe is for a conserve which is simply a jam or preserve that includes nuts. Many different kinds of nuts shine in this combination: almonds, cashews, walnuts and pecans are all superb, retaining their crunch after even months in the jar. Make sure the nuts are fresh and toast them to ensure the deepest flavor.

Because the tart bitterness of the conserve is mellowed by the wine and raisins, not only can it liven up leftovers as a sandwich spread, complement sharp artisanal cheeses, but it can also find wider use as jam, paired with English muffins or toast made with crusty bread. If you have the time or inclination, tuck it into jars, process it in a hot water bath and you’re ready for holiday gift-giving.

  • 1/3 cup packed brown sugar 
  • 1/3 cup butter 
  • 2 teaspoons cider vinegar 
  • 2 large onions, coarsely chopped 
  • 4 cups fresh or frozen cranberries 
  • 1/2 cup currants (or raisins) 
  • 1/3 cup Zinfandel red wine
  • 1/2 teaspoon mulling or apple pie spice 
  • 1 3/4 cups granulated sugar 
  • 1 cup toasted hazelnuts, coarsely chopped

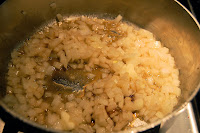
In a large skillet over medium-low heat, melt the butter and add the onions. Stir or shake the pan to prevent sticking or burning. The onions will get soft and then translucent. Sweating the onions concentrates their flavor and enhancing conversion from starch to sugar. Heating the onions releases their aroma and reduces the chemical bitterness they exhibit when raw.

Stir in the brown sugar and vinegar and cook uncovered, over low heat for about 5 minutes or until the sugar is dissolved and the onions are fully incorporated. The mixture should look jammy. Set aside.

In a large saucepan combine cranberries, currants, wine (a full-bodied red wine such as a Beaujolais or Merlot can be substituted if a Zinfandel is not available) and mulling spices. Bring these to a boil over medium heat, stirring occasionally. Continue to cook, uncovered, over medium heat for 5 minutes. Don’t over stir or you will break up the cranberries which will pop open as they heat through.

Gently stir the onion mixture and granulated sugar into the mulled cranberry mixture. Return to boiling and then reduce the heat to low and simmer softly, uncovered, for another 10 minutes, stirring frequently and gently.

Remove from the heat and gently stir in hazelnuts. Allow to cool and transfer the conserve to airtight containers or jars. Serve immediately or cover and chill until ready to serve. Any unused conserve can be stored in the refrigerator through the holiday season. Extras can be processed in a hot water bath for holiday gift-giving.


Yum

Thursday, December 5, 2013

Semolina Couche-y-Coo

It always surprise me how tastes change over time. Years ago, the only artisanal bread we bought was a hearty Country French, then we switched preferences to the airy, crusty Ciabatta loaves so named because they resemble a women’s slipper. Nowadays our loaf of choice is a golden, seeded semolina, however at nearly $5 per loaf, it is a pricey choice indeed.

So, yet again, we have embarked on another of our culinary quests to develop a manageable work-a-day recipe for semolina bread to accompany our favorite Italian antipasti and meals. The first obstacle was finding the right semolina flour and the second was forming the loaves into an appropriate shape.

A couche (pronounced “koosh” is a cloth used to proof dough or used to cover the dough while it is rising. Couche is from the French word coucher, meaning to lie down (unless you listen to Ella Fitzgerald in which case “Coochi-coochi-coo means I love you.”) A baker’s couche is not just floured fabric, it is usually a hard wearing canvas to which the dough will not stick. It is used to allow the dough to breath, hold its shape, and the crust to dry slightly. A dry crust makes it easier to handle and bakes slightly crispier. A couche is typically used for longer loaves, such as baguettes. Lean doughs are best for proofing in a couche to prevent the absorption of oils and impurities that can contaminate the cloth. Lean doughs are those that do not include eggs, milk and only have a minimal amount of oil. (A washable cotton canvas couche is best for richer dough.)

To condition a new couche, dust liberally with flour and work it into the weave of the fabric to prevent the dough from sticking. If dough sticks, allow to dry and scrape off. The cloth is left unwashed between uses to let yeast and flour collect in them which aids in the proofing process. Once you are done with the couche, allow it to dry completely and shake out any excess flour before rolling it up for storage. Storing the couche in an airtight bag or container will keep bugs from being attracted to it.

When hard wheat is milled, the endosperm is separated from its bran and germ. Semolina is made from the endosperm of durum wheat, while typical white bread flour is made from the endosperm of common or bread wheat. The cream-colored semolina contains the gluten protein that gives it unique properties for making good pasta and Italian-style breads. However, despite a very high protein content, semolina is low in the gluten needed to form a glutinous web necessary for bread to rise making it necessary to add white flour to the dough for a springy loaf of semolina bread.

  • 1 ½ cups warm water
  • 1 tablespoon yeast
  • 1 teaspoon honey
  • 1 tablespoon olive oil
  • 2 cups semolina flour
  • 2 cup all-purpose flour
  • 1 tablespoon kosher salt
  • 2 tablespoons sesame seeds
  • 1 teaspoon aniseed (optional)

Dissolve the yeast in 1 cup of the warm water in a large measuring cup or small mixing bowl and add honey. Allow a few minutes for the yeast to proof before adding the olive oil to the liquid. In a separate mixing bowl or the bowl of your mixer whisk together the flours and salt and then slowly add in the yeast mixture. Keep working until the dry and liquid ingredients are fully incorporated.  If the mixture is too dry and tough, add in more water one tablespoon at a time until the dough is supple and sticks together.

Turn the dough out onto a work surface floured with a little more semolina and knead it for 5 to 8 minutes, until smooth. You can also accomplish this in a mixer with a dough hook attachment.

Grease a bowl, set the dough in the bowl, turning to coat all sides, cover with plastic wrap, and let the dough rise until doubled in bulk, about 1 hour or more.

Punch the dough down, turn it out of the bowl, and shape it into one long loaf or two shorter loaves.  If you are coating the crust with seeds, lay the seeds out on a baking sheet and brush the loaf with a little water. Gently roll the loaf into the seeds before laying the dough on your prepared couche. Roll the sides up to keep the loaf(ves) from spreading and losing their shape. Cover dough with the remaining length of couche and let rise until doubled in bulk again, about 45 minutes.

Roll the dough off the couche onto a peel or a flat baking sheet (used the bottom  side of a half sheet pan) and bake in a preheated 450°F oven and bake for 40 minutes.  If you are using a baking stone, transfer the loaf(ves) to the stone using a peel bake at 450°F for the same 40 minutes. When done, the bread should have be a light golden brown and should sound hollow when thumped. Place the loaf on a rack to cool. Let cool thoroughly before slicing.

This recipe made a nice golden-yellow, dense sandwich-style bread. As with any recipe, it serves as a good starting point. We would have preferred lighter, airier bread and will keep making adjustments until we get it just the way we like it. You should too.


Yum

Monday, December 2, 2013

Snowy Cranberry Almond Tart

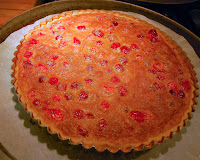
This quasi-French, frangipane-style tart reflects not only the flavors, but the colors of the holidays. Served warm, a slice of tart with a scoop of vanilla or cinnamon ice cream makes an ideal Thanksgiving dessert. The color of the red berries and snow-like dusting of powdered sugar also make it a beautiful addition to your Christmas dinner table.

Frangipane is a classic European pastry filling made with almonds, butter, eggs and sugar which is traditionally topped with pears or apples. As the tart bakes, the filling puffs up and surrounds the fruit. Because they need to be softened and sweetened slightly, the cranberries are first candied in a sugar cook separately.  The snappy tartness of the cranberries is the perfect foil for the rich, sweet frangipane. A dusting of confectioners' sugar and a dollop of lightly sweetened whipped cream cap off this tart that is literally bursting with flavor.

Tart Shell 
  • 1 stick unsalted butter, softened 
  • 1/3 cup sugar 
  • 1 large egg yolk 
  • 1/4 teaspoon almond extract 
  • 1/4 teaspoon salt 
  • 1 cup all-purpose flour 
  • ¼ cup almond meal (or additional flour)

In a standing mixer fitted with the paddle, beat the butter with the sugar at medium speed until light and fluffy, about 3 minutes. Add the egg yolk, vanilla and salt, scrape down the side of the bowl and beat at low speed until smooth. Gradually add the flour, beating until the dough just forms a ball. Pat the dough into a disk and cover with plastic wrap. Refrigerate the dough for at least 1 hour or overnight.

Roll out the dough between 2 sheets of parchment paper into a 12-inch round. Carefully peel off the top layer of parchment paper and invert the dough onto a 9-inch fluted tart pan with a removable bottom. Peel off the parchment paper and gently press the dough into the pan. Trim the dough flush with the rim. Patch any cracks with the dough trimmings. Lightly prick the bottom with a fork. Refrigerate the tart shell until firm, about 30 minutes, or freeze for 10 minutes.

Preheat the oven to 350°. Line the tart shell with foil and fill with pie weights or dried beans. Bake the tart shell for about 30 minutes, until the rim is lightly golden. Remove the foil and weights and bake the tart shell for about 5 minutes longer, until it is lightly golden all over. Set the tart pan on a baking sheet. Increase the oven temperature to 375°.

Cranberry Filling
1 1/2 cups granulated sugar
1/4 cup water
2 cups (10- oz.) cranberries

In a medium saucepan, combine the granulated sugar with the water and cook over moderately high heat, stirring, until the sugar dissolves. Add the cranberries, cover and cook over moderate heat for 3 minutes, stirring once or twice. Remove the pan from the heat and let the cranberries cool to room temperature. Drain the cranberries well; reserve the cranberry syrup.

Almond Custard
  • 2 large eggs
  • 1/2 cup brown sugar
  • 1 1/2 teaspoons all-purpose flour
  • 1/4 cup plus 2 tablespoons half-and-half
  • 1/8 teaspoon pure almond extract
  • Confectioners' sugar, for dusting
  • Lightly sweetened whipped cream, for serving

In a medium bowl, beat the eggs with the brown sugar and flour. Whisk in the half-and-half and the almond extract. Spread the cranberries in the tart shell. Drizzle 1 tablespoon of the reserved cranberry syrup over the cranberries, and then pour in the almond custard.

Bake the filled tart in the lower third of the oven until a skewer inserted in the center comes out clean, 16 to 18 minutes. Transfer the tart in the pan to a rack to cool completely, at least 2 hours. Dust the tart with confectioners’ sugar. Cut the tart into wedges and serve with whipped cream.


Yum
Powered by Blogger.

footer social

ShareThis