Sunday, September 27, 2015

10 Tips for Taking #FoodPorn Photos on Your Smartphone

Today, we are taking a little break from our regular cooking (and eating) regimen, to bring you some food photography tips. For the first time, this year Taste of Atlanta is sponsoring a #FoodPorn Photo Patrol in The Kitchen Workshop. Festival-goers will receive expert tips and tricks for taking a drool-worthy photos of their food. The photo patrol is made up of skilled photographers and influential food bloggers who will be on-hand during each seminar to offer valuable insight for capturing that perfect photo of any delicious dish. Believe it or not, I was asked to help with this new venture. In preparing for my session, I put together a list of my top tips and tricks:

1. Keep Your Lens Clean – Duh! This may sound like a no brainer, but your smartphone is a workhorse. You take calls, text, and post to social media all the while taking your phone in and out of your pocket or purse. The lens gets gunky without you even realizing it. One good swipe with a soft cloth is usually enough to remove smudges and dust.

2. Use Basic Composition Rules - Follow the “Rule of Thirds.” No, it is not another "Game of Thrones" variant. This is a tried and true method to ensure your pictures are balanced. Imagine your phone screen divided into a grid of 9 squares (3 by 3); your smartphone may even have an option to display this grid right on your screen. The idea is to place your subjects along those grid lines or at the points where the lines intersect.

3. Minimize Clutter - If that spoon, napkin or busy background doesn’t add to the photo, it detracts from the photo. If you choose to accessorize your photo, use muted colors and tones that do not distract from the focal point. Plain white plates are the best option for showing off your meal and readers can see what the food actually looks like.

4. Take Photos Under Natural Light – Okay, so this is not ALWAYS possible, but you should avoid using your camera’s flash unless absolutely necessary. Move around to find the best light source. Don’t feel confined to taking photos in your kitchen. Experiment with using a flashlight to backlight your pictures for a different lighting effect and to reduce shadows.

5. Get Close But Not Too Close - Focus on what is most important in the shot, but don’t zoom in so much that viewers can’t tell what the food is. Getting close is not the same thing as using the zoom. We have never had much success with zooming on a smartphone. Zoom tends to be out of focus It is always better to crop than to zoom.

6. Take Photos From Multiple Angles - Some plates of food look better from above, or from the side, or at a 45-degree angle. Try moving around the plate and taking photos at various angles so you can pick your favorite later. You can also change the angle of a picture when you edit as well to move the focal point or emphasize a point.

7. Edit, Don’t Filter – This will probably not be a popular tip with Instagram-loving millennials, but take some time to actually edit your pictures on your phone before uploading them to your blog post or social media channels. Trust us, it is worth the time and effort. There are dozens of photo editors available for iOS or Android phones. Find one you like and are comfortable with rather than using the over-used preloaded filters available on Twitter and Instagram.

8. When All Else Fails: Quantity Over Quality - When you are trying to take pictures of a dish you are actually preparing for a meal, all of these tricks sound great, but there is little time to shoot photos while pots are boiling over, kids are yelling, dogs are barking, and hubby is losing patience. It is much better to take too many pictures than to miss a shot altogether. This is when you just start shooting and hope to get something usable before everyone has eaten your blog post!

9. People, Yes People - Pictures of folks actually chowing down on tasty food are a good thing, but always be sure to get their permission before posting on your blog or social media sites. Try including photos of hands when your friends get tired of looking like pigs on your Facebook wall.

10. *Bonus* Backdrop Tip - At a restaurant, place a napkin or menu under the plate and alter the angle of the shot to get the restaurant name or even the name of the dish in the photo. This is especially helpful if you are at a food festival like Taste of Atlanta where you are photographing dishes from more than one source.

Don't forget to enjoy the view from beyond the camera screen. And, taste the food! You'll need to be able to describe it to your readers!

    Yum

    Friday, September 18, 2015

    Eggplant Mutabbal Will Enthrall

    We included one lone eggplant in our yarden, this year. It remains the stalwart producer in our otherwise fading collection of summer vegetables. To quote New York Times columnist, Mark Bittman, “It’s safer to label [eggplant] a food like no other, beloved and appreciated worldwide and deserving of respect, not as a meat substitute, but as a treasure in itself.” Agreed. Eggplant is pretty fabulous!

    One of our favorite ways to enjoy eggplant is one of the easiest, the eggplant dip most Americans know as baba ganoush. However, what most people call Baba ganoush is actually “mutabbal.” True Arabic baba ganoush is a dish of cooked eggplant mixed with onions, tomatoes, olive oil, while muttabbal is made with eggplant, sesame, garlic, lemon, and frequently cumin.

    Both are typically served with toasted naan or pita triangles. Whatever you may call it, this is an incredibly tasty spread that can be made in advance and improves if made a day or two in advance.

    1 large eggplant
    1 clove of garlic
    Juice of 1 lemon
    1 tablespoon olive oil
    1 tablespoon sesame oil
    ½ teaspoon cumin powder
    1 tablespoon fresh parsley, chopped
    Kosher salt and freshly ground pepper

    Preheat the oven to 350°F. Place the eggplant on a cookie sheet. The eggplant will ooze a bit so you should consider place it on aluminum foil. Bake for about an hour.

    Remove the eggplant from the oven and let it cool. Once cooled, remove the stem and peel. The outer skin should slide off the flesh fairly easily. Cut the skinned eggplant in pieces, put in a bowl and mash them with a fork. Add the mashed eggplant, lemon juice, oils, and cumin and mash again with a fork until it's mixed well. If you prefer the dip to be more smooth, you can blitz all the ingredients in a food processor.

    Taste the dip and add salt and pepper accordingly.  Garnish the mutabbal with the chopped parsley and serve with pita chips, toasted naan or crudité.


    Yum

    Wednesday, September 9, 2015

    Char-mingly Good Cabbage

    The term cabbage is a derived from the French word, caboche meaning "head." The cabbage family is large and includes kale, collards, kohlrabi, and Brussels sprouts. In years prior to local farmer’s markets and Whole Foods, most of America was relegated to mundane heads of white cabbage, which because it was wildly inexpensive, made it’s way to the dinner table far more frequently than anyone preferred. It was most often finely shredded and drenched in some sort of creamy sauce and served at every cookout ever. During winter months, it was boiled or braised and served with pork chops and ham or as sauerkraut served with sausages.

    Had any of us known how outrageously delicious grilled cabbage was, it would have been a dinner time game changer. Grilling cabbage adds a smokiness and char in addition to caramelization that occurs when the natural sugars boil at temperatures above 300 degrees. The flavors run deeper and the sugars get sweeter. The blackened edges or “char” (the burnt bits), add yet another layer of flavor and texture.

    1 head of cabbage
    3 tablespoons olive oil
    Juice of a lemon
    2 teaspoons Dijon mustard
    Sea salt and freshly ground pepper

    The best way we've found to grill cabbage is to cut it into large wedges, leaving the core intact. This helps to keep all the cabbage leaves together as it grills, and gives you plenty of surface area for charring. The idea is to char the exterior on all sides while cooking the interior so that it is soft but not mushy with a tiny bit of raw crunch at the core. You want the edges get a little blackened, and the cabbage to be warmed through. Because it can be difficult to control, the exact temperature of the grill, it is important to pay attention to the smell and appearance before flipping the wedges over or removing from the grill.

    While the cabbage is grilling, mix together the olive oil, lemon juice, Dijon mustard, and salt and pepper whisking until smooth and creamy.

    For times when grilling is impossible or impractical, you can char your cabbage under the broiler of your oven. Set the broiler on high heat and place the cabbage wedges in a single layer on a baking sheet lined with parchment or foil. Place the baking sheet under the broiler and cook for about ten minutes or until the edges chars nicely. Remove the sheet from the oven and flip the wedges and broil for another 10 minutes or so to char the second side. Make sure you are running your vent fan, as there will be a strong smell as the outer leaves burn.

    Once cooked and cooled, the wedges can be served whole (like a wedge salad with bleu cheese dressing and bacon bits) or sliced to make a chopped-style salad as we prefer. Even without dressing, it is pretty darn good with a smoky flavor that penetrates deep into its layers, with a great contrast between the nutty sweetness of the charred exterior and the fresh crunch of the center.

    Slice the wedges into ½-inch strips and coat with the vinaigrette. Let the salad rest for a few minutes before serving to allow the dressing to saturate the cabbage.  Any leftovers can be refrigerated and served as a cold salad the next day and works well as a sandwich topping.


    Yum

    Tuesday, September 1, 2015

    Classics Win at Atlanta Meatball Festival

    Last Saturday, I headed out to Belle Isle Square in Sandy Springs for the second annual Atlanta Meatball Festival produced by Taste of Atlanta and hosted by Chef Linda Harrell of Cibo E Beve. Twenty two chefs were on hand under the big tent to share their best meatball creations in this "battle of the balls" where guests were each given a gold coin to use as a voting chip for our favorite meatball! Proceeds from the event benefit Second Helpings Atlanta, which is a social action non-profit serving as a conduit between food donors and the front line agencies which feed the hungry on a daily basis.

    Of course, like most popular food items, many cultures claim to be the inventors. Case in point; the meatball is claimed to have been invented by the Chinese, Romans and the Persians and this year’s chefs certainly left no cuisine untested with their unique offerings like:
    • Braised Veal Meatball with Kimchi, Scallions and Charred Orange Vinaigrette from 1Kept
    • Lamb & Ricotta Meatball with Candied Garlic Sauce from 4th & Swift
    • Masala Meatball from Bhojanic 
    • Pork & Smoked Bacon Meatball with Honey Garlic Sauce from Community Smith 
    • Smoked Duck Meatball with Collard Green Kimchi from Food 101 
    • Turkey Poblano Meatloaf Meatball with Jalapeno Tequila Gravy from Madre + Mason
    • Shanghainese Lion's Head Meatball with Vermicelli Noodles and Cabbage from Makan
    • Fried Chicken and Champagne Meatball from Max's Wine Dive
    • Toragashi Spiced Lamb Meatball with Pita Almond Crisp, Tomato, Shisa Tzatziki Sauce from One Flew South 
    • Korean Dirty Rice Meatball from Rathbun's
    • Smoked Duck Meatball with Fire Roasted Poblano Puree and Cotija Cheese Cream from Smoke Ring 
    • Shrimp Meatball with Thai Coconut Curry and Jasmine Rice from STK Atlanta 

    Even with all the innovative and original presentations, I couldn’t help but be attracted to the traditional sauce-smothered, Italian-style meatball (25 years of marriage to an Italian perhaps?) thus my gold coin went to Davio’s whose classic delicate meatball doused with balanced, gentle tomato sauce is the genuine article and worthy of the name “meatball.”

    I must not be the only one with this same penchant for a traditional meatball since all three of this year’s finalists (who will compete in the Meatball Throw Down during Taste of Atlanta at the end of September) were made in the classic Roman style:
    • American Kobe Beef Meatball with Caciocavallo from Davio's Atlanta 
    • No. 246 Meatball from No. 246
    • Pork And Beef Polpette from Colletta

    And a shout out to Morelli's® for sharing some Maple Bacon Brittle Ice Cream which was an excellent palate cleanser and to Angel’s Envy for sharing their amazing orange-spiked cocktails. Thanks to Brave PR for once again including us in this super enjoyable event again this year!


    Yum

    Saturday, August 29, 2015

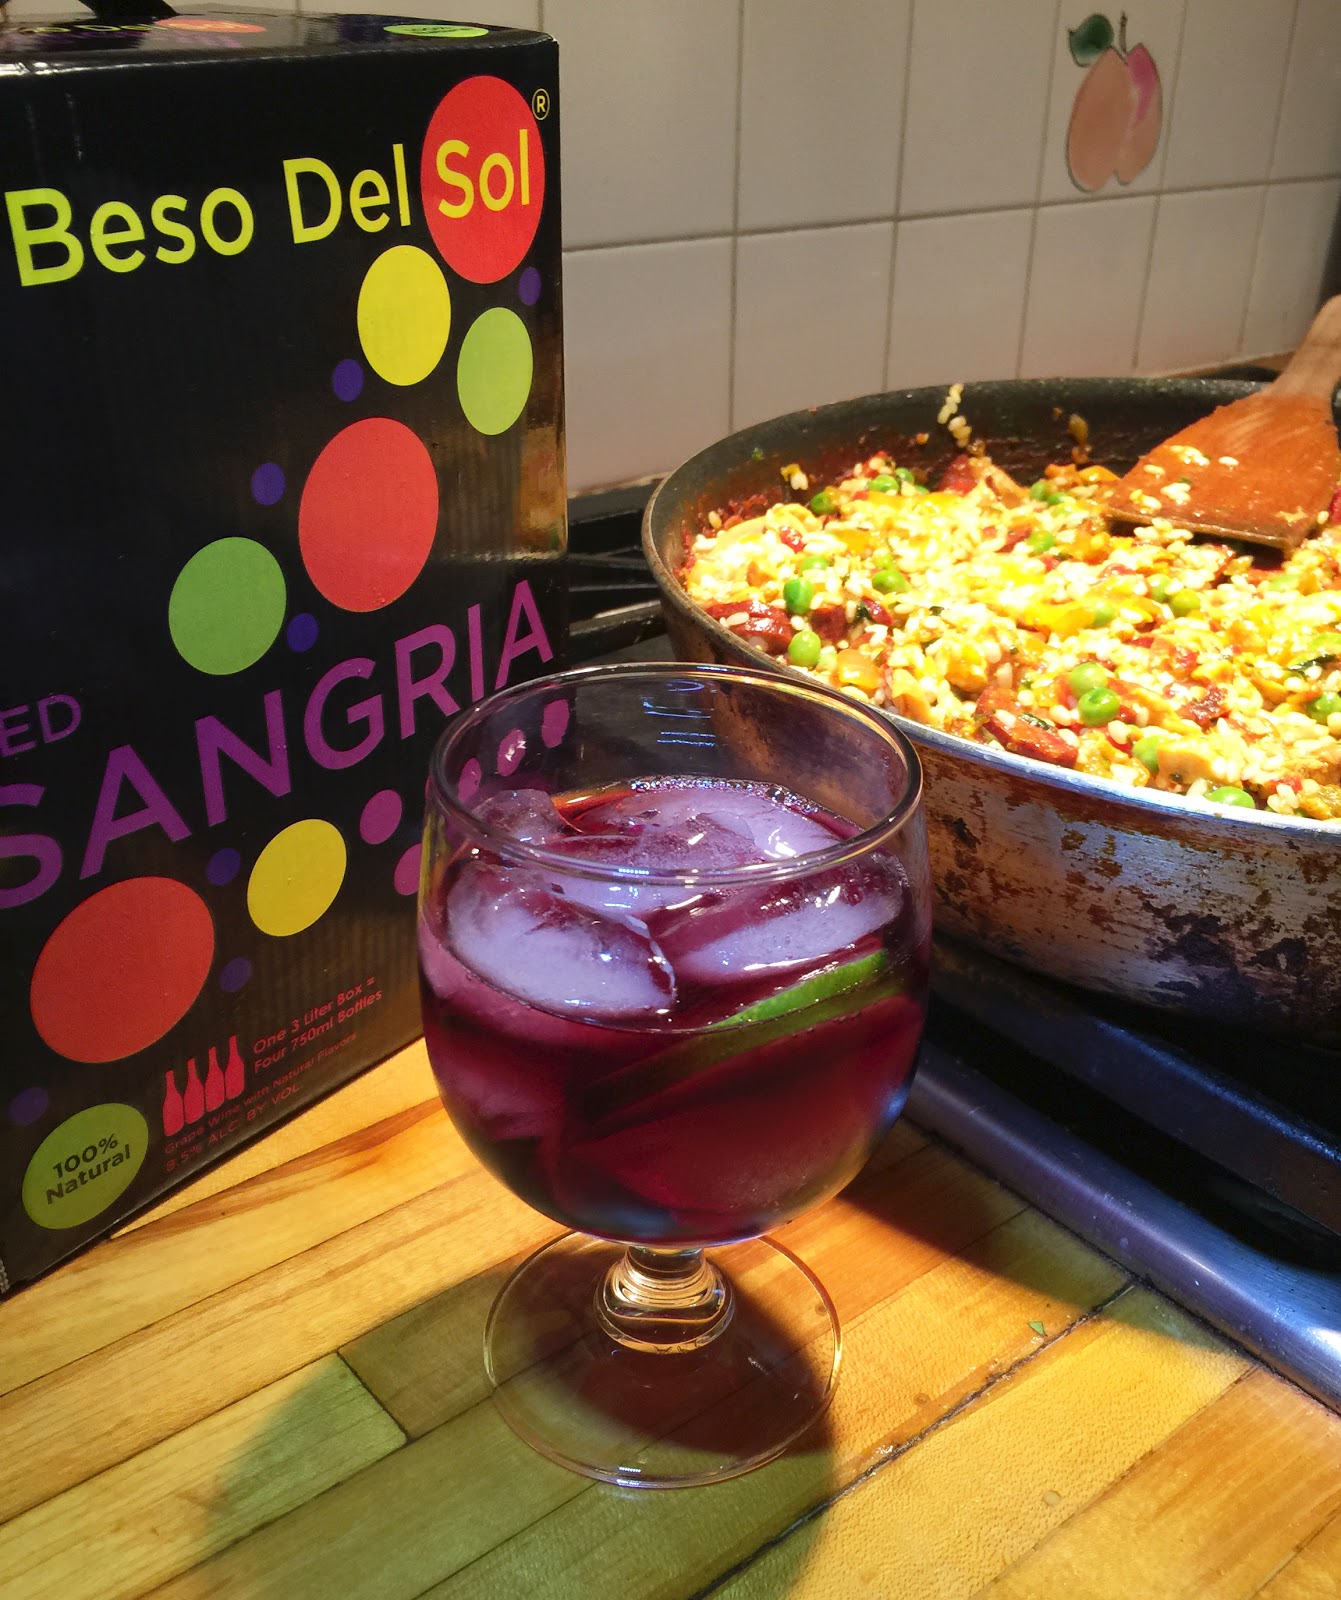
    Spanish Summer Paella with Beso Del Sol® Sangria

    With summer coming to a close, we wanted to take advantage of the timing and the weather to have a little get-together with friends and family. As luck would have it, we also had a 3-liter "bag-in-the box" of Beso Del Sol® Sangria to get the party started!
    Sangria is served throughout Spain and Portugal during summer at informal social gatherings, like a punch. Beso Del Sol® Sangria, which means “kissed by the sun,” is imported from Spain and made with high quality Spanish Tempranillo which is blended with a selection of fruits and citrus creating a light, fruity mixture that is mildly sweet and very refreshing.

    What better way to enjoy sangria than paired with another Spanish tradition: paella. Paella is the Valencian rice dish widely regarded as Spain's national dish and is a major part of a nation's identity and self-image. During the age of European empire-building, nations would develop a national cuisine to distinguish themselves from their rivals.

    After gathering all the obligatory ingredients: Valencia rice, saffron, and chorizo; we began putting the dish together. We also busted out the sangria operating under W. C. Fields' philosophy of "I cook with wine, sometimes I even add it to the food." The sangria is well-balanced and not too sweet with 8.5% alcohol (less than the 11% typical of wine) and a smooth finish.

    1 pound shrimp, peeled and deveined
    Salt and ground black pepper
    Olive oil
    8 garlic cloves, minced
    1 pound chicken thighs, boneless and skinless
    8 ounces Spanish chorizo, sliced
    1 medium onion, chopped finely
    1 red bell pepper, chopped
    2 cups tomatoes, diced
    2 cups Valencia rice (Arborio rice is a reasonable substitute)
    3 cups low-sodium chicken broth
    1/4 cup dry white wine
    1/2 teaspoon saffron threads, crumbled
    1 bay leaf
    1/2 teaspoon of crushed red pepper flakes (optional)
    1 cup frozen peas, thawed
    1 bunch fresh cilantro, chopped
    1 lemon, cut into wedges, for serving

    Pre-heat oven to 350°F and begin heating 2 teaspoons of oil in the bottom of the paellera (a 12-inch round deep sauté pan or Dutch oven are a good substitutes.

    Toss the shrimp, ¼ teaspoon salt, ¼ teaspoon pepper, 1 tablespoon oil, and 1 teaspoon of the garlic in a medium bowl; cover with plastic wrap and refrigerate until needed. Season the chicken thighs with salt and pepper; set aside.

    When the oil in the pan is shimmering but not yet smoking, add the chicken pieces in a single layer; cook, without moving the pieces, until browned, about 3 minutes. Turn the pieces and brown on the second side for about 3 minutes more and then transfer the chicken to a medium bowl. Reduce the heat to medium and add the chorizo to the pan stirring frequently. When the sausage is deeply browned and the fat begins to render, 4 to 5 minutes, transfer the chorizo to the bowl with the chicken and set aside.

    Add enough oil to the fat in the pan to equal 2 tablespoons and again heat over medium heat until shimmering but not yet smoking. Add the onion and cook, stirring frequently, until softened, about 3 minutes and then stir in the remaining garlic and chopped red pepper and cook until fragrant, about 1 minute. Next stir in the tomatoes and cook until the mixture begins to darken and thicken slightly, about 3 minutes.

    Stir in the rice and cook until the grains are well coated with the tomato mixture, 1 to 2 minutes. Stir in the chicken broth, wine, saffron, bay leaf, and 1/2 teaspoon salt. Return the chicken and chorizo to the pot, increase the heat to medium-high, and bring to a boil, uncovered, stirring occasionally. Remove from heat and stir in peas.

    Transfer the pan to the oven; cook until the rice absorbs almost all of the liquid, about 10-15 minutes depending on your oven. Remove the paella from the oven and scatter the shrimp over the rice and return to the oven to cook the shrimp until they are opaque, about 10 minutes more.

    To achieve the layer of crusty browned rice that forms on the bottom of the pan known as soccarat that is a traditional characteristic of paella, place the paellera back on the stovetop over medium-high heat for about 5 minutes. When done, let the paella rest for about 5 minutes before serving.

    Once cooled, sprinkle the paella liberally with the chopped cilantro and nestle lemon wedges along the edges. Serve with a chilled pitcher of Beso Del Sol® Sangria for an authentic Spanish experience.

    While the food items we sampled were complimentary, we received no additional remuneration. The opinions included herein are honest and unsolicited.

    Yum

    Friday, August 21, 2015

    Atlanta's Got Balls - Meatballs!

    Did someone say meatball? Living in an Italian household with hubby and two carnivorous boys, I think it is fair to say that I am somewhat of an expert on this topic. When I was invited to a preview event for the 2nd annual Atlanta Meatball Festival, I could not refuse. Executive Chef Linda Harrell invited four chefs from other Atlanta restaurants that will participating in this year’s Atlanta Meatball Festival into her kitchen at Cibo E Beve. Each chef prepared a signature meatball.

    Photo Credit: Henri Hollis
    The first meatball to arrive at the table was a perfect little package created by Chef Drew Belline of No. 246. A wonderful example of a traditional Italian meatball plated with a splash of pomodoro and a basil leaf. Yum.

    Next up was a gluten-free meatball made with Springer Mountain Farms' chicken. This morsel created by host Chef Linda was lighter than its beefy cousins with a chunkier style marinara.

    A “smoked” meatball from 7 Lamps Chef Drew Van Leuvan was a nice surprise. The meatball was made with beef and pork braised in a sincerely smoky puree of tomato and eggplant; a very nice adaptation on a classic. 

    The biggest revelation of the evening came in the way of the duck meatball with a hoisin-style glaze served atop kimchi collards presented by Chef Justin Keith of Food 101. This was truly an exceptional meatball!

    The last sample of the evening and winner of the “size matters” award was a humongous meatball in a well prepared tomato gravy came from Top Chef Ron Eyester of Rosebud who delivered his offering to the table with a mischievous grin as he said, “Ready to taste my balls?”
    If these meatballs are a sample of what’s in store at this year’s Atlanta Meatball Festival, you better go buy your tickets now to join TasteATL at Belle Isle Square in Sandy Springs on Sunday, August 30 from 1:00 - 5:00pm for a mighty selection of meatball dishes, sweets, limoncello and more from more than 20 of Atlanta's hottest restaurants.

    While the food items we sampled were complimentary, we received no additional remuneration. The opinions included herein are honest and unsolicited.

    Yum

    Saturday, August 15, 2015

    Wicked Lemon Lavender Mojitos

    As if we needed an occasion to drink more rum…  Tomorrow is National Rum Day! To help us celebrate, the folks from Wicked Dolphin Rum sent us a bottle of their Florida Silver artisanal rum, which is handcrafted using 100% Florida sugar cane in small batches and aged in bourbon barrels to give it a warm vanilla undertone. As many connoisseurs know, the true test of any distilled liquor is to drink it neat. The first sip revealed it to be a good sipping rum; smooth with a polished finish without the burn that many spirits leave behind.

    As the menfolk were gathering to enjoy some brews at a local pub, I was looking forward to some girl time with old friends. As happens most often, we take inspiration from things around us. Working in the yard, I brushed against some lavender. The heady scent captured the essence of the dog days of summer. My mind instantly went to a mojito with muddled lavender as the starting point. An experimental rendition with lime and lavender was too tart and not quite right. Subbing in lemons was the ticket; creating the perfect late summer concoction!

    Lavender Simple Syrup
    ¾ cup water
    1 cup sugar
    5-6 lavender sprigs or 2 teaspoons food grade lavender flowers

    Make the simple syrup in advance to allow it to cool sufficiently before using. Over medium heat, bring the water to a boil and the sugar and lavender stirring until all the sugar is dissolved. Remove from heat and let sit for 5-10 minutes to steep the lavender. Pour the syrup through a strainer and allow to cool completely.

    Lemon Lavender Mojitos
    Juice of ½ a lemon, freshly squeezed
    1½ oz. lavender simple syrup
    2 oz. Wicked Dolphin Silver rum
    1 oz. soda water (give or take)

    If you want a true mojito experience, you can muddle some fresh lavender in the bottom of the cocktail glass before pouring. In a cocktail shaker, mix lemon juice, lavender syrup and rum with ice and pour into a cocktail glass. Top with soda water and give a quick stir. Now get wicked!


    Yum

    Saturday, August 8, 2015

    Taste Of Atlanta Returns in September 2015

    Taste of Atlanta, the city's biggest food event, is returning to TECH Square September 25th through 27th. Below are some tips to make your tasting experience the best that it can be!
    • Take advantage of early ticket discounts: tickets are available online and at the Cook’s Warehouse. Taste of Atlanta gives many opportunities for you to save. This year codes look for special codes on Taste of Atlanta's social media channels or subscribe to their newsletter.
    • Choose your ticket level carefully: VIP tickets are more costly, but you have access to a special area with wine, beer and cocktails tastings as well as exclusive restaurant tastings (no additional tasting tickets required). You may feel the extra money is worth the benefit.
    • Do your Research: participating restaurants are listed well in advance. Research so that you know ahead which restaurant’s sample you simply must try.
    • Make a conscious decision about where you plan to park: Expect to pay $15-20 to park close to the event. Consider taking Uber especially if you have decided to purchase VIP tickets that way you can enjoy as many wine samples as you please.
    • Check the weather forecast: Taste of Atlanta is held rain or shine. It is better to be prepared than to be too hot, cold or wet!
    • Wear comfortable clothes and shoes: Do not wear your skinny jeans; you will need some breathing room. The terrain is not optimal for high heels. They may look great but you will struggle to maneuver through the crowds with ease.
    • Consider taking a bag: While frequently there are vendors handing out reusable bags of some sort, you may not have a bag when an opportunity to collect some take home samples presents itself. I take a plastic grocery store bag folded tightly enough to fit in my pocket to use until that better bag presents itself.
    • Get there early! Although most restaurants are fully prepared for the crowds, some have been known to run out of popular items.
    • Allot plenty of time. This is not a “I’m just gonna stop by” kind of event. There will be crowds and there will be lines.
    • This year, Taste of Atlanta is launching a new cashless payment system with RFID technology that will make it easier and faster to enter the festival and make purchases which means no more printed tickets, "taste coupons" or cash needed. Attendees will now be able to pay for their bites, brews and other merchandise by registering their wristbands and loading "Taste Points" online in advance or at select Taste Point Banks located throughout the festival.
    • Maximize your ticket to appetite ratio: with your entry ticket you will receive 10 “taste points” which allow you to purchase samples. If you go with a friend, you may choose to combine tickets and share tastes thereby conserving not only tickets but stomach space! Be on the lookout for bargains. For example, last year Woody’s Cheesesteaks offered generous servings of their famous sandwiches for only one ticket.
    • Splurge on a bottle of water: You will have to buy water separately, but trust me, you will need it.
    • Take advantage of the cooking demonstrations and competitions: You can rest your feet and your palate, and who knows you might actually learn something.
    • Don’t waste your last few tickets: Many of the restaurants “mark down” samples towards the end of the day, so you can grab a mini cupcake or zeppole on the way back to your car. Other items are portable making it easy to take home a treat for later such as a giant pretzel to nibble while catching the last half of your home team’s football game. While the new RFID wristbands allows for unused "taste points" to be credited back, you also have the option to donate your unused points to "Share Our Strength's Cooking Matters," Atlanta project, a cooking-based program that provides a strong foundation in nutrition, cooking, and household budgeting for adults, kids, and teens.
    • Lastly, cancel your dinner plans! You will not leave hungry.


    Yum

    Thursday, July 16, 2015

    Technique of the Week: Pan Frying

    This cooking technique involves cooking food in an uncovered “frying” pan in a moderate amount of fat. A frying pan can be any large skillet or sauté pan with sloped or straight sides. Pans with even heating are recommended. A cast-iron skillet is perfect for pan-frying due to its non-stick nature and consistent heating. Non-stick coatings also work well since breaded items may otherwise stick to the pan despite the frying oil.

    This method is often used with tender items with relatively short cook times. Meats should be tender cuts and cut to about an inch thick to avoid having a crispy outside but a raw inside. Always use a thermometer for thicker cuts of meat to ensure a safe eating temperature. Pan-fried dishes are usually coated with a breading. A three step process is generally recommended: a thin coating of flour or cornmeal, egg wash and milk/buttermilk, and a main coating of flour/breadcrumbs with seasoning.

    Tips and Techniques:
    • Choose a fat with a neutral flavor such as canola oil, vegetable oil, safflower oil or peanut oil. Butter will work as well but the item must cook very quickly over medium heat to avoid scorching the butter.
    • Starting an item at medium-high heat and lowering it after browning will prevent overcooking or scorching but lowering it too much will yield soggy results. The oil should continue to bubble after lowering the temperature. To see if it the oil is hot enough before cooking, drop in a small ball of batter (you probably have some sticking to your fingers!) if it sizzles, it’s probably good to go. If it doesn’t wait a bit to allow the oil to reach a proper temperature.
    • Don’t overcrowd the pan; it’s better to pan-fry in batches. Overcrowding causes the items to stick together and can cause the oil to drop temperature too quickly, again causing sogginess.
    • Turn your items only once during the cook time to avoid disturbing the breading. You want to touch the food in the pan as little as possible as the tiny bits of breading that come off will start to burn and the oil takes on a slightly burnt taste. If you’re doing more than a couple of batches, make sure to strain out whatever blackened bits you can and add fresh oil if necessary (and bring back up to temperature) before adding the next batch.
    • Season with a bit of salt and pepper and serve as soon as possible to avoid sogginess.


    Yum

    Tuesday, July 7, 2015

    9 Reasons to Shop Earth Fare at Emory Point + Giveaway

    Yesterday, we visited the new Earth Fare at Emory Point. The store’s grand opening is scheduled for July 8th and we got a sneak peek at all the goodies before the location’s opening to the public. Of course, the produce department was completely empty, since they will fill that at the last minute to ensure the ultimate freshness of their items. As we toured the store, we learned all about the benefits of shopping at Earth Fare. Here are our top nine:

    1. Their Food Philosophy
    The foundation of Earth Fare is built on their food philosophy that the food they sell is as close to the ground as possible. Earth Fare has extremely high quality standards.
    • Free of added hormones
    • Free of antibiotics
    • Free of artificial fats and trans fats
    • Free of high-fructose corn syrup
    • Free of artificial sweeteners
    • Free of artificial preservatives
    • Free of bleached or bromated flour
    • Free of artificial colors or flavors
    In fact, if you find a product on their shelves that contains any “banned” items in the ingredient list, they will remove it from their shelves and reward you with a $50 gift card.

    2. Earth Fare Teaches Healthy Lifestyles
    Earth Fare has initiatives for promoting health through healthy eating. Their high quality organic produce speaks for itself. Earth Fare constantly updates their website and provides helpful links about the basics of organic foods, healthy eating, a comprehensive food guide on lots of ingredients, to name just a few. Many educational resources (recipes, cooking tips, local initiatives, etc.) are regularly posted to the Earth Fare Facebook page and their Twitter account. Earth Fare employees pride themselves on their knowledge with their products. If a customer asks them about a product that they are unfamiliar with, they will open the product and try it with you.

    3. Organic Options
    Looking for organic food? Just look for circle-shaped symbols on packaging. This makes identifying organic options foolproof. Eating organic products reduces health risks. It’s common sense – well-balanced soils produce strong, healthy plants that become nourishing food for people and animals. Added bonus: organic agriculture reduces the chemicals released into the air, earth and water that sustain us.

    4. Gluten-Free Selections
    While there are a great many foods that are inherently gluten free, and increasingly more gluten-free alternatives for foods that commonly contain gluten (such as gluten-free pasta and cereal) are available in conventional grocery stores. Careful reading of food labels is absolutely necessary when adhering to a gluten-free diet. Sometimes gluten-containing ingredients are obvious, and sometimes they are not – such as with modified food starch, thickeners, natural flavorings, etc. Earth Fare has read the labels for you. Earth Fare offers many breads, cookies, crackers, salad dressings, and other products which are packaged in gluten free facilities, and each is clearly marked with a pretty blue label dot to make your gluten-free shopping easy.

    5. Earth Fare Supports Local
    Earth Fare seeks out products that are raised or made within 100 miles of your local store. That means that each store has a different local selection -- which is how it should be. Earth Fare supports local farmers by expanding and creating new markets for organic products. Earth Fare Family Producers are small, family-owned or artisan-operated producers. Whenever we can, we love to support the little guy. Look for locally brewed beers from Second Self, Monday Night Brewing and Orpheus as well as peanut and almond butters from Atlanta-based Georgia Grinders.

    6. Natural Medicine and Wellness 
    There is an entire section of the store dedicated to “Wellness” items. There are a dizzying array of natural cosmetics, deodorants, lotions, soaps and even toothpaste! There is a gorgeous island of  Biggs & Featherbelle handcrafted soaps and bath salts that draw you in with their tantalizing aromas. There is also a vast selection of natural medicine options with natural and holistic treatments for common ailments.

    7. Fast Healthy Meal Choices
    Earth Fare is your one-stop-shop for a quick meal anytime of day. With a variety of healthy options for every meal of the day, Earth Fare has an all-in-one hot and cold food counter, a deli shop, a pizza parlor, a sushi station, a juice and smoothie bar, and a scoop-your-own ravioli station.  So when you have the munchies or are just pressed for time, check out their healthy fast food options guaranteed to be better quality than the fast food chain restaurants and certainly better for your waistline.

    8. Tomato Bank Rewards Program
    Earth Fare has a rewards program called “Tomato Bank.” Every 100 points equals $1 of Earth Fare credit towards anything they sell, except alcohol and gift cards. You earn points by purchasing items on the “Get List” (which offer up to 200 points per week,) and bringing your own grocery bag. Email updates inform you of special point opportunities each week. Sign up online or at the store, and receive 100 points just for joining, then enter your Tomato Bank ID number at the register each time you shop to bank or redeem your points.

    9. There’s An App For That
    Earth Fare's mobile app for iPhone and Android is a simple and useful tool for Earth Fare shoppers. Download the app and sign in using your Tomato Bank account to browse deals available at your local store. Save deals that you want to use on your next visit and receive reminders before saved deals expire. So easy to shop, grab your deals, and show the app at checkout.

    GIVEAWAY TIME!

    Earth Fare graciously shared a $25 gift card to giveaway to a lucky We Like To Cook! reader! To enter, simply follow the instructions below! I look forward to seeing you in the aisles of Earth Fare at Emory Point. Good Luck!


    a Rafflecopter giveaway
    Want more chances to win? Visit my fellow members of the Atlanta Food Bloggers' Society to enter their giveaways:

    Do.Food.Better.

    One Glam Day
    Red Velvet Confections
    Shana Was Here
    The Cardigan Kitchen
    Diva Foodies


    Yum

    Wednesday, July 1, 2015

    July 4th Menu Planner

    Stay relaxed while you celebrate our nation's independence with some easy cookout ideas. When it's time to eat, remember to say "thank you" to all who have sacrificed for our freedom. We have put together a list of our favorite 4th of July recipes. We hope they will become your favorites as well!

    It's too hot to cook inside, so fire up that grill:

    And these chilled sides are excellent accompaniments that can be made ahead:

    And what summer party is complete without a frozen dessert?
    Lastly, don’t forget something to keep the kids from underfoot and away from the fiery grill. Yard games of bocce, corn hole or horseshoes are always popular and you can NEVER go wrong with bubbles. Try our mixture for the Ultimate Bubble Elixir and get ready for the squeals of delight!

    Be safe and enjoy a safe and well deserved three-day weekend! And, don’t forget to designate a driver or enjoy the night air by walking home when possible.


    Yum

    Sunday, June 28, 2015

    Hot Summer Night Panzanella

    There are some summer nights that it is just too hot to eat a hot meal; the idea of meat and potatoes is a little repulsive. With the tomatoes, cucumbers and papers rolling in, a simple fresh panzanella seems like just the ticket. This classic Italian bread salad is a cross between gazpacho and bruschetta with juicy ripe tomatoes and cubed stale bread as the key components forming a cool meatless yet filling dish.

    The bread should a formerly crusty artisanal type. As we frequently have leftover ciabatta, that’s our go-to. While most of the type, we are trying to keep bread from going stale, in this case you might actually want to speed up the process by cutting the bread into cubes ahead of time and leaving them in an unheated oven to dry out.

    When you are feeling your stomach just starting to rumble, start roughly chopping your fresh veggies, assemble your salad and toss with the vinaigrette. The key to this dish is time.

    Allowing the panzanella to rest for at least a half hour gives the vegetable juices time to mingle with the vinaigrette, and the bread time to absorb all the flavors. The bread should still be nicely chewy, but not soggy. You can up your game by adding some cubed mozzarella or shaved Parmigiano Reggiano for a little added protein if desired. Oh, and an insider tip: leave the salad out to rest. Placing it in the refrigerator tends to slow macerating process, and while I’ve been known to save leftovers for my lunch the next day, it is NEVER the same as it is fresh!

    6 slices of rustic bread (about 2 cups)
    2 medium fresh tomatoes, chopped (about 2 cups)
    1 small cucumber, chopped
    1 small bell pepper, seeded and chopped
    1/4 cup extra-virgin olive oil
    3 tablespoons red wine vinegar
    1 small clove garlic, minced
    Generous pinch of salt
    Pepper, to taste
    6-8 large basil leaves, thinly sliced

    Cut the bread into 1-inch cubes and set aside. If possible do this in advance to allow the cubes to get thoroughly stale. Then roughly chop the tomatoes, cucumber, and bell pepper into bite-sized pieces. This is a rustic salad, so preciseness in chopping in not necessary.

    Combine the olive oil, red wine vinegar, garlic, salt, and a few grinds of fresh pepper in in a small bowl and whisk to combine. Toss the bread cubes and chopped vegetables in a large mixing bowl. Pour the vinaigrette over top and mix to thoroughly combine. I use my hands here so as not to break up the bread too much.

    Let the salad sit for 1/2 hour to an hour. Add the basil chiffonade and toss before serving with a nice glass of chilled Pinot Grigio or a Chianti Classico. Buon appetito!


    Yum

    Wednesday, June 17, 2015

    Bandwagon Chia Seed Pudding

    Several months ago, I first experienced chia seed pudding at True Food Kitchen. To say I was skeptical is a vast understatement. The server assured me I would not be disappointed, but when the slightly grey conglomeration was delivered, I was quite hesitant to try it. I bravely (very bravely) took a spoonful and – Wabam! I was hooked. How could something so healthy (and unappetizing) be so incredibly delicious?

    Chia seeds which were a staple of Mayan and Aztec diets, are tiny black seeds from the plant Salvia Hispanica (a cousin of mint,) are among the easiest ways to add fiber to your diet. By weight, they are about 14% protein, and are loaded with antioxidants, vitamin B, niacin, potassium, and zinc.

    The tiny seeds can expand to hold about 10 times their dry weight in liquid. When they absorb liquid, the seeds develop a gelatinous coating and swell into globules reminiscent of miniature tapioca balls and make a delicious and healthy pudding.

    1/4 cup of chia seeds
    1 cup unsweetened almond milk
    1 tablespoon honey or brown sugar
    1 teaspoon vanilla (optional)

    In a 2-cup storage container (l like the airtight glass type), add the almond milk, chia seeds and honey. You can actually use any type of non-dairy “milk” product. We've tried cashew milk and it is equally tasty! The container will seem oversized for the amount of ingredients, but remember your seeds need room to expand.

    Stir (or shake) the mixture to ensure that all seeds are “wet.” Set the container in the refrigerator for at least 4 hours or overnight. It’s that easy!! Your chia seed pudding will keep for several days in an airtight refrigerated container.

    There are a few tricks I've learned having made this a few times. (I may be late to jump on the chia pudding bandwagon, but I'm making up for  lost time!) The seeds tend to clump at the bottom of the container as they expand. I find that if you stir the mixture after about the first 2 hours, it gives the seeds more room to swell and the pudding will be creamier and less dense. Also, be sure to give the pudding a good stir before topping it with fruit, granola or eating it plain.

    If you like chocolate pudding, adding 2 tablespoons of cocoa powder, a pinch of cinnamon, and dash more honey if needed makes a healthy dessert alternative (and disguises the sort of grey hue to regular chia pudding).

    What are your favorite ways to serve chia seed pudding?


    Yum

    Tuesday, June 9, 2015

    Refreshing Zucchini Soup

    The zucchini surplus has begun! This mild and refreshing soup is a cool way to rejuvenate at lunch. It also makes a nice opener for a light summer supper. Garnished with a dollop of sour cream and an herb sprig and it could definitely pass for haute cuisine.

    2 tablespoons extra-virgin olive oil
    1 small onion, finely chopped
    4 medium zucchini, thinly sliced
    1/2 teaspoon ground ginger
    Kosher salt
    Freshly ground pepper
    1 ½ cup vegetable or chicken stock

    In a large saucepan, heat the olive oil. Add the onion and cook over low heat until softened, about 7 to 8 minutes.

    Add the garlic and zucchini and cook, stirring occasionally until softened, about 10 minutes. Keep the heat low enough that the garlic doesn't brown; you want everything to sweat. Add the stock and ginger, and simmer until the vegetables are very soft, another 10 minutes or so.

    Working in 2 batches, puree the soup in a blender or food processor until the soup is silky-smooth. Taste and season salt and pepper to your desired flavor. Like most soups, this is significantly better after a night in the refrigerator to let the flavors meld. Serve it hot or chilled for an uplifting dish.


    Yum

    Tuesday, May 26, 2015

    Sweet Onion Marmalade

    This tangy, sweet onion marmalade is a wonderful condiment that can be used for a variety of meats, poultry, and fish or simply as a spread for sandwiches, breads, and appetizers. This easy-to-make sweet-tart onion jam is great with roasted lamb, chicken liver pate, a charcuterie board or even as a topping for pizza.

    We chose yellow onions for this recipe because they are the most popular, and most readily available variety comprising more than 85% of the U.S. onion crop. They are also the best type of onion for caramelizing. Cooking brings out their nutty, mellow, often sweet, qualities when caramelized.

    There are even some health benefits associated with this delicious jam as well. Onions are known to reduce inflammation and heal infections, while raw onions encourage the production of good cholesterol (HDL). Onions contain chromium, which helps regulate blood sugar and contain “quercetin,” a powerful compound that plays a significant role in preventing cancer. Phytochemicals in onions work with Vitamin C in the body to increase immunities.

    Onion Marmalade
    2 tablespoons olive oil
    3 medium yellow onions, thinly sliced
    ½ teaspoon Kosher salt
    ¼ cup sugar
    2 garlic cloves, smashed
    2 tablespoons cider vinegar

    Heat olive oil in a heavy saucepan or skillet, add onions and salt, and sauté stirring frequently for about 10 to 12 minutes, or until the onions are golden. Add the garlic and sugar, and cook while stirring for 5 more minutes. The point is to cook the mixture until it has achieved full jamminess. If the onions start to get too thick or stick to the pan, add a tablespoon or two of water. Allow the onions to really caramelize. Add the vinegar and cook for 1 minute. Remove from heat, cool and serve.

    Store unused portion in an airtight container in the refrigerator for up to 1 week. If you are making for gifts or to store for longer than a week, you should plan to hot pack in canning jars to prolong their shelf life.


    Yum

    Friday, May 15, 2015

    Home Cooking with Georgia Grinders

    Georgia produces 50% (or more) of the peanuts consumed in the entire nation, and for the first time in history, Georgia boasts its own peanut butter manufacturer. Jamie Foster, known for her NaturAlmond products, has recently launched her Georgia Grinders line of peanut and cashew butters. We had the privilege of attending a dinner at the home of the editor of Pretty Southern to try some amazing dishes prepared by Jamie using her all natural nut butters.

    “Our nut butters are perfect for baking, making dips and sauces, churning homemade ice cream and pairing with different cheeses and jams. Depending on what you pair it with, the sweet or savory flavors in the nut butters emerge,” she says. Her true commitment to her products shines through as she chats with us through dinner. She reverently shares that each time she tastes her almond butter that she can feel the presence of her grandfather whose recipe she uses to painstakingly create each jar she makes.

    We arrived to find medjool dates that had been stuffed with almond butter and goat cheese, wrapped in bacon, and a wheel of brie topped with jam and almond butter and baked in a puff pastry crust. Both were rich and flavorful with the butters lending the perfect complement to the other ingredients. Our entrée was baked filet of salmon with an almond butter and soy sauce glaze and panko sesame crust with an orzo salad with cashew butter dressing both of which were a fresh and unique twist on these classic dishes. For dessert we had a peanut butter chocolate chip cheesecake and a special after-dinner beverage that originated as a base for a peanut butter ice cream that didn’t quite set properly and the addition of Kahlua. For the record, I preferred it as a cocktail!

    We all left with a jar of peanut butter and the recipes for the dishes we shared. I enjoyed the salmon so much, I thought I should share Jamie’s recipe with you all. I plan to try it at home and hope you will too.

    1 ½ tablespoons NaturAlmond Almond Butter
    1 tablespoon soy sauce (Jamie used Light soy sauce)
    1 tablespoon mirin (seasoned rice wine vinegar)
    1 teaspoon honey
    ½ teaspoon fresh ginger, minced
    1 clove of garlic, crushed
    ½ teaspoon hot sauce
    1 ½ lb. salmon filet(s)
    1/3 cup Panko bread crumbs
    2 tablespoons almonds, chopped, sliced or slivered
    1 teaspoon sesame seeds
    2 teaspoons sesame oil
    Salt and pepper to taste

    Preheat your oven to 425°F before lining a baking sheet with aluminum foil and spraying with vegetable oil.

    In a small bowl, combine almond butter, soy sauce, mirin, honey, ginger, garlic and hot sauce until smooth. Immerse the salmon in the sauce and then place fish on the lined baking sheet. Spread a little more sauce over the top.

    In a separate mixing bowl, combine panko breadcrumbs, chopped almonds, sesame seeds, sesame oil, and salt and pepper. Sprinkle the breadcrumb mixture over the fish and bake just until fork tender, about for 12 – 20 minutes depending on the thickness of the filet(s).


    While the food items we sampled were complimentary, we received no additional remuneration. The opinions included herein are honest and unsolicited.


    Yum

    Monday, May 4, 2015

    Grilled Green Tomatoes with Red Pepper Coulis and Goat Cheese

    It is bound to happen. We've been growing tomatoes for years and it is inevitable that in the process of staking, pruning and tying them, you knock an unripe green orb to the ground. With as much work that goes into nurturing each baby tomato to maturity, it is maddening to think of wasting even one especially this early in the season. Sure, the typical Southern solution is to slice it and smother the slices in cornmeal and fry them up in lard and top them with pimento cheese, but we were looking for a lighter, healthier variation.

    During the summer, we always seem to have a grill fired up and ready to go, so it was a no brainer to toss a few slices on the grill to see what might happen. Grilling always adds a nice smoky, caramelized flavor to vegetables and we were hoping that green tomatoes would be no different. And, man-o-man were we right! The grill softens the under ripe flesh and concentrates the natural sugars.

    As for the pimento cheese which is THE ultimate complement to green tomatoes, we took the two main components (red peppers and cheese) and added lighter versions of those as well.

    3 large green, unripe tomatoes
    3 large red bell peppers, roasted
    3 tablespoons extra-virgin olive oil
    1 small shallot, thinly sliced
    1 tablespoon champagne or white balsamic vinegar
    Kosher salt and freshly ground white pepper
    1 cup (8 ounces) goat cheese, crumbled

    Prepare a grill for medium-high heat or heat a grill pan over medium-high.

    Roast the red peppers directly over the flame of the grill or under the broiler, turning occasionally, until the peppers are blackened all over. Place the peppers in a sturdy plastic bag, seal the bag and let the peppers steam as they cool.

    While the peppers are cooling, brush both sides of the tomato slices with olive oil and grill until softened and lightly charred, about 4 minutes per side.

    Peel the peppers and discard the skins, seeds and cores. Coarsely chop the peppers. In a food processor, combine the peppers with the olive oil, shallot and vinegar and puree in a food processor until very smooth. Season the coulis with salt and pepper.

    (Cook's note: we used white pepper rather than black so as not to discolor the coulis. Black pepper is perfectly fine to use instead. )

    To serve, ladle coulis on the serving plate and lay the grilled tomatoes over the plated sauce. Top the grilled tomatoes with crumbled goat cheese and prepare yourself for a taste sensation.


    Yum

    Thursday, April 23, 2015

    Technique of the Week: Deep Frying

    Deep frying involves fully immersing food in hot oil. It is an extremely fast cooking method, and, despite the use of liquid oil, is best classified as a dry cooking method because it does not involve water. The oil or fat used for deep-frying should have a high smoke point. The smoke point is the point to which it can be heated without smoking. For that reason, shortening, lard, and vegetable, canola, peanut and safflower oils are good candidates, while butter and margarine or not. The temperature of the fat is all-important and can mean the difference between success and disaster. Fat at the right temperature will produce a crisp exterior and succulent interior. If it's not hot enough, food will absorb fat and be greasy; too hot, and it will burn. An average fat temperature for deep-frying is between 325°F and 375°F, but recipes differ according to the characteristics of each food.

    Tips and tricks:
    • If you are not using a special deep-fat fryer, be sure to use a heavy-bottomed pot or deep sauté pan.
    • To allow for bubbling up and splattering, the container should be filled no more than halfway full with oil. 
    • If your oil starts to smoke it is too hot, remove the pan from the cooking surface very carefully and allow it to cool down.
    • To ensure ingredients are cooked properly, a clip on thermometer is recommended. Oil that is ready will bubble around the edges of a clean, dry chopstick (or other wood stick) when inserted.
    • The temperature of the oil will drop when you add your item so add items in small batches to avoid the temperature dropping too quickly. If the temperature drops too quickly, it will result in greasy, uncooked items and longer reheat times.
    • Use a slotted spoon and lower items gently to avoid hot oil splashes.
    • Drain your item on a paper-towel lined surface and season immediately with salt/pepper.
    • Fat or oil used for deep-frying may be reused. Let it cool, then strain it through cheesecloth and funnel into a bottle or other tightly sealed container before refrigerating.
    • Save your oil container and after cooling the oil to room temperature, use a fine mesh strainer to strain the oil back into its original container. Store in a cool, dark place or freeze for up to two months.
    • When oil is no longer usable, dispose of oil properly. Do not pour used oil down sink! Seal tightly and throw it away or put it in your compost pile.


    Yum

    Sunday, April 12, 2015

    Tex's Tacos Spices Up Neighborhoods

    It's hard to think of a better way to spend a Sunday afternoon than with friends munching on tacos. Members of the Atlanta Food Bloggers’ Society converged on the home of Lauren Patrick, editor of Pretty Southern with our beverages and lawn chairs to enjoy treats from the award-winning and ever-popular Tex’s Tacos food truck that was parked outside her house.

    This fully-equipped taqueria on wheels serves a delicious assortment of Tex-Mex treats with bravura and flair. Tex’s Tacos started when two long time friends shared a meal San Antonio. Mac Helms, bemoaning the lack of his Texas favorites in Atlanta, joined forces with Harrison Jones to bring authentic Tex-Mex tacos to his city. They call their take on the Tex-Mex cuisine “Nueva Texicana,” creating a style that is unique & exciting.

    The duo spent six months working with chefs to craft their offerings, dedicating as much as a week to perfecting each individual taco. The resulting menu is comprised of fresh, high-quality ingredients and packed with flavor and includes only best tacos, tantalizing quesadillas, chips with salsa and guacamole and their signature Texicana Fries which are lime fries loaded with toppings like grilled onions, queso fresca, and pico de gallo. While the food truck concept is quick-serve, all of their food is made fresh to order and is fully customizable.


    We had the option of sampling our choice of tacos. I chose a Carne Asada and a Pastor De Puerco taco and Texicana Fries. The Carne Asada taco had citrus-splashed skirt steak, grilled onions, cheese, guacamole and cilantro, while the Pastor de Puerco contained pork al Pastor, pineapple, cheese, grilled onion and cilantro; both were garnished with copious amounts of fresh cilantro and a fresh lime wedge. The first impression when they hand the tacos out of the window is how good they smelled and how very fresh they looked. The carne asada was earthy and rich while the pork was a bit sweeter with very tender pork. The over the top lime fries were like a variation on nachos with toppings over crispy fries. The generous portion of fries could easily make a meal of their own. Of course they were all the better with a cold cerveza with one of those lime garnishes!

    We chatted with neighbors and friends as we devoured our Tex-Mex goodies all the while discussing how convenient and enchanting it was to have a food truck pull right up in front of a home, delight guests and drive away when the party is over. Now for the beauty part, we can and you can too because Tex’s Tacos caters. You invite the guests, select the menu items you want to offer them, give Tex’s the headcount and they do all the rest. Convenient and enchanting indeed!

    While the food items we sampled were complimentary, I received no additional remuneration. The opinions included herein are honest and unsolicited.

    Yum

    Wednesday, April 8, 2015

    Meatloaf Smeatloaf Romeo Style

    “Meatloaf, smeatloaf, double beatloaf. I hate meatloaf.” This quote from the 1983 movie, A Christmas Story could have been taken directly from a scene in our family kitchen growing up. There is a notorious story from my childhood that can still cause my mom’s jaw to set during the retelling.

    Upon arriving home from school one day, I noticed that there were two items strategically placed on the kitchen counter: a lump of thawing hamburger and a loaf of Wonder bread. These two ingredients placed in close proximity at this time of the afternoon could only mean one thing, one bad thing: meatloaf.  So being a clever and resourceful daughter, I waited for just the right moment when Mom’s back was turned I nonchalantly stole the bread from the counter and hid it.

    Tick, tock, tick, tock; I waited in my room pretending to be doing homework. Nothing. My father arrived home and pleasantries were exchanged; still nothing, until… “Where’s the bread” came a slightly shrill call from my mom. “What bread?” my dad and I replied in unison. “The bread for the meatloaf.” came the brief and definitive explanation from Mom. Dad then made the face; the I-hate-meatloaf-more-than-even-you-do face. I silently mouthed, “I hid it,” to my Dad whose eyes instantly lit up. Mom came trudging down the hall. I was busted, yet, there I stood steadfast and determined not to give in to the mundane meatloaf menace. Low and behold Dad backed me up! “We aren’t really in the mood for meatloaf tonight,” he diplomatically attempted to skirt the issue. Mom retorted something about us never being in the mood for meatloaf. The cards were on the table, all bets were off, the secret was out; "No, in fact, we hate meatloaf and would prefer to never have it again," Dad responded. And we didn’t. Meatloaf was off the regular menu rotation, reserved only for occasions when mom was cooking for herself or for Dom who completely shares her love for the hamburger-bread amalgamation.

    Dom, who knows of my meatloaf aversion and typically honors my preference not to ingest the dish, recently needed a meatloaf fix on a stormy, unfriendly evening. He dug out a dusty copy of James Beard’s tome of recipes and set to work at creating dinner. I’ve known him a long time and he knows me; he knew that if he used JB’s recipe, I wouldn’t (couldn’t) dream of protesting. So here is Dom’s variation on meatloaf inspired by the equally indomitable James Beard.

    2 pounds ground beef
    1 pound ground pork
    2 doves of garlic, minced
    1 large onion, finely chopped
    1 teaspoon salt
    1 teaspoon black pepper, freshly ground
    ½ teaspoon oregano
    1 teaspoon jalapeno pepper
    ½ cup bread crumbs
    2 eggs
    Thickly-sliced bacon

    Mix all ingredients except bacon thoroughly and knead with the fingers until the mixture is very thoroughly blended. Form into a long loaf or cake and press firmly. Arrange enough slices of bacon or salt pork on the bottom of a baking pan to hold the meat loaf. Brush the loaf liberally with a mixture of half ketchup and half yellow mustard and then cross with 2 to 4 additional slices of bacon. Roast at 325°, basting occasionally with more ketchup and mustard, for 1½ to 2 hours, or until the loaf is cooked through.

    Once the internal temperature reaches 155°F, the loaf is done and can be removed from the oven.  Let it stand for 10 to 15 minutes before carving to allow the juices to settle. If you want to try my Mom’s and Dom’s favorite preparation, wait until lunch the next day and sandwich a thick slice between pieces of crusty bread.


    Yum
    Powered by Blogger.

    footer social

    ShareThis