Saturday, February 13, 2016

Aphrodisiacs for a Romantic Valentine's Day

Just in time for Valentine’s Day, Chef Nick Leahy of Saltyard, Flavors Magazine and Springer Mountain Farms teamed up to host "Valentine's Day Cooking" at Bloomingdale's in Lenox Square Mall where Chef Nick taught guests to recreate a romantic Valentine's Day dinner at home. He prepared two aphrodisiac-infused recipes in the Bloomingdale’s Home kitchen.

The chef began the demonstration by explaining the concept behind aphrodisiacs and the varying types. Aphrodisiacs (named for the Greek goddess of love, Aphrodite) are items that inspire lust, improve potency or enhance sexual function and most commonly refer to food. There are three categories of aphrodisiacs (with some overlap):

Visual Enticements – Ingredients that resemble sexual organs. These include phallic symbols such as bananas, cucumbers, carrots as well as oysters, papayas and figs.

Expectation-Setters – Items that set a tone to suggest that a romantic evening is inevitable. These items might be expensive, decadent, rich or meaningful to the couple in some way including champagne, caviar, or chocolate.

Physiological Stimulants – these ingredients are that cause a physical reaction as such warming the blood, lowering inhibitions, or increasing energy levels which include chili peppers, red wine, honey, watermelon and chocolate.

Chef Nick proceeded to make a truly sexy dish of chicken livers from Springer Mountain Farm made with 5 aphrodisiac ingredients. The delicately cooked liver with the luxurious cream sauce definitely aroused the taste buds!

Chicken Livers in Brandy Cacao Cream 
1 lb. chicken livers, rinsed and trimmed
2 cups flour
1 tablespoon Kosher salt
1 tablespoon freshly ground black pepper
1 tablespoon sunflower oil
¼ cup brandy
¼ cup vegetable or chicken stock
¼ cup heavy cream
1/2 tablespoon cacao nibs
½ cup cold butter, diced
3 tablespoons pistachios, finely chopped (optional)

Heat the pan over medium high heat and add oil.

Combine flour, salt and pepper in a mixing bowl. Drain the chicken livers and dredge each in the flour mixture.

Once the oil in the pan has reached the smoking point, sear livers for 2 minutes on each side. Remember to place the livers in the pan with a motion going away from you to avoid splatter burns. Once livers are cooked set aside on a plate.

Remove the pan from the flame and add brandy. Deglaze the pan with the brandy, scraping all the flavorful brown bits from the pan. Add the stock and stir to combine, then add the heavy cream. Bring the pan sauce to a boil and reduce heat. Allow to simmer and thicken for 2 minutes.
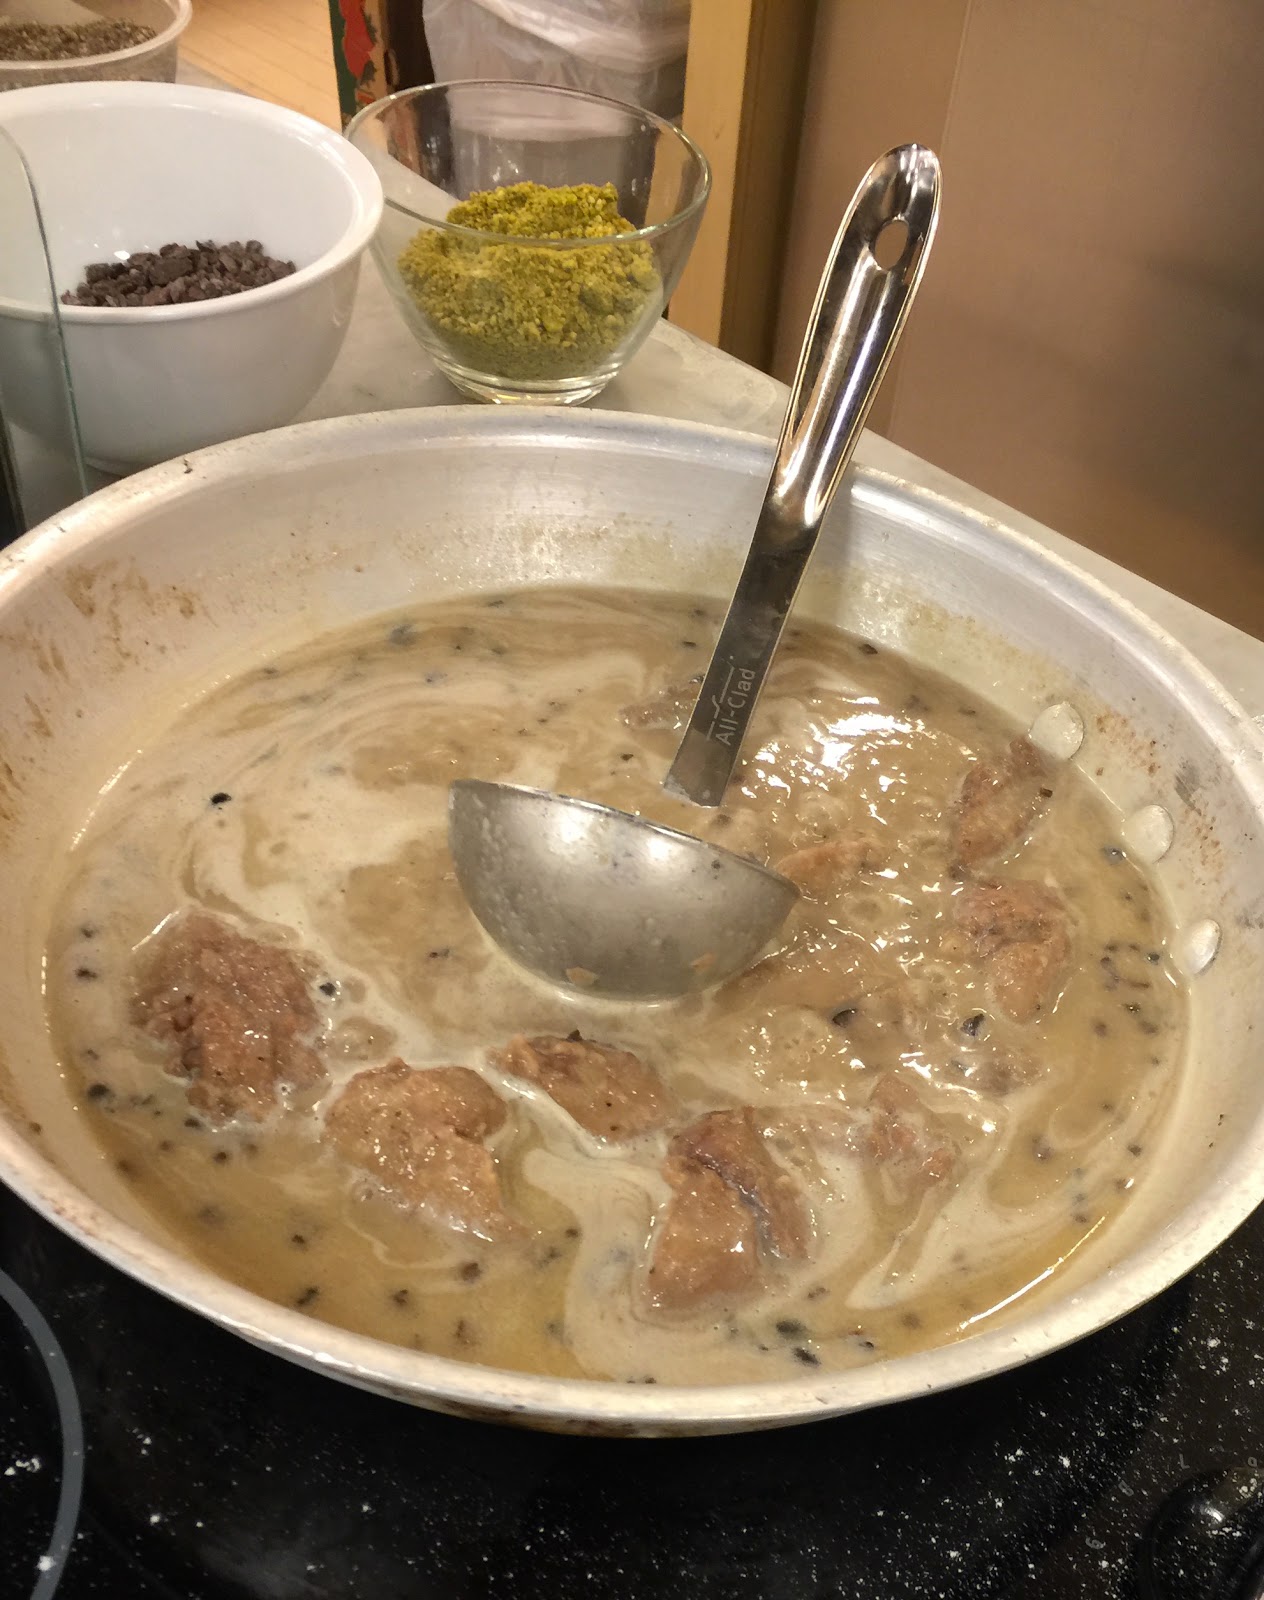
Add the cacao nibs and gradually swirl in knobs of butter, piece by piece. The cream sauce with begin to emulsify and look silken. Season the sauce to taste with salt and pepper. Return livers to the pan to coat evenly before serving and garnishing with a sprinkling of chopped pistachios.

Chef Nick recommends serving the livers over polenta, or with a little side salad of bitter lettuces like frisee or chicory, with a light dressing.

Yum

Thursday, February 11, 2016

Junior League of Atlanta's Annual Tour of Kitchens Marks 19th Year

The Junior League of Atlanta is hosting their 19th annual Tour of Kitchens featuring a view into 14 upscale kitchens in Sandy Springs, Dunwoody, Midtown, Chastain, Buckhead and Decatur. During the two-day self-guided tour to be held March 19th and 20th, ticket holders will be captivated by the work of the talented designers and skillful contractors responsible for the awe-inspiring kitchens on the Tour.

Guests will also enjoy culinary demonstrations from some of Atlanta’s top restaurants and food vendors including Batdorf & Bronson, Bulkhead Club, Gunshow, Farm Burger, Nikolai’s Roof, Bar Margot, Eclipse Di Luna, Flip Burger, CouCou Cakes and Beautiful Briny Sea. In addition, one of the kitchens on the tour will host an all-day cookbook sale showcasing Junior League of Atlanta, Inc.’s cookbook, “True Grits” as well as cookbooks from other Junior Leagues around the country.

Since its inception, The Tour of Kitchens has raised nearly $1.8 million to carry out the Junior League of Atlanta’s mission to benefit women and children at risk. Now is your chance to get a look at some of Atlanta’s most gorgeous kitchens, and enjoy some tasty treats while supporting local charities. Purchase tickets in advance and pick them up at the any of the homes during Tour hours Saturday and Sunday. Tickets are valid for both days of the tour.


Kitchen by Lefko Design + Build

Yum

Friday, January 29, 2016

Et Voilà! Classic French Cassoulet

Cassoulet is a rustic, slow-cooked, French dish, which you might deduce from its name, is a cousin to a casserole. Though they are similar, the differences between a cassoulet and a casserole are very distinctive; a cassoulet, pronounced (cass-oo-lay) with a haughty French accent, generally refers to a long-simmering stew from southwest France which includes duck, lamb or pork, and white beans.

A casserole, on the other hand, is a slow-cooked, often baked dish that includes a starch, vegetables, some sort of sauce, frequently involves cheese, and sometimes contains a protein. Classic American casseroles include macaroni and cheese, green bean casserole, chicken pot pie, and lasagna. The French sometimes use the term gratin to refer to homey potluck-style baked dishes that we’d call a casserole.

Cassoulet is a favorite cold weather dish in our house; dish that warms body and soul. The addition of beans to the braised beef adds a creamy depth and hearty broth. Served with a crusty baguette, et voilà, you have a classic French meal.


Beef Cassoulet
1 lb. of stew beef trimmed of fat and cut into 1”-2” cubes
Kosher salt and freshly ground black pepper
1 to 2 tablespoons olive oil
1 ½ cups chopped onions or leeks
1 cup peeled and sliced carrots
3/4 cup sliced celery
4-6 cloves of garlic, minced or squished
1 teaspoon kosher salt
½ teaspoon oregano
¼ teaspoon dried thyme
½ cup white wine
2 cups beef broth
1 tablespoon tomato paste or ketchup
1/2 lb. dried Great Northern beans, (pre-cooked according to package directions)
1 bay leaf
Salt and pepper to taste
Fresh parsley or chives, chopped for garnish (optional)

Pre-heat your stewing pot. Pat the beef dry with paper towels, season with salt and pepper, and then add it to the hot pan. Allow the beef to form a crust before turning it over to brown the other side. Remove seared beef from pot and set aside. Add the diced vegetables and a drizzle of olive oil and allow them to sauté until soft. Stir in spices and then de-glaze the pan with a good glug of white wine or cooking wine (about half a cup) and stir in the ketchup.

Add the seared beef chunks back to the pot and cover with beef stock. Put on the lid, place in a 200oF oven and cook for 3-4 hours until the meat is meltingly tender. Check periodically to make sure that the sauce is not reducing too fast, if it is add some more stock or water to prevent it from drying out.

About 30 minutes before serving, remove the stew from the oven and add cooked beans to the pot. Stir together gently (so as not to break apart meat or smash the beans) and simmer on your stove over low heat until ready to serve. Ladle cassoulet into serving dishes and garnish with chopped parsley or chives and serve with crunchy bread.


Yum

Wednesday, January 20, 2016

Technique of the Week: Broiling

Broiling is a quick, high-heat cooking method that exposes food directly to very high heat. This cooking method works best with tender cuts of meat and less tender vegetables. Basically an upside-down grill, broilers are generally the same device that heats up your oven, often at the top of the oven, though in same cases the heating element is at the bottom of the oven and broiler can be in a separate drawer below the oven.

The single broiling element provides intense, consistent heat over a large surface area without needing to heat the entire. It only takes a few minutes to pre-heat the broiler. The basic idea is to have the item about 3-5 inches from the surface of the broiling element to cook the item to a crusty, caramelized, slightly charred exterior. Broilers often have no heat setting which means controlling the intensity of the heat by moving the oven rack closer or further away from the element.

Tips and tricks:
  • Most broilers have only two settings: on or off. You simply set the oven to broil. If your oven gives you options, you'll have to play with it to see which settings are ideal for which circumstances. 
  • Turn on the broiler 5 or so minutes before cooking to give the oven (or broiler compartment) time to heat up - much like starting the grill and then lowering the lid.
  • Don’t get distracted! Broiling is a quick cooking method. Most foods will be done in 5-10 minutes, after which it can quickly go from nicely seared to completely burned. Watch the pan carefully.
  • You're really only cooking the outer surface of the food, this is why thin cuts of meat and quick-cooking fresh vegetables, are ideal for broiling.
  • If your food isn't done cooking, you can always put it in the oven for a few minutes to finish. And vice versa - you can cook food in the oven and then run it under the broiler at the very end to give it a nice crust or sear on the outside.
  • It's not strictly necessary to cook foods on a grated broiler pan. This pan allows air to circulate under the food, but you can accomplish the same effect by flipping the food partway through cooking. A pre-heated cast-iron skillet works well.
  • Leaving the oven or broiler compartment door partially ajar during cooking can also help. This keeps the cooking environment from getting too hot or steamy. Too steamy and the food won't develop a good caramelized crust. Too hot and the broiler element could automatically shut off. 


Yum

Thursday, January 14, 2016

Tomato Jam with a Kick

To tell the truth, I don’t go to cooking classes very often. Dom and I have been cooking for over 20 years and like to think we are well skilled in the kitchen. The one area, however, that I lack confidence in is canning. I have a mortal fear of poisoning someone with a tainted batch of preserves. When I had the opportunity as a CulinaryLocal Ambassador to take a lesson from seasoned-canner, Lyn Deardorff of Preserving Now, I couldn't resist the offer.

Lyn, who has over 40 years of canning experience, showed us how to cut fresh tomatoes first coring and then cubing them into 2-inch pieces. I was surprised that we were leaving the skins on, but Lyn explained that since they will cook for up to 2 hours the skins will soften and lend a nice texture to the jam. We put the tomatoes in the pot with the remaining ingredients, brought them to a boil and set the pot on a back burner to simmer as she went on to describe the differences between varying types of preserves from butters and jams to jelly, elaborating on the canning processes as well.

5 pounds of fresh ripe tomatoes, finely chopped
3 ½ cups sugar
½ cup freshly-squeezed lime juice
2 teaspoons fresh ginger, grated
1 teaspoon ground cinnamon
½ teaspoon ground cloves
1 tablespoon sea salt
½ tablespoon red pepper flakes

Place jars in a large pot of water. After water reaches boiling point, keep on low heat until needed. Place lids in a small saucepan, cover with water and place on very low heat.

Wash and prepare your tomatoes. Use the ripest tomatoes you can find. It is best to use organic tomatoes when available not only for their healthfulness but also for flavor.

Combine all ingredients in a non-reactive pot. If you do not have access to fresh ginger root, you can use the ginger puree found in tubes in the produce section of your grocery store. Also, the amount of red pepper flakes you should use depends on how fiery you like your food. This recipe will give the jam a nice kick. If you are sensitive to spicy foods start with 1 teaspoon and then taste. You can always add more but it is impossible to take it back out. While Lyn’s recipe doesn't call for black pepper, but I added some to mine. Again, taste as you go and adjust seasonings to your preference.

Bring the mixture to a boil over high heat, then reduce the heat to low.  Simmer the jam, stirring regularly, until it reduces to a a consistency similar to jam. If you wish to test it, drop a teaspoonful onto a saucer.  When cooled, the jam should stay in a mound. If it runs down the saucer when titled, it needs more cooking.  This will take between 1 ½ to 2 hours.

When jam has cooked down sufficiently, remove pot from the heat and ladle jam into the prepared jars, leaving ¼- inch headspace.  Wipe the rims, apply the lids and rings, and process in a water bath for 20 minutes. Remove from the water bath to a towel and let the jars cool. Listen for the lids to pop as they cool. This tells you that you have a good seal on the jars. Place any jar that do not “pop” in the refrigerator and be sure to use these within a few weeks.

Personal tip: Before placing the jar in your pantry, write the type of jam and the date on the lid with a Sharpie marker. Giving the jam as a gift? No worries; the marker can be removed with a little rubbing alcohol.


Yum

Friday, January 8, 2016

College Cooking Series: Chapter 8 - Essential Ingredient: Rice

Rice is an essential ingredient in college cooking because not only is it very inexpensive, it has many health benefits. Eating rice is extremely beneficial for your health, simply because it does not contain harmful fats, cholesterol or sodium. Rice is a great source of energy and is rich in vitamins. Abundant in carbohydrates, rice acts as fuel for the body and aids in the normal functioning of the brain. It is also an excellent source of vitamins and minerals like niacin, vitamin D, calcium, fiber, iron, thiamine and riboflavin which provide the foundation for body metabolism, immune system health, and general functioning of the organ systems.
  1. Rinse the rice: While rinsing isn't strictly necessary, it's a good idea to rinse your rice in a strainer to remove any powdery starch on the surface of the rice along with any leftover chaff or debri. 
  2. Use the correct water-to-rice ratio: For most rice, use one cup of rice to two cups of water (1:2 ratio). Plan for a half cup of uncooked rice per person and scale this ratio up or down depending on how much you're making. 
  3. Some rice varieties will need a little less or a little more water as it cooks, so remember to always read the package instructions before cooking. [Chart below shows ideal ratios for rice varieties].
    Rice Cooking Chart
  4. Boil the water: Rice expands as it cooks, so choose a saucepan large enough to accommodate the water and plumped rice. A 2-quart saucepan for one to two cups of uncooked rice is a good size. Bring the water to boil over medium-high heat.
  5. Then add the rice: When the water has come to a full boil, stir in the rice along with ½ teaspoon salt and 1 tablespoon of butter or olive oil (optional) per cup of uncooked rice.
  6. Bring the rice back to a boil: Continue cooking over medium-high heat until the rice comes back to boiling and lower heat to lowest setting.
  7. Cover and cook: Cover the pot and simmer gently. Don't take off the lid while the rice is cooking to prevent steam from escaping which can affect cooking time and texture.
  8. Rice is done when tender: Start checking the rice around 18 minutes for white rice and 30 minutes for brown rice. When done, the rice will no longer have a crunch. If there is still water left in the pan when the rice is done, you should tilt the pan to drain it off. The rice may be slightly sticky, but it shouldn't be gummy. Remove from heat and let the rice stand a few minutes, covered to steam just a bit more.
  9. Fluff the rice: Using a fork or spoon, gently separate cooked grains of rice, and let it sit for a few moments to release excess moisture.
  10. Serve the rice: This is the fun part! Rice is extremely versatile and is a good match with most meals. Use your imagination.
  11. Keep leftover rice: Leftovers will keep in the fridge for several days, so you can make extra ahead to serve later or to use in other recipes such as fried rice, rice pudding or add to soup.
etoufee

Homework: Think about the numerous dishes you regularly eat. Would rice be a healthy accompaniment? Let us know in the comments, what meal(s) you plan to serve with rice.


Yum

Wednesday, December 30, 2015

Warm Prosperity Dip for the New Year

Those of us that live in the South are accustomed to the tradition of eating collards, black-eyed peas and pork on New Year’s Day to ensure luck, wealth and happiness in the coming year. Yet many do not know the symbolism behind each of the prescribed ingredients for prosperity.

Cooked greens of any sort, including cabbage, collards, kale, and spinach, are eaten on New Year's in different countries because the green leaves look like folded money, and symbolize economic fortune. It's widely believed that the amount of wealth you have is directly proportionate to the amount of greens you eat.

Eating a black-eyed pea for each day of the new year (366 this year because it’s a leap year) is said to bring luck and good fortune. According to Southern folklore this tradition traces back to the Civil War when many ran out of food while under attack. After the Northern troops commandeered Southern food supplies, all that was left was field peas (and greens and salt pork). The Southern residents felt fortunate that they still had food to eat thus making the peas lucky.

Legumes of all sorts are consumed on New Year’s Day in other parts of the world and are believed to be symbolic of money. Their small, round appearance resembles coins that swell when cooked so they are consumed with financial rewards in mind. For some, the tradition also signifies a year’s worth of good health. Black-eyed peas for example are high in nutritional value, containing calcium, fiber and protein, all for less than 200 calories a cup, depending on how you prepare them.

Now pork has an even stranger association: the custom of eating pork on New Year's Day is based on the idea that pigs symbolize progress because pigs root in the ground, pushing forward. Thanks to the rich fat content found in pork, it also signifies wealth and prosperity. For us, pork symbolizes happiness because who isn’t happy eating bacon?!

In planning for our New Year’s Eve festivities, we want to create a dish with these traditional ingredients in mind. And, of course, it isn’t a party without dip, right? So, starting with the idea of the old reliable warm spinach dip, I headed to Sprouts Farmers Market to get fresh collards, where is addition to the gorgeous greens, I also found black-eyed peas in the bulk bins. A plan was forming in my head… beans would be a healthy substitute for cheese in our dip. A package of bacon and we were good to go.

Warm Prosperity Dip
5 bacon slices, cooked & chopped
1 small onion, chopped
2 garlic cloves, chopped
2 cups collard greens, blanched and chopped
2 cups black-eyed peas, cooked
8 ounces cream cheese, room temperature
½ teaspoon black pepper
½ teaspoon salt
Tabasco (optional)
¼ cup freshly grated Parmesan cheese

Prepare collards by bringing a large pot of lightly salted water to a boil. Wash collards greens and remove tough stems. Place collards leaves in the boiling water and boil for approximately 20 minutes. Drain collards and let cool.

Cook bacon over medium-high heat for 5 to 6 minutes or until crisp. Remove bacon from the pan, drain on paper towels and set aside. Using the about 1 tablespoon of the bacon drippings and stirring to loosen particles from bottom, sauté the onion and garlic until the onion is translucent, about 3 to 4 minutes.

Combine the cream cheese, cooked black-eyed peas (soaked overnight and boiled until tender with salt and pepper) sautéed onions, salt, pepper and Tabasco (as desired) in the bowl of a food processor and pulse until fully combined.

Squeeze out the excess liquid from the cooled collards using a kitchen towel and then coarsely chop greens.  In a large mixing bowl fold collards into the black-eyed pea puree until fully incorporated then transfer the dip to a lightly greased 1.5-qt. baking dish or smaller ramekins.

Crumble the reserved bacon pieces and sprinkle the Parmesan cheese and bacon over the top of the dish. Bake in preheated oven until bubbling, about 20 minutes. Garnish as desired. We dusted the top with smoked paprika, but chopped scallions would be a nice addition as well. Serve with toast, assorted crackers, flatbread, crudities or whatever suits your fancy. We know it will be difficult, but leave a smidgen in the dish to guarantee a stocked pantry in the New Year.

And, did you ever wonder if there are foods you should avoid eating on New Year’s Day? Apparently, eating any winged fowl could cause your good luck to fly away. And because chickens have the tendency to scratch backwards, eating yard bird could cause you to dwell on the past and/or could lead to serious setbacks in the coming year.

To encourage everyone to eat healthy, wealthy and wise in 2016, Sprouts Farmers Market has provided us with a $50 gift card to share with one of our lucky readers. (We hope you ate all your black-eyed peas for this one!) Please enter below:


While the gift cards we received were complimentary, no additional remuneration was received. The recipe is our original creation and the opinions included herein are honest and unsolicited. 

Yum

Wednesday, December 16, 2015

Sconies Sure to Please

For those of you who know me well, you know I have a bit of a scone fetish. There are even several recipes on this site for scones. So when a box of sconies (small size scones) from Seven Sisters Scones arrived, I showed remarkable restraint in not devouring them en route from the mailbox!

I was delighted to open the box and find not only 10 individually wrapped sconies in a variety of flavors, but also a bag of mushroom Swiss croutons and cappuccino “bisconnies.” As though I needed an excuse to make a cup of coffee and take a break, the bisconnies (a clever combo of scone and biscotti) were definitely it! A little sturdier than a scone but not the tooth cracking hardness of many biscotti, these treats are positively praise worthy.

And the scones… believe it or not they made it to breakfast the next morning. It was terribly difficult to decide which to try first: apple caramel? Raspberry white chocolate? Lemon poppyseed? How about the fig and goat cheese? In the end, I went for the traditional blueberry to give me a more accurate acid test of these little gems. Yowza! They are fantastic; mildly sweet with a lovely proportion of blueberries, a little moist, but with a nice crumb and a firm almost crunchy outer-crust.


Clearly owner Hala Yassine, with inspiration from her siblings, has mastered the art of sconing. And her sconies may be the next cronut. These half-size scones are actually better than their full-sized predecessors as the ratio of moist interior to caramelized exterior is better balanced with the added bonus of being smaller and less filling. Needless to say, I’m hooked!

While Seven Sisters Scones has a brick and mortar store in the John’s Creek area of Atlanta, their items are also available by online mail order (they even have a Scone of the Month Club!) They also have a catering menu with delivery service (within a reasonable distance, of course). So what are you waiting for? Visit them in person or online and experience their unique pastries baked in house daily from fresh, high-quality ingredients in decadent flavors.

While the products we sampled were complimentary, no additional remuneration was received. The opinions included herein are honest and unsolicited. 


Yum

Saturday, December 12, 2015

12 Days of Holiday Cookies

 
There is nothing like the scent of vanilla wafting through the house as
the holiday cookies are baking. We have compiled some of our family favorites for you. 
Simply click on the picture to be taken directly to the recipe!


Yum

Thursday, December 10, 2015

Yummy Holiday Gift Guide Giveaway


You are invited to participate in the Do.Food.Better. Yummy Holiday Gift Guide Giveaway!
Be sure to enter for your chance to win some really yummy prizes!
.
Hopefully all of y'all had a fabulously delicious and blessed Thanksgiving Holiday and are ready for an even yummier Christmas! Do.Food.Better. has partnered with some some brands to offer you great products! Below you'll see products donated for this Yummy Holiday Gift Guide Giveaway hand picked just for you! We love every single product and brand here and can endorse them 110%! We know you'll enjoy them as much as we love them!
.
You can visit the host of the Do.Food.Better. Yummy Holiday Gift Guide Giveaway for more information and to see what all these great products listed look like. So, what does all this mean to you? It means Do.Food.Better. has teamed up with some great brands to giveaway some fantastic yummy products! Who's joining Do.Food.Better. and co-hosting on Team Yummy Holiday Gift Guide Giveaway? That would be The Front Porch Gourmet, Shana Was Here, Gluten Free Go To Guide, We Like To Cook! and Willy B Mum! You can visit their sites and enter to win too!

When Do.Food.Better. first decided to do a Holiday Gift Guide we had brands we love in mind, so we got busy reaching out to some. The Cook's Warehouse is an absolute favorite store of ours. So they were first on our list. They really should put in a coffee and snacks bar inside their stores, like Barnes and Nobles has. If we could spend happy hours in this store so could and do others! Something to think about The Cook's Warehouse! Ok, back to my point. I asked TCW if they would have any products they'd like to offer up (I trust their judgement completely!) for our YGGG. Guess what? They absolutely did! So, we gave them a whirl and here's what we found and our thoughts about them.
.
Hammer Stahl 5 1/2" Santoku Knife ($100.00+ value! 1 winner!)
Here's one we're very excited about. This knife is one of the better ones we've used in the kitchen.This Japanese style knife is made of high carbon German steel and handles well on the easiest of cutting in the kitchen to those tougher on chef, self made or trained. It's one of Hammer Stahl's most popular knives, known for its versatility and sized for small and medium jobs. We've always been a girl who prefers smaller to medium sized knives, so this one we've enjoyed using and it is quickly becoming our go-to knife. One of the things we like about this one, is its packaging. It's housed in a very sleek box perfect for wrapping. You could gift this to anyone who cooks and they would love you for it. It's valued at over $100, but The Cook's Warehouse has it (paired up with the sharpener directly below) on special for the holidays at $29.99. That, my friends, is a deal!

Hammer Stahl Knife Sharpener ($12.95 value! 1 winner!)
This handheld knife sharpener works great with Hammer Stahl's knife. It's easy to use and handles great. It pairs perfectly with the Santoku 5 1/2" knife shown above.

Savory Spice Shop - 6-month spice club membership ($49.00 value each! 6 winners!)
Another favorite place of mine is the Savory Spice Shop! we've lucky enough to have stores located near us and we're all lucky enough to have them just a click away! I don't think there's a spice they don't have and when we asked if we could get some products to showcase here, we never expected them to offer up their 6-month spice club memberships as prizes! They have a few different memberships to choose from. If you haven't heard of them, we're happy to introduce you to them. You can buy individual spices, multiples and even gift packs are available for $25 and under. Check out their spices at their website if you can't make it into a store.

Seven Sisters Scones Goodies (Value varies)
Ok, here's the thing. I don't like scones. Never have. They've always been too dry and brittle for my liking. BUT these ladies know how to cook a scone people! Really. We can't say enough good things about them. They're not dry. They're not hard. They're not brittle and the flavor... oh em gee. They have local stores around the Greater Atlanta area so if you can get into one, don't waste any time doing so. No worries if you don't have one near you. They just happen to have a website you can order from. I highly recommend you get some for your holiday entertaining, send them as gifts (they are perfect for it!) or just get yourself some. Heck, join Scone of the Month Club and let them surprise your taste buds! You won't be sorry.
.
Other prizes we're giving away that we highly recommend!
.
The Broad Fork by Chef Hugh Acheson - Signed Copy! ($35.00 value! 1 winner!)
Got a vegetable you want to do something deliciously different with? The "The Broad Fork" is your cookbook people! We love everything about this one, even the author. What a great guy! One lucky Grand Prize Winner will receive a SIGNED copy!
.
Christmas 101 Cookbook by Rick Rogers ($14.00+ value! 1 winner!)
Who doesn't like Christmas dishes? Not us! This is another cookbook we like and can recommend as a holiday gift.
.
Drinking the Devil's Acre by Duggan McDonnell ($18.00+ value! 1 winner!)
Would you like to know a little history on San Francisco cocktails? If so, then this is a book for you! Duggan McDonnell has pulled together historical and interesting information, along with recipes to teach you about what you're sipping on! Don't drink? It doesn't matter, it's still a good read and a great gift for anyone on your list who likes to partake in spirits.

For more great gift ideas for the holiday, visit Do.Food.Better.!
Now Let's get started at giving these FANTASTIC PRIZES away!
It's easy peasy to enter and there's only one mandatory entry to be included. So, let's DO THIS!


This giveaway is open to residents of the US ages 18+ years old, void where prohibited by law. Winners will be announced on our winners page once they've responded to the email notification. The participating bloggers are not responsible for the shipment of prizes. Some prizes will be sent from participating Brand Sponsors and the remaining prizes from the Yummy Holiday Gift Guide Giveaway Host (Do.Food.Better.). All winning entries will be verified, if the task associated with the winning entry was not completed, you will be disqualified. Please direct any questions to president@seriousyum.com. This event begins December 11th, 2015 at 7:00 pm Eastern Standard Time and ends on December 18th, 2015 at 11:59 pm Eastern Standard Time. Entry is simple! The only mandatory entry is the very first one on the main giveaway tool form! The more tasks you complete (all are optional with the exception of the 1st one!), the better your chances are to win! This event is in no way associated with Facebook or any other social media site.

Follow my blog with Bloglovin

Yum

Monday, December 7, 2015

Cook's Warehouse Holiday Picks 2015

There is only one thing better than an excellent brunch prepared by a bubbly chef and that is having it served with a fantastic glass of champagne. That was the case yesterday at The Cook’s Warehouse for the fifth annual Holiday Blogger Breakfast. As we devoured amazing dishes by Chef Mandy Landefeld of Sumptuous Living, Cook’s Warehouse owner, Mary Moore shared for “hot” products for the 2015 holiday season (listed below).

Chef Mandy demonstrated the oyster knife as she prepared crispy fried oyster biscuits with arugula and homemade remoulade:

Fried Oysters:
2 lbs shucked oysters (about 2 dozen)
1 cup buttermilk
2 Tbsp water
1 tsp creole seasoning
2 eggs
1 cup all-purpose flour
½ cup cornmeal
½ tsp freshly ground black pepper
Kosher salt
Vegetable oil, for frying

Shuck the oysters and place in a small bowl. Cover with 1 cup buttermilk and let soak for 15 minutes. In a medium bowl, whisk together water, creole seasoning and eggs. Place the flour, cornmeal, black pepper, and salt into a brown paper bag, close and shake to mix.

In a large heavy-bottomed pot, pour enough oil to fill the pan halfway. Heat until a deep-frying thermometer inserted in the oil reaches 360° F.

Drain the oysters from the milk. In batches dip oysters in the egg mixture then drop in the paper bag. Close and shake. Remove to a plate and repeat with the rest of the oysters. When oil is at 360° F, fry oysters in batches. Do not overcrowd. Cook turning once until golden brown and cooked through, about 3 minutes. Remove to a paper towel. Repeat with remaining oysters.
Remoulade Sauce:
¾ cup mayonnaise
2 tsp Dijon mustard
1 ½ tsp whole-grain mustard
1 tsp white wine or champagne vinegar
1 tsp Sriracha
2 tsp drained tiny capers, chopped
1 Tbsp chopped fresh flat-leaf parsley
¼ cup chopped celery
1 green onion (3 inches of green left on), very thinly sliced
Salt and freshly ground black pepper, to taste

Mix the remoulade ingredients in a bowl or place in a food processor. Give a few quick pulses to blend. Chill until oysters are done.

Chef Mandy also utilized the Locarno Raclette Grill to crisp flatbreads topped with wilted kale and Serrano ham with a side of gooey Comté fondue. She capped the meal with beautiful serving size pavlovas topped with lemon curd, whipped cream and fresh blackberries. She explained that the pavlovas were extra large and airy because she used the new Copper Tango whisk. The copper tines of the whisk help to stabilize the conalbumin in egg whites making them less likely to deflate.

As finished our meal, we perused the flagship store and observed demonstrations of both the Lux Multi-Cooker and the Aupa Planca grill in action. In addition, we each received a goodie bag which included the new Hammer Stahl Santoku knife to try at home.

Cook’s Warehouse Holiday Gift Guide 2015:
  • Aupa Plancha Authentic Basque Grill  - $965.95-$1148.95
  • Behmor Brazen Connected Brew System - Regular $369.99 Sale: $299.99
  • CM Pot Scrubber - $19.99
  • Copper Tango Whisk - $39.99
  • Corkcicle Canteens - $19.99 - $32.99
  • Craft A Brew Beer Making Kits - $44.99
  • French Bull Super Cooker - $99.00
  • Hammer Stahl Cutlery - Regular: $62 to $1,345 Sale: $29.99 to $995.99
  • Lux Electric Multi-Cooker - $129.99 for 6-Quart and $159.99 for 8-Quart
  • Memphis Wood Fire Grills - from $2,499.99
  • Locarno Raclette Grill with Granite Stone - $149.99
  • Shucker Paddy Oyster Knife - $19.99
  • Swissmar Shucker Paddy Oyster Tray Set - $44.99
  • Yeti Coolers, Hoppers And Colsters - $29.99 to $349.99
  • The Cook’s Warehouse Gift Cards - Any Amount

While the brunch and gift bag were complimentary, no additional remuneration was received. The opinions included herein are honest and unsolicited.  


Yum

Wednesday, December 2, 2015

Preserving your Sanity with Homemade Gift Ideas

The race is on! If your schedule is anything like ours, you are running non-stop from now until New Year’s Day! While you are making plans for Thanksgiving, the last thing on your mind is your holiday gifts, right?

Think again. Now is the perfect time to be stocking up on holiday gifts – stocking your pantry that is. Last weekend we were very fortunate to attend a Holiday Preserving workshop taught by Lyn Deardorff of Preserving Now at the beautiful Bosch Experience Center in Serenbe. As a 40-year canner, she has revived the tradition of preserving while bringing in 21st century science to teach fun, easy and safe home canning.

We began the class by cutting pears to make a pear-cranberry butter. Once the fruit was in a pan cooking down, we started preparing a wine jelly. Yes, you read that correctly! Using a master recipe, we prepared a Rosemary Chardonnay jelly that is a marvelous accompaniment to sharp cheese and cured meats for that perfect holiday cheese board. The same master recipe can be used to make jellies from any wine varietal including Reisling, Pinot Noir, Cabernet Sauvignon or Zinfandel.

Red Wine Jelly
3½ cups red wine of choice
¼ cup lemon Juice (fresh or bottled)
1 package powdered pectin
4 cups sugar
Herbs & spices such as rosemary, peppercorns and/or cloves (optional)

White Wine Jelly
3½ cups white wine of choice
½ cup lemon Juice (fresh or bottled)
1 package powdered pectin
4 cups sugar
Herbs & spices such as lavender, mint, and/or tarragon (optional)

Combine the wine, lemon juice and herbs and spices (if using) in a large saucepot and bring to a boil. Following package directions, stir in powdered pectin. Bring back to a boil, stirring frequently. Then add sugar, stirring constantly until completely dissolved. Return to a rolling boil and boil hard 1 minute, stirring constantly. Be very careful at this stage as the boiling sugar can cause serious burns. The mixture may starts to boil over even with constant stirring, reduce heat or remove from the flame for a few seconds to reduce foaming. After a minute, remove from the heat, and strain (to remove spices) and ladle hot jelly into hot jars, leaving at least ¼- inch headspace. Process jars for 10 minutes in a boiling water bath.

The fruit butter was still cooking down while Lyn gave us a tutorial on making shrubs. Shrubs are a way of preserving fruit in a vinegar and sugar solution that can be used to make a sweet-tart refreshing drink. Dating back to colonial days, shrubs combine fruits will all sorts of herbs, spices, even veggies for thousands of varied drink combinations. More and more, we are seeing trendy shrubs used by mixologists to make fancy signature cocktails. Now you can too! Shrubs are SO easy to make: one part fruit, one part vinegar, and one part sugar. You could make plum/red wine/maple syrup, or maybe cranberry/cider vinegar/white sugar? Mixed with seltzer water, they make excellent unique non-alcoholic sodas for the kids too. We sampled some cherry/balsamic/brown sugar with bourbon and club soda (which could possibly be my new favorite drink for the holiday season) along with some of our Chardonnay jelly with goat cheese and a variety fruit butters prepared by Lyn.

After we finished putting our pear-cranberry butter in jars and set them in a water bath, Lyn showed us a variety of adorable and inexpensive ways to package our gifts for giving. Wrapping jars in burlap or cellophane bags with a decorative spoon, or a jar of jam with homemade shortbread cookies in a cute hatbox make unique homemade gifts for family, friends, office workers and teachers that are sure to please!

For more ideas for homemade canned items, please visit Lyn’s website. Preserving Now offers classes and workshops throughout the year in various locations around the North Georgia & Nashville areas. Everything needed including food, jars, equipment, and recipes, is always provided and the classes are completely hands-on.

While the class we experienced was complimentary, no additional remuneration was received. The opinions included herein are honest and unsolicited.  

Yum

Wednesday, November 18, 2015

Being Your "Best Self" and a Pumpkin Facial

We are so honored and thrilled to have been named Best Self Atlanta Magazine’s “Best Local Food Blog” for 2015. We are very thankful to all of you for your support and readership.
In writing this post, we have talked a lot about what being your “best self” really means. This blog has never been about fitness or dieting, and we have not hung out a shingle claiming to be life coaches. For us, being your best self simply means:
  • Being True To Yourself: Be introspective and don’t let others define you for the sake of acceptance. It is OK is have an opinion that doesn’t jive with your co-workers or friends. Listen to your body, follow your heart and trust your instincts. At the end of the day, you are the one with your head on the pillow trying to sleep at night. 
  • Being True To Your Family And Friends: Accept them as they are, as individuals, unconditionally. Be loyal, kind and forgiving. Share your honest opinions. Be genuinely happy when they receive, or achieve something that you truly desire. And, as important as it is for you to be there for them, sometimes you have to be willing to let them be there for you.
  • Maintaining A Healthy Diet: We are not registered dietians and every recipe on this blog is NOT non-fat, gluten-free, low carb or otherwise alimentative. A healthy diet includes eating a well-balanced variety of nutritive foods. Eat foods that are the best quality that you can afford: fresh, organic, natural, fewer preservatives, less artificial ingredients. Eat foods that are less healthful in moderation. It is OK to splurge and have a slice of coconut cream pie, just don’t eat the whole pie! (Believe us, we KNOW how hard this can be!)
  • Keeping Your Body Strong: Walk. Run. Ride your bike. Don’t stop moving. Research shows that regular exercise extends your life whether you are of normal weight, overweight, or obese. 
  • Learning From Your Mistakes: What is the definition of insanity? Doing the same thing over and over and expecting different results. If you make a mistake, own it, fix it and grow from it. That is the definition of experience. Make failure your best friend. Let it tell you where you go wrong so you can start-over from a smarter perspective.
  • Trying New Things: Don’t get stuck in a rut. Expand your mind and your palate. Be brave! Learn how to crochet or study a new language. If you always read fiction, try a biography. If you've never tried sushi, give it a go, you might even like it. Do the Sunday NYT crossword puzzle in ink. Play dominoes or learn backgammon. Never stop increasing your knowledge and exposure. 
  • Letting Go Of Anger: This is by far the most difficult task on the list. We all hold grudges over the times we have been betrayed, cheated, hurt or wronged in some way. You can’t know the amount of effort it is taking and stress it is causing in your life until you allow yourself to let it go. Remove the negative from your life. Use that energy to focus on the positive and what you can do today to be happy!
  • Getting Your Rest: This sounds like a no brainer, but sleep is the first thing you sacrifice when you are overworked or overscheduled. Know your limitations. Drinks with friends, dinner with colleagues and going dancing with hubby after a long grueling day might not be the best plan. Don’t be afraid to say, “No” and go home to have some chicken soup, do some laundry, give yourself a facial and catch up on your favorite TV shows.
Just as in cooking, using healthy ingredients in other areas of your life is important too. Using natural ingredients for your skin and hair adds to your overall health. With a little research, you will be shocked at how many DIY all natural (and inexpensive) skin and hair treatments you can make at home. A good example is this super nourishing facial made with a little leftover pumpkin from making that iconic pie. Packed with zinc, antioxidants, and vitamins, pumpkins protect your skin from wrinkles and age spots. An egg adds nourishment and a subtle tightening effect to sagging skin, and a few teaspoons of honey has antibacterial properties that prevents breakouts and seals in moisture.

Pumpkin Face Mask
¼ cup pumpkin puree
1 egg
2 teaspoons honey

Whisk ingredients together until completely combined and smooth. Slather the mixture over your face, and relax for 15 to 20 minutes. You will be surprised at how the mask dries and tightens like a commercial product. Rinse and lightly exfoliate to reveal a brighter, firmer, smoother complexion. This is particularly indulgent after that long overscheduled day!

Thanks again for following along. We genuinely appreciate your readership and hope this inspires you to be your “Best Self”!


Yum

Sunday, November 15, 2015

Complete Thanksgiving Menu Planner

With Thanksgiving a week away, we are all in menu planning mode. As one of the biggest, if not the absolute biggest food holiday, we thought we would make it easier for you by compiling a round-up of some of our favorites, old and new. Last year we published a Thanksgiving e-cookbook with some Thanksgiving ideas, but this year we have gone a step further and expanded the list to include 40+ recipes with some morning noshes, turkey tips, condiments, side dishes and desserts. Many of them are healthy and some are a bit more indulgent. We even added a few ideas for what to do with those turkey leftovers.

Cranberry Financiers
Pumpkin Chestnut Scones
Mug Muffins
Pumpkin Cranberry Bread
Baked French Toast

Turkey Preparation:
     • Brining
     • Stuffing
     • Trussing
     • Barding
     • Butter-crisped Roasting

Two Cranberry Sauces
Pear Cranberry Chutney
Cranberry Zinfandel Conserve
Chardonnay Rosemary Jelly

Jalapeno Cornbread Muffins
Boston Brown Bread
Cream of Peanut Soup
Corn Pudding
Potatoes Fondantes
Bacon-braised Brussels Sprouts
Curried Cauliflower
Swiss Chard Gratin
Roasted Beets
Mashed Potatoes with Love
Broccoli with Lime Dressing
Charred Cabbage
Rice-stuffed Tomatoes
Green Beans Gremolata
Sorghum Caraway Carrots

Apple Crostada
Hasty Pudding
Chocolate Pecan Pie
Peach Almond Galette
Gingerbread Cake
Sweet Potato Pie
Bread Pudding
Pineapple Cranberry Cobbler
Pumpkin Crème Brûlée

Bobbie Sandwich
Turkey Enchiladas Verde
Turkey Jambalaya

We are honestly thankful to our all al loyal readers! Enjoy your Thanksgiving Holiday!


Yum

Wednesday, November 11, 2015

Get Green with the OrganicGirl Flavor Craze

This is the time of year when our garden looks so sad. The tomato plants are shriveling and the peppers look like straggly weeds. The lettuces, kale and chard have been planted but it will be weeks (nay, months!) before they are ready to be eaten. Finding fresh, organic produce sounds simple, but is no easy feat. We have been buying OrganicGirl arugula and romaine hearts at our local Publix, so we were thrilled when they reached out to us and asked us to try their new salad mixes and dressings, we did not hesitate!

Our goodies arrived in a refrigerated box in which we were excited to find full-sized versions of their products. Their new “Peppergreens” has arugula (our favorite), baby mustards, cress, baby spinach, baby chard and other seasonal greens with a peppery kick. The “Sweet Pea” mix contains sweet pea shoots, baby green romaine, tango, baby oakleaf lettuces, baby green bok choy, lolla rosa (which may vary by season). All OrganicGirl greens are triple-washed and it is obvious. The greens were super clean, fresh and crisp and both had amazing flavor. The Peppergreens really do pack a spicy punch that was an excellent complement to a pre-game BLT. Conversely, the Sweat Pea mix has a great crunch and is indeed a bit sweet with the addition of the pea shoots.
OrganicGirl is a small group in California's fertile Salinas Valley who strive to offer the very best quality produce done the right way which means unique approaches to organic growing, triple washing their greens, and using earth-friendly 100% recycled plastic packaging. It also means no synthetic pesticides, growing and selecting only the very best quality produce, and getting products to the stores as quickly as possible to ensure ultimate freshness.

In addition to the gorgeous greens, we also received bottles of each of OrganicGirl’s new Salad Love Vinaigrettes: Fresh Tomato Italian, Kale Parmesan, Lemon Agave, and White Cheddar. Believe me when I say it was nearly impossible to decide which to try first! We went with the Lemon Agave (vegan) made with fresh lemons and lemon puree which originally we tried on the Peppergreens and WOW what a great combo! The contrast in flavors was absolutely perfect, spicy, tangy and a little sweet. We later served it over goat cheese for a healthy snack which was zesty and refreshing.

The vibrant green of the Kale Parmesan was so enticing, we opened that next. We had some leftover roasted cauliflower which rather than reheating, we tried cold with the vinaigrette drizzled on top. Again, WOW! With two of the top ingredients (kale and spinach) being #1 and #5 on the Aggregate Nutrient Density Index (ANDI), we added extra nutrients to an already healthy vegetable dish.

The Tomato Italian made with Roma tomatoes, fresh basil and Parmesan, was wonderful over the Sweat Pea mix and was soon devoured on pizza night as a dipping sauce for leftover crusts. And, last but certainly not least (especially in the flavor department) was the White Cheddar. Initially we were hesitant to open this bottle, thinking it would be the least healthy (and most caloric), but with only 60 calories per serving and only five grams of fat, we used this in place of blue cheese dressing on a wedge salad. We may never go back to blue cheese dressing. Ever. And with Buffalo chicken wings – Awesome!


You don’t have to wait until next Spring to have fresh organic salad greens or fresh produce to make homemade dressings. You can head over to your local store (in Atlanta, head to Publix or Whole Foods) and pick up OrganicGirl products with the knowledge that they are produce-based, non-GMO, gluten free, contain no corn syrup, vegetarian and of course, organic. It doesn’t get much fresher than that!

While the products we sampled were complimentary, no additional remuneration was received. The opinions included herein are honest and unsolicited. 

Yum
Powered by Blogger.

footer social

ShareThis