Wednesday, October 9, 2013

Oh My Darling Lemon Thyme Marmalade

When life gives you lemons, instead of making lemonade, we make marmalade. Homemade preserves and jams with farm-fresh fruit are the essence of rural Italian cuisine. Every family has its own cherished recipes for making jams and jellies. In the spirit of Italian orticoltura, we have nurtured a Meyer lemon tree for several years and enjoy the fruits of our labor (sorry, couldn’t resist that pun!)

I am a huge fan of marmalade and making a batch of marmalade has been on my agenda for over 2 months now. My preferred method of consumption is slathering the tangy, syrupy conserve on a toasted and buttered English muffin, but it makes the perfection addition to glazes, barbecue sauce and even as an addition to specialty cocktails. Its unique, slightly tart aftertaste is also a fabulous contrast when paired with sharp or creamy cheeses, crackers, and a sparkling white wine.

  • 7 (about 2 lbs.) lemons, preferably Meyer
  • 2 cup cold water
  • 2 cups granulated sugar
  • 2 sprigs of fresh thyme
  • Pinch of salt

Scrub the lemons and trim the ends, and then using a vegetable peeler, peel strips of zest off the lemons. Thinly julienne the peel strips into thin strips about two inches long. Put these into a small pot, cover with cold water, and bring to the boil. Allow the zest to blanch for about one minute and then shock by rinsing with cold water. Strain the peels and set aside.

Using a sharp knife, peel all the skin and pith off the fruit. Removing all the pith will create a lovely clear marmalade that is not as others I have tasted. It's flecked with large lumps of fruit, as well as the julienned zest which turns into lovely candied goodness. Prepare the fruit by holding the peeled lemons over a small bowl and cutting the segments free from the membranes. Discard seeds. Capture the segments and juice in a bowl and place the membranes, pith in a small saucepan and cover with cold water. Bring these to a boil and allow to simmer for 2-3 minutes. Remove skins and reserve boiling liquid.

In a small saucepan, bring one cup of boiling liquid, sugar, and salt to a boil over medium-high heat for about 2 to 3 minutes, stirring until the sugar completely dissolves. Add the julienned peels, lemon segments, juices and thyme sprigs, and return to a boil. Reduce the heat to low and skim any foam from the surface. Simmer very gently until the mixture breaks down and thickens, 40 to 60 minutes, checking frequently to prevent scorching or overcooking.

To test, dip a wooden spoon into the marmalade and allow the mixture to drip. When two drips merge on the end of the spoon instead of running off the spoon, the mixture will set on cooling. Alternatively drop a spoonful onto a chilled plate, run your finger through it and if your trail remains there, it's reached setting point.

Remove the thyme sprigs if you prefer (I leave them in). Take off the heat and let the mixture set for 15 minutes to help evenly distribute the peel. Using a sterilized spoon, carefully spoon the marmalade into sterilized jars leaving ample head room. Screw on lids and set aside to cool.
Oh My Darling Lemon Thyme Marmalade on Punk Domestics
You can water-process the jars at this time if you want to extend the shelf life of the marmalade. Remember to wipe down the outside of jars with a wet cloth, label and date and then store in a cool, dark place.


Yum

Friday, October 4, 2013

Hunka Burnin' Love Hot Pepper Jelly

Our family’s burning love for hot peppers (all pun intended) is well documented. Like many natives of the South, I grew up with peppers, lots of them. The hot, muggy climate seems to make for the perfect growing conditions for a wide variety of capsaicin-laden peppers.

Sweet, tart, and spicy, hot pepper jelly is nearly irresistible to those of us raised in the South.  Most frequently ladled over goat cheese or cream cheese, this jelly adds a serious kick to a simple grilled cheese sandwich and makes a great glaze for chicken wings, pork loin or even grilled quail.

You can use whichever kinds of peppers you wish (or that are plentiful.) For this batch, I used a combination of poblano, cayenne, cow horn and a few mild cherry peppers ranging from 1,000 to 50,000 on the Scoville Scale which is the measurement of the spiciness of chili peppers or other spicy foods containing capsaicin. While the cayenne peppers have a robust flavor, they are very fiery.

Not a fan of the heat?  It is fine to use mild, sweet peppers.  I would, however, recommend using peppers that are all the same color (red or green) else you will end up with a murky-brown jelly that will not look very appealing.

  • 2-2 ½ cups peppers, seeded and coarsely chopped
  • 5 cups sugar
  • 2 cups distilled white vinegar
  • Pinch of salt
  • 1 (3-ounce) envelope of liquid pectin

Be sure to wear latex gloves when working with hot peppers. If you want your jelly hotter, include a few seeds. Pulse the chopped peppers in a food processor (and seeds if desired) in food processor until finely minced, 12 to 15 pulses, scraping down bowl every 5-6 pulses.

Combine peppers, sugar, and vinegar in large saucepan and bring to vigorous boil over medium-high heat. Stir the mixture to ensure that the sugar is completely dissolved. Keep a close eye on the pot so it doesn't boil over.  Having made this mistake, I can tell you the mess is epic.

Add the liquid pectin and return to vigorous boil, stirring constantly, for about 10 to 15 minutes until the temperature registers 221 degrees F on a candy thermometer.  Using large spoon, skim any foam from top of jelly.

Ladle the jelly into sterilized jars with tight-fitting lids. Let the jars cool to room temperature and then cover and refrigerate. Let jelly set in refrigerator for 12 to 24 hours. Jelly can be refrigerated for at least 2 months. The jar can also be processed in a hot water bath for longer term storage.

This jelly will be a wonderful condiment addition to your Thanksgiving table; in fact I plan to mix some in with my homemade cranberry sauce this year. Come to think of it, this would be a wonderful hostess gift for the upcoming holiday season!


Yum

Monday, September 30, 2013

Marcella-Inspired Ribollita (Tuscan Soup)

Italians are legendary for being able to feed hoards of family and friends having spent little or no money. Frugal homemakers grow their own tomatoes and peppers, gather mushrooms and arugula growing along roadsides, and prepare cuts of meat (offal) that in other cultures would be discarded. Italians are also masters of making two or even three meals from one. In fact, we are often surprised at how many dishes in Italian cuisine are made with leftovers.

Take for example arancini; a specialty made with leftover risotto filled with cheese and then deep fried. Not to mention the thousands of recipes that call for stale bread: mollica, panzarella, and Marcella Hazan’s favorite, ribollita. Hazan, the queen mother of Italian cooking in America, was quoted as saying, “I’d be loathed to order pasta in a Tuscan trattoria when a ribollita or any soup with beans or ‘kale’ is on the menu.” Ribollita is a hearty vegetarian stew made with leftover beans, greens, broth and is fortified with the addition of other vegetables such as potatoes, carrots and celery. This is one of Tuscany's most revered dishes. Freshly made, this is a hearty, brothy soup, but when reheated the next day, it becomes a deeply flavorful, porridge-like stew.

What better way to celebrate the life of the famous Italian cook than by using the leftovers from a Saturday antipasti supper which consisted of greens, Tuscan white beans, grilled sausage, Caprese salad and a fresh loaf of ciabiatta to make a meatless- Monday dinner. On Thursday, it doubles back as antipasti again served on crostini.

  • ¼ cup extra-virgin olive oil
  • 1 medium yellow onion, peeled and chopped
  • 1 carrot, peeled and chopped
  • 2 ribs celery, trimmed and chopped
  • 1 large russet potato, peeled and diced
  • ½ cup chopped canned Italian plum tomatoes
  • 1½ cup greens (kale, collards, chard, cabbage), cooked
  • 2 cups vegetable (or chicken) broth
  • 1-2 sprigs of fresh herbs (rosemary, sage, oregano, etc.)
  • 1 bay leaf
  • 1 ½ - 2 cups of Tuscan white beans, cooked
  • 2 thick slices day-old country white bread, cubed
  • Salt and freshly ground black pepper

Heat 2 tablespoons of the oil in an earthenware casserole over medium-low heat. Add onions, and cook until soft, about 20 minutes. Add carrots, celery, potatoes stirring until mixed. If you are using fresh greens, you will need about 3 cups rinsed and chopped greens since they shrink incredibly. Add them to the vegetable mixture and toss to coat with oil. You may need to add the greens in batches until they all fit in the pan. Next add the tomatoes, cover the pot, and cook until the greens are completely wilted, about 20 minutes.

Add the stock, bay leaf and herb,s and then simmer with the lid on until all the vegetables are soft, about 1 hour. Add the cooked beans and cubed bread stirring gently and cover. Return the soup to a simmer, and cook until bread begins to soften, about 10 more minutes. Season the soup to taste with salt and pepper, and serve with a drizzle of olive oil. Remove the bay leaf and refrigerate any leftover soup.

The next day, preheat oven to 375ºF and heat the leftover soup in the casserole in the oven, uncovered, stirring occasionally, until heated through, about 1 hour. For the last 30 minutes, do not stir; let soup brown lightly. Drizzle with another ¼ cup oil, and serve topped with a sprinkling of grated Parmesan cheese.

If preferred, you can use the cold leftover stew as a bruschetta topping served atop crusty, toasted bread with a smattering of cheese or Denise's peppers.

As you might imagine, this is not exact recipe and varies with each batch that you make. It is also contingent on how much you have in the way of leftovers in the beginning. We have even on occasion used leftover rice in place of bread. You can add or subtract, reduce or increase any of the ingredients to your taste.


Yum

Friday, September 20, 2013

The Pulled Pork Definitive

Home cooks seeking flavorful meals that require minimal effort and time in the kitchen should look no further than pulled pork, the ultimate meal solution. Pulled pork has seen a recent surge in popularity, as home cooks and chefs alike discover new ways to prepare and serve this savory favorite. It's not just the flavors that make a dish, but the layering of textures. We love pulled pork because of the contrast between the crispy exterior and the succulent, almost-melting inside.

We start with a pork butt which is a cheap, but flavorful cut with a good amount of fat that renders out during cooking and bastes the meat adding to its caramelized crust. The pork shoulder is the entire front leg and shoulder of a hog. In your grocery store you will usually find this divided into two cuts, the Boston butt and the picnic ham. Contrary to what most of us believe, the butt comes from the upper part of the front shoulder. While a picnic ham is a good option, a Boston Butt is easier to work with, uniform in shape, and contains the right ratio of fat to lean. You should look for a Boston Butt that is rectangular in shape with a layer of fat on one side. The color should be a rich pink to purple and the meat firm to the touch. The key is to start with a cut that has ample marbling and connective tissue so it softens as it slowly cooks, becoming so tender that it easily pulls apart.

Once you have selected your meat, trim off any loose fat and skin. These won't aid the pork much and will tend to just get in the way. With the meat ready, apply a rub to flavor the meat while it smokes and help it produce a crusty surface called “bark.” A typical pork rub will have sugar, salt, pepper (any combination of black, white, or red), and herbs. Work the rub deep into the meat and let it sit on the meat for about an hour to sink into the meat and form a moist paste on the surface. Now you're ready to smoke.

Fill a smoker or kettle grill with charcoal and light.* When the coals are mostly white, spread them out with tongs. Spread ½ cup of the wood chips over the coals (use 1 cup for a kettle grill). The smoke of pulled pork is provided by hickory and/or oak. While you can use any mild wood these are the traditional woods. You will want an even temperature around 225°F. You should try to keep the smoker temperature below 265°F no matter what.  If the temperature is too high, it will make the meat tough. You want to smoke your pork roasts for about 1 to 1½ hours per pound. This means you will be cooking your pork for a long time; low and slow.

Place the pork fat-side down on a rack (over the water pan if possible) in the smoker or on the grill, cover and cook, rotating the pork every hour or so. Add additional coals and water as needed to maintain the temperature and moisture in the smoker. We do not add wood after the first 2 hours of smoking because we think too much smoke gives the meat a bitter taste. You can remove the pork from the heat once it reaches an internal temperature of 165°F, but it won't be ready. You will want to continue cooking at a temperature around 190°F until you can easily shred the meat with a fork. [Of course, if you have trouble maintaining a grill for this long you can use alternative cooking methods after a few hours. Wrap the pork tightly in foil and place it in your oven at 225°F until it is finished.]

When done, remove the meat from the grill and wrap completely with foil. Let stand for 20-30 minutes to redistribute the juices and cool enough to handle. Transfer the pork to a rimmed baking sheet (you'll want to catch all the flavorful juices) and shred by inserting two forks into a chunk of meat and pull in opposite directions to get long, thin shreds. Repeat with remaining meat. Pile the shredded pieces on a platter and pour any juices from the baking sheet on top.

Now the fun begins! You can use this juicy meat in any manner of dishes from traditional pulled pork sandwiches to smoky pork tacos. Try some pulled pork in a spicy Cuban-style wrap or stacked on a salad with grilled peaches and torn fresh mozzarella. The possibilities are endlessly delicious!

*If using a gas grill, preheat to high on one side; put soaked wood chips in a smoker box. Once smoking, reduce the heat to maintain a temperature of about 250°F and cook the pork, covered, on the cooler side of the grill.


Yum

Saturday, September 14, 2013

Brownies: Historically Delightful

A chocolate brownie is a flat, baked square or bar developed in the United States at the end of the 19th century. The brownie is a cross between a cake and a cookie in texture. Brownies come in a variety of forms. They can be either fudgy or cakey, depending on their density and they may include nuts, chocolate chips, or can be frosted. Brownies are a common lunchbox addition and are popular in restaurants, where they can be found on many dessert menus served warm with ice cream (à la mode), topped with whipped cream or sprinkled with powdered sugar. The earliest published recipes for both cakey- and fudgy-style chocolate brownies have been traced to The Boston Cooking-School Cook Book, edited by Fannie Merritt Farmer in the late 1890s.

Nineteenth century changes in chocolate form, taste and availability encouraged experimentation in cooking and baking. Boston-based chocolatier Walter M. Lowney debuted the first American-made chocolate bars at the Columbian Exposition held in Chicago, Illinois, in 1893. Many culinary historians believe that it was also at the Columbian Exposition that brownie was introduced. As the story goes, wealthy socialite Bertha Potter Palmer asked her chef to create a dessert that could be tucked into a box lunch for ladies to eat while attending the Columbian Exposition.The resulting treat was a super-rich, fudgy-chocolate confection topped with walnuts and an apricot glaze that was the predecessor to the modern-day brownie.

Regardless of their origin, it is clear where brownies are going… into the mouths of three of their biggest fans. A full batch of brownies rarely lasts a full day in the Romeo house! While I no longer need to refer to this recipe, we are sharing our family’s version is hopes it will become a favorite in your house.

  • 1/2 cup (1 stick) butter, melted 
  • 1 cup sugar 
  • 1 teaspoon vanilla extract 
  • 2 eggs 
  • 1/2 cup all-purpose flour 
  • 1/3 cup cocoa powder
  • 1/4 teaspoon baking powder 
  • 1/4 teaspoon salt 
  • 1/2 cup chopped nuts (optional) 
  • 1/2 cup chocolate morsels (optional)

Pre-heat oven to 350°F. Grease 9-inch square baking pan. Using an electric mixer, cream together butter (or margarine), sugar and vanilla in bowl. Add eggs and beat well. Mix dry ingredients of flour, cocoa, baking powder and salt together and gradually add to egg mixture, beating until well blended.

Stir in nuts and morsels, as desired. Spread batter evenly into a greased baking pan.  Bake 20 to 25 minutes or until brownies begin to pull away from sides of pan.

They are done when a toothpick pricked into the center comes out clean with no batter. Cool completely in the pan on a wire rack. Cut into squares small or large and watch them disappear!


Yum

Wednesday, September 11, 2013

Chicken Paillard in Creamy Mustard Sauce

Chicken Paillard is a classic dish of boneless chicken breasts that have been thinned out using a mallet, rolling pin or merely “butterflied.” The mallet breaks down the fibers in the meat, making it more tender, while the thinner cutlets cooks faster with less loss of moisture. This recipe uses a creamy mustard sauce which complements the flavor of the tenderized chicken perfectly. It goes well with any number of fresh sides like a crisp salad, steamed vegetables or baby new potatoes.

  • 2 chicken breasts, pounded to ¼’ thick
  • 1 tablespoon butter
  • 1 tablespoon olive oil
  • ¼ cup white wine
  • 1 tablespoon whole grain mustard
  • 2/3 cup chicken stock
  • 1/3 cup heavy cream
  • Salt and pepper to taste

Place the chicken breasts between 2 sheets of waxed paper or plastic wrap and hit with glancing blows, working from the center to the edge using a meat mallet or a rolling pin to flatten the cutlets to ¼” thickness.

In a large sauté pan over medium-high heat, melt the butter with the olive oil until almost smoking. Add the chicken and cook, turning once, until golden brown and cooked through, about 4 minutes per side; add more butter and oil to the pan if needed. Transfer the chicken to a warmed plate and cover loosely with aluminum foil.

Reduce the heat to medium and add the wine and deglaze the pan stirring to scrape up the browned bits.  Add stock and mustard and cook until the sauce begins to thicken, 3 to 5 minutes. Stir in the cream and season with salt and pepper and cook until smooth with the consistency of thick gravy.

Add the chicken back to the pan and fully coat the cutlets with sauce. Serve the chicken with additional sauce poured over the top as desired. The sauce is delicious ladled over a side of potatoes as well.


Yum

Friday, September 6, 2013

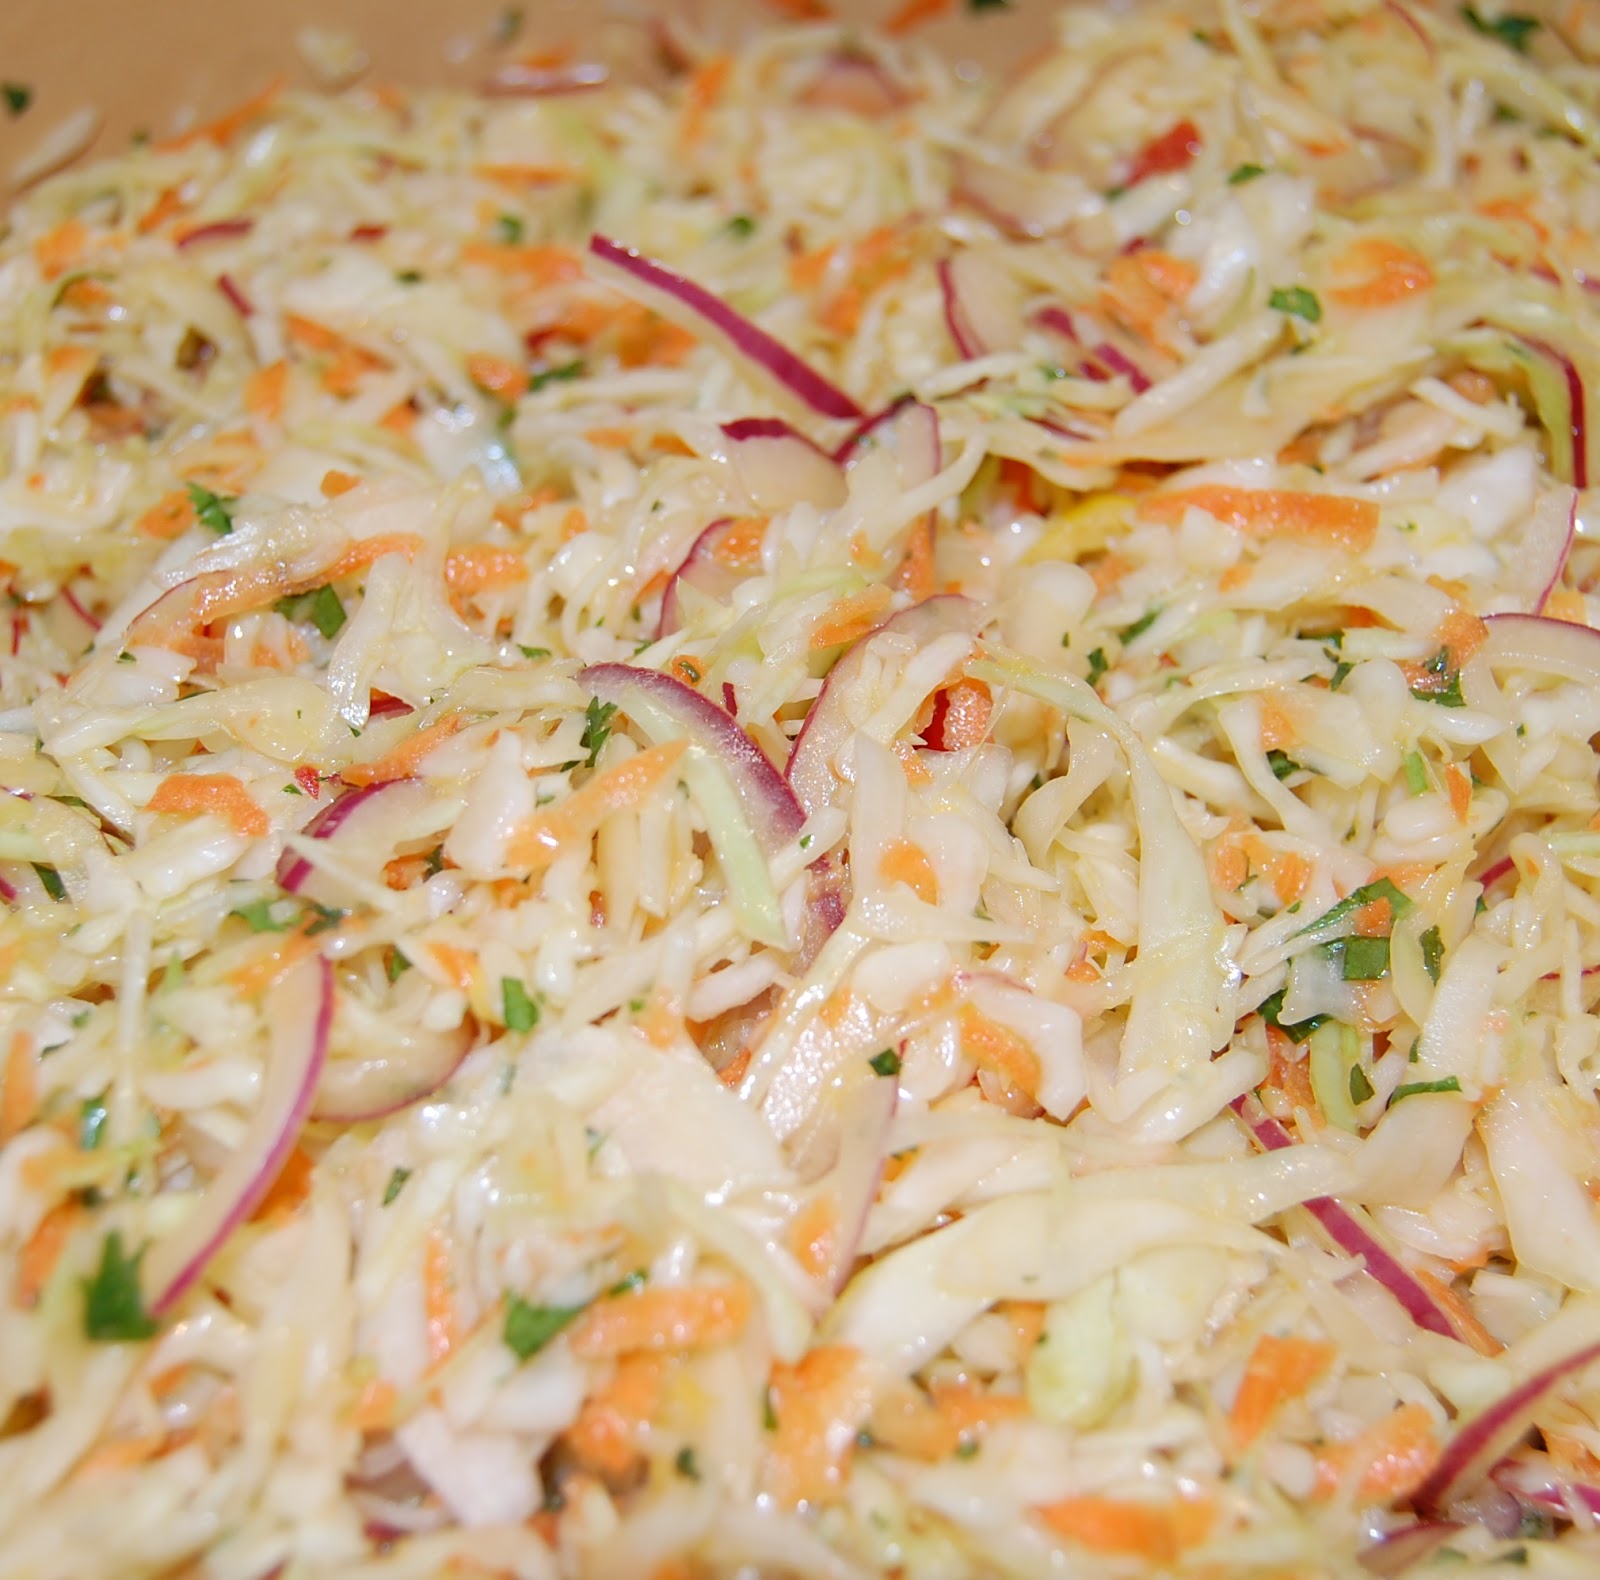
Harmonious Jalapeno Basil Coleslaw

When it comes to food, people have very definitive opinions about how certain dishes should be prepared; the most controversial among these are pizza, barbecued ribs, potato salad and cole slaw. With the latter, it seems there is even disagreement about the origin of its name. While some historian believe  the name comes from the Dutch kool sla for "cabbage salad," others contend that it is derived from kohl schlagl which is German for “cabbage chopped.”

For the purposes of this discussion, we shall define cole slaw (or coleslaw) to mean chopped or shredded cabbage covered in a dressing that includes at least a splash of vinegar. This is apparently where the friction begins. It seems that slaw purists add only dressing or mayonnaise (which technically is a dressing that contains vinegar), while others are adamant that carrots, raisins, pickles, relish, pineapple and even cheese be included.

Now to my way of thinking, celery seed is the greatest abomination to ever grace a spice cabinet not to mention a bowl of coleslaw, yet Dom is a fan - thus a minor example of the discord that slaw can cause. You all may also recall that Dom is NOT a fan of mayonnaise: this recipe is our matrimonial compromise. It is spicy and full of fresh herbal flavor (with no mayonnaise or celery seeds!)

  • 1 lb. (about 4 cups) red and/or white cabbage, shaved
  • 1/2 red onion, shaved very thin
  • 1-3 carrots, grated
  • 2 fresh jalapenos, seeded and sliced very tin
  • 1/2 cup cilantro leaves, chopped

  • Vinaigrette:

  • 1 cup loosely-packed basil leaves
  • 1 shallot, chopped
  • 2 garlic cloves, pan toasted to
  • 1/2 cup olive oil
  • 2 teaspoons honey
  • 1/4 cup Champagne vinegar
  • 1 teaspoon salt (or to taste)
  • 1/4 teaspoon black pepper (or to taste)

In a large bowl, place cabbage, carrot, jalapenos, and cilantro leaves. If the red onion is too sharp, rinse in cold water before adding to the cabbage mixture. Chill until ready to serve.

In a blender or food processor, place basil, shallot, toasted garlic, and oil. Blend until smooth. Add honey, vinegar, salt, and pepper and pulse to fully combine. Pour over slaw at least 5 minutes before serving. The slaw takes on a different texture (almost like kimchi) when it marinades in the dressing, in some cases we like it better this way. This gluten-free slaw is awesome served alone or with barbecued ribs, on pulled pork sandwiches, and in fish tacos!


Yum

Saturday, August 31, 2013

Labor Day Menu Planner

Stay relaxed while you entertain on this much-anticipated day off with some easy cookout ideas. When it's time to eat, enjoy the fruits of your labor, because that's precisely the point of this lovely summer holiday which won't last much longer! We have put together a list of our favorite Labor Day recipes. We hope they will become your favorites as well!

Just because the summer is winding down, doesn't mean it's time to pack away your grill:

And these chilled sides are excellent accompaniments that can be made ahead:

And what summer party is complete without a frozen dessert?
Lastly, don’t forget something to keep the kids from underfoot and away from the fiery grill. Yard games of bocce, corn hole or horseshoes are always popular and you can NEVER go wrong with bubbles. Try our mixture for the Ultimate Bubble Elixir and get ready for the squeals of delight!

Be safe and enjoy a safe and well deserved three-day weekend! And, don’t forget to designate a driver or enjoy the night air by walking home when possible.


Yum

Friday, August 30, 2013

Couscous with Cranberries and Toasted Peanuts

Couscous is a coarsely ground pasta made from semolina, a type of durum wheat.  Its name is derived from the Berber word meaning “well rolled.” Historically, couscous is a popular staple food throughout the Northern African countries of Morocco, Algeria, Tunisia as well as Italy’s southern-most region of Sicily.

Similar to Italian pastas, couscous is made from semolina flour, but instead of mixing the semolina with a given amount of water and/or egg into a dough, couscous is made by rubbing the semolina between lightly-moistened hands until the semolina combines with just enough water to form hundreds of tiny grains. This process takes a very light touch to prevent the grains from becoming a gooey mess, but once learned, it is one of the simplest forms of making pasta and one that is practiced in villages throughout the Mediterranean basin.

The traditional preparation of couscous involves a special pot called a couscoussière. Steaming couscous is an involved operation, requiring sealing the top of the couscoussière to its bottom with rags and then interrupting the steaming several times to rub the softening couscous grains to insure that they remain separate. However, due to the broad availability of instant couscous (found on the shelves of U.S. grocers), it is no longer necessary to go through all the trouble. This product has already been steamed and then dried again before it is packaged. It needs only to be soaked in boiling water until it swells, a process that takes about 10 minutes.

Since couscous has very little flavor of its own, it works well as a base for vegetable or meat dishes. It also mixes beautifully into salads and can be flavored with herbs like coriander, basil or mint, or even studded with fruit like raisins or apricots. It's a very neutral base for all sorts of dishes and provides a healthy addition to almost any meal. Our favorite flavor profile includes adding dried cranberries to the couscous while cooking and topping with chopped peanuts.

Cranberry Peanut Couscous
  • 1 1/2 cup couscous
  • 2 cups water
  • 1 tablespoon unsalted butter
  • 1/2 teaspoon salt
  • 1/2 cup dried cranberries
  • 1/3 cup peanuts, chopped and toasted
  • 1/4 cup sweetened coconut, shredded (optional)

In a saucepan, add water butter and salt and bring to a boil. (You can use chicken broth instead of water for a subtle flavor.) Stir in couscous and then remove from the heat and allow to steam for another 5 minutes. Be sure to allow the couscous to absorb the water. Using a fork, fluff couscous and place in a serving bowl. The couscous should be light and fluffy, not gummy. Before serving, top with toasted peanuts.

Yum

Saturday, August 24, 2013

Ultimate Three Cheese Marinara and Giveaway

Honestly, I had not eaten Betty Crocker Hamburger Helper since college. At the time it seemed gourmet in comparison to the ever popular Ramen noodles that were the mainstay of my post-secondary diet. I abandoned both my beloved Ramen and Hamburger Helper during the MSG (monosodium glutamate) awareness era of the 1990s.

When MyBlogSpark offered us a chance to try the new line of Betty Crocker Ultimates products [HINT: keep reading to the end of the post], we were curious to try them again. I was pleasantly surprised to learn that today’s “Helper” products are made with natural ingredients and do not include MSG. In fact, the packaged ingredients of the Three Cheese Marinara kit we received has a mere 0.5 grams of total fat with no saturated or trans-fat and included real Cheddar, Parmesan and Ricotta cheese as well as real tomatoes in the marinara sauce.

And, I'd forgotten how fast and easy they are to make.  While the box recommends using one pound of lean ground beef, you can certainly add your choice of protein, which we did: ground turkey. We simply followed the directions on the box and with a minimum amount of stress and prep work, dinner was ready in less than 30 minutes.

We also received a box of Betty Crocker Ultimate Cheddar Cheese Mashed Potatoes.  Again, these were super quick and easy to make, and were ready to eat within a couple of minutes.  While there was no doubt that they were instant potatoes, they were passable for a speedy side dish.

Each box of the all-new Betty Crocker Ultimate Helper and Ultimate Potatoes mixes comes with both delicious seasonings and a rich, creamy sauce in a variety of flavors including Ultimate Hamburger Helper Three Cheese Marinara, Ultimate Hamburger Helper Creamy Stroganoff, Ultimate Chicken Helper Cheddar Broccoli, Ultimate Chicken Helper Creamy Parmesan, Ultimate Betty Crocker Loaded Mashed Potatoes and Betty Crocker Ultimate Au Gratin Potatoes.

[Surprise!] We were also given a second prize pack on behalf of Betty Crocker to share with one of our readers that includes three boxes of Ultimate Hamburger Helper, 1 box of Betty Crocker Ultimate Potatoes, 3-piece set of orange bamboo serving bowls, 4 decorated melamine plates and a serving spoon from Zak! Designs.

Here how to enter to win…

Mandatory Entry: On or before Friday, August 30th, leave a comment below telling us which flavor(s) of the Helper Ultimates you think you will like the best.

You can get additional entries for each of the following:


Yum

Sunday, August 18, 2013

Lemon Artichoke Pesto Temptation

If artichokes are an ingredient in a recipe, I immediately start drooling which explains why I couldn’t resist buying a jar of Lemon Artichoke Pesto at Bella Cucina Porta Via when the opportunity presented. When I used the last bit to make bruschetta last week, I detoured to the shop to buy more. Unfortunately, the shop has gone out of business, so I decided to attempt to make some myself.  The label on the jar stated that the pesto “contains artichokes, Parmesan cheese, olive oil, canola oil, lemon juice, parsley, garlic, salt and spices.” So with some experimentation, I came up with a good reproduction.

And, I do mean good. I mean lick-the-spoon-and-dig-in-for-more good.  It is the kind of good that you don’t want to share.  You want to go sit in a corner by yourself with a spoon and enjoy every last spoonful.  If you can somehow avoid the temptation to eat it straight out of the food processor, then try smearing some on a toasty piece of crostini.  Or you could try it with some orzo for an easy summer dinner. The possibilities are endless provided you don’t eat it all straight from the jar.

Lemon Artichoke Pesto
  • 1 9-oz. package of frozen artichoke hearts
  • 1/3 cup olive oil
  • 2 cloves garlic, peeled
  • 1/4 cup fresh flat leaf parsley, chopped
  • 2 tablespoons lemon juice
  • Zest of one lemon
  • ½ cup Parmesan cheese
  • Generous pinch of Salt
  • Pepper to taste

Garlic is a key component in countless Italian recipes, but we don’t always want that pungent raw flavor. Raw garlic’s harshness comes from a compound called “allicin”, which forms as soon as the clove’s cells are ruptured and continues to build as it sits. Since the citric acid in lemon juice hastens the conversion of harsh-tasting allicin to more mellow compounds called thiosulfonates, disulfides, and trisulfides, we recommend steeping sliced garlic in the lemon juice while you get the other ingredients ready. Heating the sliced garlic in the olive oil is another method to mellow the garlic which produces the same milder-tasting compounds that form when the garlic is steeped.

Put all of the ingredients in a food processor and pulse until smooth. Store the pesto in an airtight container in refrigerator. It should keep for two weeks or so (if it lasts that long).

Did I mention it would make a good hot dip too?

1 cup Artichoke Lemon Pesto
1/4 cup mayonnaise
1/2 cup Parmesan cheese

Preheat oven to 350 degrees F. Mix together all ingredients and spoon into baking dish and evenly sprinkle a little more cheese over the top. Bake the dip for 30 minutes or until golden crust forms on the top. Serve with crusty bread or pita chips.


Shared on Say Not Sweet Anne's Sweet Sharing Monday.

Yum

Monday, August 12, 2013

Cherry Tomato Triscuit Tartlets

The tomatoes are still rolling in, and in the instance of the cherry tomatoes, we mean this quite literally as one of the baskets we frequently use to harvest garden goodies sprang a leak and sending cherry tomatoes gamboling across the kitchen.  These bright little berries (yes, technically tomatoes are a fruit) tend to disappear before we can use them in a recipe much like blueberries or cherries.

And, like blueberries and cherries, tomatoes are an excellent addition to a classic French tart. Tarts are so pretty and impressive with their carefully arranged elements. Unlike recipes for other savory tarts which usually have custard or cream-based fillings, this recipe guarantees that the taste and texture of the tomatoes will not get lost.

The crust is made from a new line of Triscuit crackers baked with 100% whole grain brown rice and wheat as well as other natural ingredients. These new "Real Food" Triscuit varieties have a lighter texture and crispier crunch. But, the true stroke of genius is the layer of mustard you spread on the tart crust which provides a spicy back-bite to the baked tomatoes. I used a layer about as a thick as you would spread on a sandwich, but you can be as parsimonious or as generous as you please. These little babies are perfect summertime fare, whether hot from the oven, or served at room temperature.

Triscuit Tartlet Crust
1 9-oz. box of Triscuit Brown Rice, Tomato & Sweet Basil crackers
1½ cups shredded sharp cheddar cheese
6 tablespoons (3/4 stick) unsalted butter, cubed and chilled
½ teaspoon freshly ground black pepper

To make the crust, empty the box of Triscuit crackers into a food processor and pulse until the crackers resemble fine bread crumbs. Pour the cracker crumbs out into a mixing bowl and mix in the butter, shredded cheese and pepper until completely combined. Place the dough in the refrigerator until ready to use. It is best if you can chill the dough for at least an hour.

Pre-heat your oven to 425°F. If you are using tartlet pans, take about a one-inch ball of dough and flatten between the palms of your hands, then lay the disc into the tartlet pan and mold the dough into the pan. As you complete each one, set it in the freezer until ready to add tomato filling. You can also use a mini muffin pan to make tartlets, using about ½” ball of dough and molding into the cups.

Tomato Tartlet Filling
2 cups cherry tomatoes (or 3 medium vine-ripe tomatoes, cored and sliced ¼" thick)
2 tablespoons Dijon mustard
¼ cup grated Pecorino cheese, for sprinkling on top
Fresh herbs (thyme, basil, oregano), finely chopped

To fill the tartlets, spread a thin layer of Dijon mustard on the bottom of each tartlet. Gently prick a knife in each cherry tomato to barely pierce the skin. This will help the tomatoes to melt without exploding. Arrange the tomatoes in a decorative pattern on the tartlet crust. Repeat this process for each tartlet before baking them for 15-20 minutes depending on the size of your tartlets.

For the finishing touch, remove the tartlets from the oven 5-10 minutes before they are done and sprinkle the tops with Pecorino cheese and fresh herbs and pop back in the oven. When the crust is golden brown and the cheese is completely melted, remove the tartlet to a cooling rack. Allow them to cool for 5-10 minutes before serving because the tomatoes will remain scaldingly-hot for longer than you would think. Serve with a fresh salad and a crisp white wine for an irresistible summer treat.

A new take on an old favorite. Enjoy the new line of Triscuit baked with whole grain brown rice and wheat, some with real food ingredients like sweet potato or red beans.​ How do you reinvent classic meals or snacks? Comment below with your ideas!

This is a sponsored conversation written by me on behalf of Triscuit. The opinions and text are all mine.


Yum

Friday, August 9, 2013

Tribute to Dad Gazpacho

It is with a heavy heart that I write this post. My dad, Tim Flinn, the man who taught me everything I know about gardening and homesteading, passed away this week. It has taken a while to decide how best to honor his memory here.

My dad was a true Renaissance man: Marine Corp. veteran, former carpenter, elementary school teacher, blueberry grower, sheep farmer, master woodcarver, and self-taught folk potter. A family friend (and librarian) recently commented, “Your dad could have written every how to book in the library.” He never cared that I was a girl; he taught me anything I was willing to learn (and a lot that I wasn't.) I learned how to hammer planking on the deck of our house, drive a tractor, bait a hook (even though I still hate doing it), fire a rifle, render lard, build and fly a kite, help deliver lambs in Spring, and make a mean old-fashioned.

Dad was also a consummate storyteller. There was never silence when Dad was in a room!  He would wax nostalgic about his time in Okinawa or about framing houses in the suburbs of Boston. He pontificated on any political issue and gladly shared his knowledge on any project I endeavored.

Years later, in my own home with a husband and kids, Dad would stop by on his way to or from the “aventure du jour” to visit. Frequently these visits occurred around lunch time. The typical exchange went something like this:

Denise: “You hungry? Would you like something to eat or drink?”
Dad: “Of course. I can always eat something.”
Denise: “What would you like?”
Dad: “Do you have any of that gazpacho you make?”

He knew full well that I didn't have any gazpacho on hand and that I would make it fresh while he waited. So I would grab a few of the tomatoes, cucumbers and peppers just picked from the backyard garden and start mincing the ingredients while he sat comfortably at the kitchen counter regaling me with his latest adventures, triumphs and defeats. For years, I thought the reason he asked for gazpacho was that my mom was not a big fan and rarely made it. It wasn't until I sat down to actually write this post that it occurred to me that the real reason he asked for the hand-chopped, made-while-you-wait potage was that I became his captive audience and would give him my undivided attention while I meticulously chopped each ingredient. And, yes, some people toss all the veggies in a food processor and blitz them to smoothie thickness, but I prefer (as did my dad) the organic texture of the hand-chopped version as the garden goodies tend to keep their identity and crunch.

So, some of you are thinking: “what is the big fuss over gazpacho?” In a nutshell, gazpacho is a liquid salad consisting of finely-diced, super-fresh vegetables and tomato juice served as a cold soup. Made with vine-ripe tomatoes, bell peppers, cucumbers, garlic, olive oil, and a splash of good vinegar, it is the signature dish of Spain's Andalusia region. Gazpacho originates from a 17th Century Arabic soup consisting of just bread, almonds, olive oil, water and garlic. Later Andalusian field workers needing a modest lunch and relief from the fiery summer heat added New World tomatoes and peppers thus transforming the soup into today's classic red gazpacho. There is a simple reason this soup has been popular for centuries: it is delicious.

  • 5 whole tomatoes, diced
  • 3 cups tomato juice, ice cold
  • 2 cloves garlic, minced
  • 1/2 whole red onion, diced
  • 1 whole large cucumber, brunoised
  • 1 bell pepper, brunoised
  • 1 whole zucchini, brunoised (optional)
  • 2 teaspoons fresh herbs, finely chopped
  • 1 tablespoon sugar
  • 2 tablespoons red wine vinegar
  • 3/4 teaspoon smoked paprika
  • 1/2 teaspoon ground cumin
  • 1/4 teaspoon cayenne pepper (optional)
  • Salt and black pepper to taste
  • Extra-virgin olive oil, for drizzling
  • Sour cream (optional)
  • Fresh croutons (optional)

In the bowl of a food processor or in a blender, combine the minced garlic with half the red onion, half the cucumber, half the tomato, half the zucchini, half the celery, half the tomato juice, olive oil, red wine vinegar, sugar, spices, herbs of your choosing (oregano, thyme, basil, cilantro, parsley) and a dash of salt. Pulse until all ingredients are blended well; mixture will have a nice speckled, colorful texture.

Pour into a large bowl and add the rest of the tomato juice, and the remaining onion, cucumber, tomato, zucchini, and celery. Stir mixture together and check seasonings, adding salt if needed.

If possible chill soup for a couple of hours before serving; gazpacho is best served  very cold! Otherwise chill over a bowl of ice or add a few ice cubes to the soup.

Remove the soup from the fridge and stir. Check seasonings one last time. Ladle into a bowl and garnish with your favorite topping such as a sliver of fresh avocado, a dollop of sour cream, chopped cilantro or even a scoop of fresh crab meat, and serve with slices of  grilled bread.


Yum

Thursday, August 1, 2013

Bread-N-Butter Pickles

I cannot imagine a Labor Day cookout without the pickles. Whether you put them on burgers and hot dogs or toss them in your potato salad, they are an integral part of the end-of-summer festivities.

Cucumbers belong to the same botanical family as watermelons and cantaloupes, that of squashes like zucchinis and pumpkins. Cucumbers are one of the most cultivated vegetables in the world and are known to have many health benefits. Cucumbers have most of the vitamins the body needs in a single day and are rich in vitamin A, B1, B6, C & D, Folate, Calcium, Magnesium, and Potassium. Cucumbers also contain lariciresinol, pinoresinol, and secoisolariciresinol. These three lignans have a strong history of research in connection with reduced risk of several cancer types, including breast cancer, ovarian cancer, uterine cancer and prostate cancer.

Having grown up in a rural area, I rarely had a “store-bought” pickle. In fact, our closest neighbor, Inez, was known throughout the county for her home-canned, bread-n-butter pickles. While I was never a recipient of her famous pickle recipe, this variation is quite splendid.

  • 2 pounds (about 6 1/2 cups) Kirby cucumbers, cut into 1/4”-thick rounds
  • 1 (about 1 cup) medium white onion, thinly sliced
  • 1/4 cup pickling salt or kosher salt
  • 2 cups ice
  • 1 ½ cups sugar
  • 1 cup white vinegar
  • ½ cup water
  • 1 ½ teaspoons mustard seeds
  • ½ teaspoon coriander seeds
  • ½ teaspoon black pepper, cracked
  • ¼ teaspoon crushed red pepper flakes
  • Pinch of ground clove

Rinse and cut cucumbers into preferred shapes making sure to remove at least 1/16th inch from the blossom end as the blossom end contains enzymes that can cause softening.  Trim and remove any blemishes and remove any extra or unwanted seeds. I used a crinkle cutter, but a mandolin would work well also.

In a medium bowl, combine the cucumbers, onion and salt and toss to mix well. Cover the mixture with ice. Let the cucumbers and onions stand at room temperature for two hours. The ice makes the cucumbers “crisp” and creates a brine that preserves them. Drain cucumbers and onions.

In a saucepan, bring the sugar, vinegar, water and spices to a boil. Add the cucumbers and onions to the vinegar mixture and bring almost back to a boil. Remove from heat and allow to cool. You can store the pickles in an airtight container for up to three weeks in the fridge. They will begin tasting pickled in just a couple hours.

If you want to keep the pickles for a longer period, you can process them in a hot water bath. Using a slotted spoon fill hot sterilized jars with the pickles and onions and pack firmly.Ladle the pickling juice over the cucumbers, leaving about 1/2-inch below each jar's neck. Wipe the rims of the jars with a clean, damp cloth and cover tightly with sterilized lids and screw tops.

Place jars in a deep pot filled with hot water, being sure to keep jars upright at all times. Jars should be spaced about 1” apart and should not touch sides of pot. Cover the jars with water by 1 inch. Cover the pot, and bring to a boil and reduce heat to barely keep the water boiling for 10 minutes.

Carefully remove the jars from the canning water and set on a heat safe surface and let cool completely. Press down on each lid. If the lid pops back with a clicking noise, it's not sealed properly. Refrigerate any unsealed jars immediately and use within 1 month as above. Sealed jars can be stored in a cool, dark place for up to 1 year. We recommend writing the canning date on the jars with a Sharpie marker (which can be later removed with alcohol or a light scrubbing with a soapy sponge.


Yum

Saturday, July 27, 2013

Ten Ways with Tomatoes

Each January, we find ourselves looking at the pitiful excuse for tomatoes in the produce section of the supermarket, and pining for the plump, juicy treasures still warm from the mid-day sun sliced and sandwiched between two slices of bread. Since their cultivation by the Aztecs and Incas as early as 700 A.D. and their introduction to Europe during the 16th century, tomatoes are one of the world’s most popular ingredients.

However, many people are unaware how good they can actually be for us. Tomatoes are low in calories and packed with health-promoting nutrients such as vitamins A and C, potassium and the super anti-oxidant called lycopene. Lycopene is a carotenoid that supports heart health by reducing the tendency of blood to form clots and promotes healthy cholesterol levels. It's also been found to be a potent hedge against many kinds of cancer. Tomatoes are so incredibly versatile making them crazy easy to incorporate into almost any meal. Here are our top ten:

1. Toss them: Simply toss fresh cherry tomatoes in a salad with fresh crisp lettuces and toss with your favorite dressing. Or, set a pot of water on the stove to cook pasta and place a sauté pan over medium heat. Toss cherry tomatoes in the pan and allow them to slowing cook until they “melt.” Add torn basil, a crushed garlic clove, salt and coarsely ground black pepper and simmer until pasta is cooked and drained. Pour this simple sauce over the pasta and toss. Don’t forget the grated Parmesan cheese.

2. Slice them: There are few things better on the entire planet than a fresh caprese salad! Freshly sliced tomatoes layered with fresh mozzarella and just-picked basil leaves; nirvana. Lactose intolerant? No worries… try a Japanese chilled tofu dish called hi-yayakko. Alternate slices of tomato and best-quality sliced tofu, firm or soft. Make a dressing of olive oil, soy sauce, seasoned rice wine vinegar, ginger, garlic and a touch of sugar to taste then top with slivered green onions.

3. Chop them: Coarsely chop tomatoes into a mixing bowl, salt them well with about one full pinch per cup and let them macerate for 20 minutes. If you don’t care about seeds and skins, you will end up with firmer, more flavorful tomato dice and a lot of delicious juice waiting to saturate any ingredients you mix with the tomatoes. Add a bit of garlic and fresh herbs and, Presto! – Bruschetta!

4. Grate them: This is my favorite tomato trick of all time. Cut the tomato in half through the equator, pluck out the seeds with your fingers and grate the cut side against the large holes in a box grater set over a bowl. You will end up with a bowlful of gorgeous tomato flesh and a naked skin in your palm within seconds. What do you do with it? I like to keep going with other vegetables and grate cucumbers, peppers and a little onion for a quick, coarse-textured gazpacho that you season with oil, vinegar, salt and fresh herbs.

5. Strain them: Blanch four large tomatoes in boiling water to easily remove skins. Once cooled and peeled, coarsely chop tomatoes in a food processor with a couple of teaspoons of salt. Pour into the chopped tomatoes over several thicknesses of folded cheesecloth in a sieve and drain the excess liquid from the pulp (reserving the liquid.) Use the pulp to make a quick tomato sauce for pizza, pasta or meatloaf. If you’re an epicurean, use the reserved tomato water in a refreshing agua fresca or to make an amazing tomato martini.

6. Juice them: Blanch the tomatoes as above and pureed the peeled tomatoes in a food processor along with a rib of celery, several mini peeled carrots and a bit of chopped onion. Heat the juice until just boiling in a sauce pan and simmer for about 20 minutes. Season the juice with a pinch of sugar and salt to taste. If you prefer a smoother juice, you can strain the puree through a sieve before using it to make the best Bloody Mary ever!

7. Cream them: Start by sautéing a chopped onion in butter in a pot. Add a couple of cloves of minced garlic and four to five big tomatoes that have been chopped. Add a spoonful of tomato paste and three to four cups of chicken or vegetable stock. Add two spoonfuls of raw rice. Bring to a boil and simmer for 20 minutes, until rice is cooked. Puree in the blender, strain the skins through a sieve and reheat in a saucepan with salt, pepper and a healthy glug of cream or half-and-half. Serve this amazing tomato bisque with garlic bread or a classic grilled cheese sandwich.

8. Freeze them: Remember that tomato pulp from above? Good, now throw four cups of it into the blender with a half cup of cilantro leaves, the juice of a couple of limes and a squirt of your favorite hot sauce. Pour the resulting goop over a cookie sheet and place it in the freezer. Every 20 minutes or so, scrape the frozen edges to the center of the pan with a fork. When you have nothing but red flakes of crystallized ice, you have spicy tomato granita. Place in a covered container and freeze until ready to eat. This makes an fancy and unexpected appetizer or dessert.

9. Roast them: Cut the tomatoes in half through the equator and place cut side up in a 13-by-9-inch baking pan. Sprinkle the top with chopped garlic and any herbs you like along with salt and a generous drizzle of olive oil. Bake at 325 degrees F for about two hours, watching to make sure they’re not drying out too quickly. If they’re still very juicy, turn up the heat to 400 and cook for a few more minutes until the juices start to caramelize. Pull the skins off with your fingers and use them as is or mash with a spoon to a nice tomato paste consistency before using.

10. Preserve them: Just like the many other fruits of summer, tomatoes make a wonderful jam. Combine about a pound and a half of good ripe tomatoes (coarsely chopped), one jalapeno or other pepper that has been stemmed, seeded and minced, a cup of sugar, juice of two limes, a tablespoon of grated ginger, a teaspoon of salt and of ground cumin, a big pinch of cinnamon and a small pinch of ground cloves in a large saucepan. Bring to a boil over medium heat, stirring often. Reduce the heat and simmer, stirring occasionally, about 1 hour 15 minutes until mixture has consistency of thick jam, Taste and adjust seasoning, and then cool and refrigerate until ready to use; this will keep at least a week. This jam can be canning and processed in a water bath and preserved for months.

While there are few pleasures more sincere than a freshly-picked, vine-ripened tomato, for many of us a garden is simply not feasible, and the grocery store offerings are less than optimal. That is the time to open a can of Red Gold tomatoes. Red Gold has been around since the 1940s focused on growing local in the Midwest, where true seasons positively impact the flavor of tomatoes. The Midwest, while it's cold in the winter, has the perfect growing season for tomatoes, perfect angle of the sun, perfect temps; even the winters are good for tomatoes, as they break up the soil for tiny root systems.

Red Gold is celebrating tomato season with a Summertime Grillin' Party which is now live on Facebook. They are giving away 1,000 aprons each week for five weeks leading up to a grand-prize drawing for a Green Egg Ceramic Grill & Smoker. The sweepstakes and ends Aug. 30th. To enter: click on the Grillin' Party image that's posted on their Facebook header. The direct link is: https://www.facebook.com/RedGold/app_349542138512669.

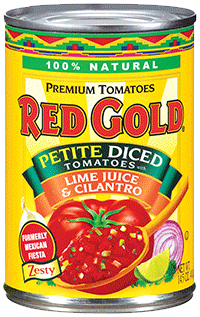
But wait!! It gets even better! Red Gold is giving us an opportunity to celebrate summer grilling with our readers as well! We are hosting a give-away of a Red Gold Summer Gift Pack with Red Gold Tomatoes with Green Chilies, Red Gold Lime Juice & Cilantro, Red Gold Ketchup, Coupons for other Red Gold products and recipes for Spicy Tomato Burgers and Caribbean Chicken Burgers. They are providing the gift pack and shipping it directly to the winner.

Red Gold Grillin' Giveaway

Enter today and remember to head over to the Red Gold Facebook page for a chance to win a Red Gold apron or the Big Green Egg Grand Prize!


Yum
Powered by Blogger.

footer social

ShareThis