Friday, August 9, 2013

Tribute to Dad Gazpacho

It is with a heavy heart that I write this post. My dad, Tim Flinn, the man who taught me everything I know about gardening and homesteading, passed away this week. It has taken a while to decide how best to honor his memory here.

My dad was a true Renaissance man: Marine Corp. veteran, former carpenter, elementary school teacher, blueberry grower, sheep farmer, master woodcarver, and self-taught folk potter. A family friend (and librarian) recently commented, “Your dad could have written every how to book in the library.” He never cared that I was a girl; he taught me anything I was willing to learn (and a lot that I wasn't.) I learned how to hammer planking on the deck of our house, drive a tractor, bait a hook (even though I still hate doing it), fire a rifle, render lard, build and fly a kite, help deliver lambs in Spring, and make a mean old-fashioned.

Dad was also a consummate storyteller. There was never silence when Dad was in a room!  He would wax nostalgic about his time in Okinawa or about framing houses in the suburbs of Boston. He pontificated on any political issue and gladly shared his knowledge on any project I endeavored.

Years later, in my own home with a husband and kids, Dad would stop by on his way to or from the “aventure du jour” to visit. Frequently these visits occurred around lunch time. The typical exchange went something like this:

Denise: “You hungry? Would you like something to eat or drink?”
Dad: “Of course. I can always eat something.”
Denise: “What would you like?”
Dad: “Do you have any of that gazpacho you make?”

He knew full well that I didn't have any gazpacho on hand and that I would make it fresh while he waited. So I would grab a few of the tomatoes, cucumbers and peppers just picked from the backyard garden and start mincing the ingredients while he sat comfortably at the kitchen counter regaling me with his latest adventures, triumphs and defeats. For years, I thought the reason he asked for gazpacho was that my mom was not a big fan and rarely made it. It wasn't until I sat down to actually write this post that it occurred to me that the real reason he asked for the hand-chopped, made-while-you-wait potage was that I became his captive audience and would give him my undivided attention while I meticulously chopped each ingredient. And, yes, some people toss all the veggies in a food processor and blitz them to smoothie thickness, but I prefer (as did my dad) the organic texture of the hand-chopped version as the garden goodies tend to keep their identity and crunch.

So, some of you are thinking: “what is the big fuss over gazpacho?” In a nutshell, gazpacho is a liquid salad consisting of finely-diced, super-fresh vegetables and tomato juice served as a cold soup. Made with vine-ripe tomatoes, bell peppers, cucumbers, garlic, olive oil, and a splash of good vinegar, it is the signature dish of Spain's Andalusia region. Gazpacho originates from a 17th Century Arabic soup consisting of just bread, almonds, olive oil, water and garlic. Later Andalusian field workers needing a modest lunch and relief from the fiery summer heat added New World tomatoes and peppers thus transforming the soup into today's classic red gazpacho. There is a simple reason this soup has been popular for centuries: it is delicious.

  • 5 whole tomatoes, diced
  • 3 cups tomato juice, ice cold
  • 2 cloves garlic, minced
  • 1/2 whole red onion, diced
  • 1 whole large cucumber, brunoised
  • 1 bell pepper, brunoised
  • 1 whole zucchini, brunoised (optional)
  • 2 teaspoons fresh herbs, finely chopped
  • 1 tablespoon sugar
  • 2 tablespoons red wine vinegar
  • 3/4 teaspoon smoked paprika
  • 1/2 teaspoon ground cumin
  • 1/4 teaspoon cayenne pepper (optional)
  • Salt and black pepper to taste
  • Extra-virgin olive oil, for drizzling
  • Sour cream (optional)
  • Fresh croutons (optional)

In the bowl of a food processor or in a blender, combine the minced garlic with half the red onion, half the cucumber, half the tomato, half the zucchini, half the celery, half the tomato juice, olive oil, red wine vinegar, sugar, spices, herbs of your choosing (oregano, thyme, basil, cilantro, parsley) and a dash of salt. Pulse until all ingredients are blended well; mixture will have a nice speckled, colorful texture.

Pour into a large bowl and add the rest of the tomato juice, and the remaining onion, cucumber, tomato, zucchini, and celery. Stir mixture together and check seasonings, adding salt if needed.

If possible chill soup for a couple of hours before serving; gazpacho is best served  very cold! Otherwise chill over a bowl of ice or add a few ice cubes to the soup.

Remove the soup from the fridge and stir. Check seasonings one last time. Ladle into a bowl and garnish with your favorite topping such as a sliver of fresh avocado, a dollop of sour cream, chopped cilantro or even a scoop of fresh crab meat, and serve with slices of  grilled bread.


Yum

Thursday, August 1, 2013

Bread-N-Butter Pickles

I cannot imagine a Labor Day cookout without the pickles. Whether you put them on burgers and hot dogs or toss them in your potato salad, they are an integral part of the end-of-summer festivities.

Cucumbers belong to the same botanical family as watermelons and cantaloupes, that of squashes like zucchinis and pumpkins. Cucumbers are one of the most cultivated vegetables in the world and are known to have many health benefits. Cucumbers have most of the vitamins the body needs in a single day and are rich in vitamin A, B1, B6, C & D, Folate, Calcium, Magnesium, and Potassium. Cucumbers also contain lariciresinol, pinoresinol, and secoisolariciresinol. These three lignans have a strong history of research in connection with reduced risk of several cancer types, including breast cancer, ovarian cancer, uterine cancer and prostate cancer.

Having grown up in a rural area, I rarely had a “store-bought” pickle. In fact, our closest neighbor, Inez, was known throughout the county for her home-canned, bread-n-butter pickles. While I was never a recipient of her famous pickle recipe, this variation is quite splendid.

  • 2 pounds (about 6 1/2 cups) Kirby cucumbers, cut into 1/4”-thick rounds
  • 1 (about 1 cup) medium white onion, thinly sliced
  • 1/4 cup pickling salt or kosher salt
  • 2 cups ice
  • 1 ½ cups sugar
  • 1 cup white vinegar
  • ½ cup water
  • 1 ½ teaspoons mustard seeds
  • ½ teaspoon coriander seeds
  • ½ teaspoon black pepper, cracked
  • ¼ teaspoon crushed red pepper flakes
  • Pinch of ground clove

Rinse and cut cucumbers into preferred shapes making sure to remove at least 1/16th inch from the blossom end as the blossom end contains enzymes that can cause softening.  Trim and remove any blemishes and remove any extra or unwanted seeds. I used a crinkle cutter, but a mandolin would work well also.

In a medium bowl, combine the cucumbers, onion and salt and toss to mix well. Cover the mixture with ice. Let the cucumbers and onions stand at room temperature for two hours. The ice makes the cucumbers “crisp” and creates a brine that preserves them. Drain cucumbers and onions.

In a saucepan, bring the sugar, vinegar, water and spices to a boil. Add the cucumbers and onions to the vinegar mixture and bring almost back to a boil. Remove from heat and allow to cool. You can store the pickles in an airtight container for up to three weeks in the fridge. They will begin tasting pickled in just a couple hours.

If you want to keep the pickles for a longer period, you can process them in a hot water bath. Using a slotted spoon fill hot sterilized jars with the pickles and onions and pack firmly.Ladle the pickling juice over the cucumbers, leaving about 1/2-inch below each jar's neck. Wipe the rims of the jars with a clean, damp cloth and cover tightly with sterilized lids and screw tops.

Place jars in a deep pot filled with hot water, being sure to keep jars upright at all times. Jars should be spaced about 1” apart and should not touch sides of pot. Cover the jars with water by 1 inch. Cover the pot, and bring to a boil and reduce heat to barely keep the water boiling for 10 minutes.

Carefully remove the jars from the canning water and set on a heat safe surface and let cool completely. Press down on each lid. If the lid pops back with a clicking noise, it's not sealed properly. Refrigerate any unsealed jars immediately and use within 1 month as above. Sealed jars can be stored in a cool, dark place for up to 1 year. We recommend writing the canning date on the jars with a Sharpie marker (which can be later removed with alcohol or a light scrubbing with a soapy sponge.


Yum

Saturday, July 27, 2013

Ten Ways with Tomatoes

Each January, we find ourselves looking at the pitiful excuse for tomatoes in the produce section of the supermarket, and pining for the plump, juicy treasures still warm from the mid-day sun sliced and sandwiched between two slices of bread. Since their cultivation by the Aztecs and Incas as early as 700 A.D. and their introduction to Europe during the 16th century, tomatoes are one of the world’s most popular ingredients.

However, many people are unaware how good they can actually be for us. Tomatoes are low in calories and packed with health-promoting nutrients such as vitamins A and C, potassium and the super anti-oxidant called lycopene. Lycopene is a carotenoid that supports heart health by reducing the tendency of blood to form clots and promotes healthy cholesterol levels. It's also been found to be a potent hedge against many kinds of cancer. Tomatoes are so incredibly versatile making them crazy easy to incorporate into almost any meal. Here are our top ten:

1. Toss them: Simply toss fresh cherry tomatoes in a salad with fresh crisp lettuces and toss with your favorite dressing. Or, set a pot of water on the stove to cook pasta and place a sauté pan over medium heat. Toss cherry tomatoes in the pan and allow them to slowing cook until they “melt.” Add torn basil, a crushed garlic clove, salt and coarsely ground black pepper and simmer until pasta is cooked and drained. Pour this simple sauce over the pasta and toss. Don’t forget the grated Parmesan cheese.

2. Slice them: There are few things better on the entire planet than a fresh caprese salad! Freshly sliced tomatoes layered with fresh mozzarella and just-picked basil leaves; nirvana. Lactose intolerant? No worries… try a Japanese chilled tofu dish called hi-yayakko. Alternate slices of tomato and best-quality sliced tofu, firm or soft. Make a dressing of olive oil, soy sauce, seasoned rice wine vinegar, ginger, garlic and a touch of sugar to taste then top with slivered green onions.

3. Chop them: Coarsely chop tomatoes into a mixing bowl, salt them well with about one full pinch per cup and let them macerate for 20 minutes. If you don’t care about seeds and skins, you will end up with firmer, more flavorful tomato dice and a lot of delicious juice waiting to saturate any ingredients you mix with the tomatoes. Add a bit of garlic and fresh herbs and, Presto! – Bruschetta!

4. Grate them: This is my favorite tomato trick of all time. Cut the tomato in half through the equator, pluck out the seeds with your fingers and grate the cut side against the large holes in a box grater set over a bowl. You will end up with a bowlful of gorgeous tomato flesh and a naked skin in your palm within seconds. What do you do with it? I like to keep going with other vegetables and grate cucumbers, peppers and a little onion for a quick, coarse-textured gazpacho that you season with oil, vinegar, salt and fresh herbs.

5. Strain them: Blanch four large tomatoes in boiling water to easily remove skins. Once cooled and peeled, coarsely chop tomatoes in a food processor with a couple of teaspoons of salt. Pour into the chopped tomatoes over several thicknesses of folded cheesecloth in a sieve and drain the excess liquid from the pulp (reserving the liquid.) Use the pulp to make a quick tomato sauce for pizza, pasta or meatloaf. If you’re an epicurean, use the reserved tomato water in a refreshing agua fresca or to make an amazing tomato martini.

6. Juice them: Blanch the tomatoes as above and pureed the peeled tomatoes in a food processor along with a rib of celery, several mini peeled carrots and a bit of chopped onion. Heat the juice until just boiling in a sauce pan and simmer for about 20 minutes. Season the juice with a pinch of sugar and salt to taste. If you prefer a smoother juice, you can strain the puree through a sieve before using it to make the best Bloody Mary ever!

7. Cream them: Start by sautéing a chopped onion in butter in a pot. Add a couple of cloves of minced garlic and four to five big tomatoes that have been chopped. Add a spoonful of tomato paste and three to four cups of chicken or vegetable stock. Add two spoonfuls of raw rice. Bring to a boil and simmer for 20 minutes, until rice is cooked. Puree in the blender, strain the skins through a sieve and reheat in a saucepan with salt, pepper and a healthy glug of cream or half-and-half. Serve this amazing tomato bisque with garlic bread or a classic grilled cheese sandwich.

8. Freeze them: Remember that tomato pulp from above? Good, now throw four cups of it into the blender with a half cup of cilantro leaves, the juice of a couple of limes and a squirt of your favorite hot sauce. Pour the resulting goop over a cookie sheet and place it in the freezer. Every 20 minutes or so, scrape the frozen edges to the center of the pan with a fork. When you have nothing but red flakes of crystallized ice, you have spicy tomato granita. Place in a covered container and freeze until ready to eat. This makes an fancy and unexpected appetizer or dessert.

9. Roast them: Cut the tomatoes in half through the equator and place cut side up in a 13-by-9-inch baking pan. Sprinkle the top with chopped garlic and any herbs you like along with salt and a generous drizzle of olive oil. Bake at 325 degrees F for about two hours, watching to make sure they’re not drying out too quickly. If they’re still very juicy, turn up the heat to 400 and cook for a few more minutes until the juices start to caramelize. Pull the skins off with your fingers and use them as is or mash with a spoon to a nice tomato paste consistency before using.

10. Preserve them: Just like the many other fruits of summer, tomatoes make a wonderful jam. Combine about a pound and a half of good ripe tomatoes (coarsely chopped), one jalapeno or other pepper that has been stemmed, seeded and minced, a cup of sugar, juice of two limes, a tablespoon of grated ginger, a teaspoon of salt and of ground cumin, a big pinch of cinnamon and a small pinch of ground cloves in a large saucepan. Bring to a boil over medium heat, stirring often. Reduce the heat and simmer, stirring occasionally, about 1 hour 15 minutes until mixture has consistency of thick jam, Taste and adjust seasoning, and then cool and refrigerate until ready to use; this will keep at least a week. This jam can be canning and processed in a water bath and preserved for months.

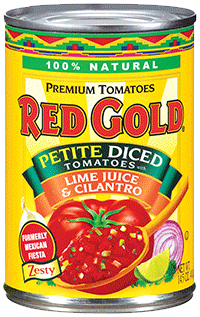
While there are few pleasures more sincere than a freshly-picked, vine-ripened tomato, for many of us a garden is simply not feasible, and the grocery store offerings are less than optimal. That is the time to open a can of Red Gold tomatoes. Red Gold has been around since the 1940s focused on growing local in the Midwest, where true seasons positively impact the flavor of tomatoes. The Midwest, while it's cold in the winter, has the perfect growing season for tomatoes, perfect angle of the sun, perfect temps; even the winters are good for tomatoes, as they break up the soil for tiny root systems.

Red Gold is celebrating tomato season with a Summertime Grillin' Party which is now live on Facebook. They are giving away 1,000 aprons each week for five weeks leading up to a grand-prize drawing for a Green Egg Ceramic Grill & Smoker. The sweepstakes and ends Aug. 30th. To enter: click on the Grillin' Party image that's posted on their Facebook header. The direct link is: https://www.facebook.com/RedGold/app_349542138512669.

But wait!! It gets even better! Red Gold is giving us an opportunity to celebrate summer grilling with our readers as well! We are hosting a give-away of a Red Gold Summer Gift Pack with Red Gold Tomatoes with Green Chilies, Red Gold Lime Juice & Cilantro, Red Gold Ketchup, Coupons for other Red Gold products and recipes for Spicy Tomato Burgers and Caribbean Chicken Burgers. They are providing the gift pack and shipping it directly to the winner.

Red Gold Grillin' Giveaway

Enter today and remember to head over to the Red Gold Facebook page for a chance to win a Red Gold apron or the Big Green Egg Grand Prize!


Yum

Monday, July 22, 2013

Guys Trippa to Rome

Dom and Nic spent six days in  Rome; the trip was a graduation gift which afforded good father son time. While taking in the sites of the Eternal City, appetites were roused Being adventurous, they explored the cradle of modern civilization for the best authentic Roman cuisine.  In the weeks preceding the anxiously-awaited trip, lists of restaurants were prepared in anticipation of foreseen hungriness. Topping the list was Trattoria Dal Cavalier Gino located at Vicolo Rosini, 4, 00186, more commonly called Da Gino by its regular patrons.

Finding the restaurant proved to be challenging, but after traversing the curvy alleyways surrounding the Piazza del Parlamento, and with the help of a very nice policeman, the guys found the restaurant down a narrow, hidden side street. The small, unassuming restaurant was already packed to the gills despite being half an hour short of the regular lunch hour. They were seated at a tiny cloth-covered table; mere inches from the diners at the next table. Very little Inglese was spoken, but Dom was able to communicate in cobbled Italian.

After a shared order of Carciofi alla Romana (artichokes braised in olive oil and lemon seasoned with fresh mint), both tucked into heaping plates of Bucatini All'Amatriciana (long, hollow pasta strands with a tomato sauce cooked with onions, guanciale and pecorino cheese). They were both so sated that they almost resisted the urge to order dessert, but seeing the tiramisu on another table, they caved.

Having relished their first meal at Da Gino, they decided to celebrate their last evening in Rome at the cozy little eatery. They were seated at the table nearest the kitchen with a full view of the plate preparations. The waiter, having remembered the guys from their first visit, began chatting them up. He recommended the house specialty of tonnarelli cacio e pepe (think long pasta with pecorino cheese and freshly ground black pepper) which Dom promptly ordered and Nic decided upon the carbonara (which we all know is his absolute favorite.)

While waiting for their entrees to arrive, they glanced around at the family photos on the walls drawing the attention of one of the photo’s subjects who explained that the ristorante was completely family-owned. She was the daughter of the chef (her mom) and the manager (her dad). She and her brother work the register and pinch hit as waiters as well. As they were conversing, a plate of something tasty went by and Dom asked what it was; “trippa di Roma” was the response, “have you ever tried it?” Dom relayed that he had not had a good version since his grandmother made it. So a plate of stewed tripe was immediately delivered to the table.

Anxious to see their reaction, the whole family watched as the guys tentatively tasted the dish. Finding it tender and not only edible but delectable, Dom asked for the recipe. They downed every ounce of their meals; mightily impressed with the tonnarelli pasta used in the cacio e pepe and the carbonara. When asked if they wanted dessert, they graciously declined as the basis of being on the verge of exploding. In sympathy, the daughter brought out a bottle of Amaro “to help with the digestion.”  Having had such a wonderful time, the guys were sad to leave, but after pictures with the family, headed back to the little rented apartment to pack.

After arriving home, Dom was impatient for another plate of the stewed tripe and thus bought a pound to experiment with. Having imparted the recipe given him by the mama chef, we embarked on our first attempt to replicate the dish. Unbelievably, we prepared  a reasonable facsimile on the first try. Here’s what we did:

Roman Tripe Stew
  • 1 lb. beef or veal tripe
  • Salt
  • 1 cup white vinegar
  • Water for boiling
  • 2 tablespoons extra-virgin olive oil
  • 1 medium yellow onions, finely chopped
  • 1 red bell pepper, chopped
  • 2 carrots, chopped
  • 1 stalk celery, chopped
  • Freshly ground black pepper
  • 1 cup white wine
  • 2 cups tomato sauce
  • 1 bunch parsley leaves, finely chopped
  • 2 cloves garlic, peeled and minced
  • 3 stalks celery, finely chopped
  • 2 tablespoons butter
  • 1 cup freshly grated Parmigiano-Reggiano
  • Salt and pepper to taste

Rinse the tripe well in warm water and unfold the layers. Coat the pieces with salt or baking soda (or a combination of both) and using a stiff culinary brush, give the pieces a good scrubbing as you would a scrap of dirty carpet. Rinse well with cold water and set aside while water boils.

Bring a pot of water (enough to fully cover the tripe) to a boil over high heat. Add vinegar and a generous pinch of salt, then plunge tripe in and allow water to return to a boil. Turn off the heat and let the tripe sit in the water for a minute or two before draining and rinsing under cold water. Pat the tripe dry and lice tripe into 4" × 1⁄2" pieces with a sharp knife, then cover sliced tripe and set aside.

Heat oil in a large heavy pot over medium heat before adding onions carrots and 1 stalk of diced celery, and cook until golden, 10–15 minutes. Add tripe and wine and cook until the alcohol has evaporated, about 3 minutes. Add tomato sauce and bring to a boil. Reduce heat to low, cover, and simmer for 4–6 hours, until tripe is very tender.

Add the remaining celery about 1 hour before tripe is done. Add parsley and garlic, butter, and half the Parmigiano-Reggiano about 10 minutes before serving and adjust seasonings. When you are ready to serve, dust the plate with the remaining Parmigiano-Reggiano and savor an authentic taste of Roma!

Special thanks to our new friends at Da Gino in Rome.  If you are ever in Rome, do as the Romans do and go to this wonderful little family restaurant!


Yum

Wednesday, July 17, 2013

Frozen Churro Caramel Chai

We are not sure about your house, but in ours it just is not summer without ice cream. Now you can even start the day with it! International Delight® and Cold Stone Creamery™ have teamed up to bring three new ice cream flavors to your morning routine: Hot for Cookie™, Founder’s Favorite™ and Churro Caramel.

These new creamers are so tasty, you will be looking for new ways to sneak it into your meals all day long. Our new favorite afternoon indulgence is cinnamon caramel chai made with Cold Stone Creamery™ Churro Caramel creamer and blended to frozen perfection.

1 cup boiling water
4 black tea bags (like Early Grey or English Breakfast)
3 tablespoons sugar
1/3 cup International Delight® Cold Stone Creamery™ Churro Caramel
2 cups ice cubes
Ground spices to taste (nutmeg, cardamom, ginger or even black pepper)

Prepare the tea by adding tea bags to the boiling water and allowing to steep for 4 minutes before removing the tea bag(s) from the cup. Add the sugar and stir to dissolve. Let the tea cool completely or overnight in the refrigerator.

To make the frozen chai, pour the tea to a blender and add the ID Churro Caramel creamer, ice cubes, and desired spices, and then blitz on high until the ice cubes are smooth and incorporated with the ID. Pour the frozen froth into a tall glass and don’t forget the straw!

If you have any leftover (doubtful!), pour it into an ice cube tray and place in the freezer for your next batch. By using the flavored cubes, the chai will not be diluted by the melting ice making a smoother, richer treat.

This is a sponsored conversation written by me on behalf of International Delight. The opinions and text are all mine. In accordance with the Federal Trade Commission’s 16 CFR, Part 255, we are disclosing that we received compensation for recipe development and contest promotion from International Delight® and Cold Stone Creamery™. A favorable review was not required; any review of the product is based solely on our personal opinion and experience and may differ from those of our readers.

Yum

Sunday, July 14, 2013

Tasteful Creole Sauce and Shrimp

The tomatoes are ripe. And, not just one or two but baskets full. You know what that means? Time to make Creole sauce! Technically creole sauce is to be made with “creole tomatoes,” but the big secret is that there is really no such thing. Many tomato cultivars have the genetic material to look, taste, and smell like the Creole tomato we all know and love. A true Creole tomato is contingent upon the unique growing conditions of the south Louisiana river parishes, but any good, organic, vine-ripened tomato is a viable substitute.

Creole sauce is not only used to make its incredible namesake: Shrimp Creole. Traditionally, jambalaya is topped with creole sauce before serving and it makes a wonderful sauce for grilled fish as well as stuffed peppers.Bear in mind that every family has their own version of the sauce, whether they call it Creole Sauce, Red Gravy, or Sauce Piquant (which is not exactly the same, but darned close). Regardless of the name, they all contain the same basic ingredients of tomatoes, “Cajun Trinity” (onion, celery, bell pepper), garlic, hot peppers, bay leaf and stock (chicken, vegetable or otherwise.)

Here is our variation on this classic sauce. This recipe makes a large batch. If you don’t use it all for one meal, freeze the remaining sauce for use as a topping for other delicious Cajun-style dishes.

  • 2 pounds medium to large shrimp, with shells on
  • 2 1/2 cups stock (shrimp. chicken or vegetable)
  • 1/4 cup vegetable oil
  • 2 1/2 cups, in all, chopped onions
  • 2 cups celery, chopped
  • 1 ½ cups green bell pepper, chopped
  • 1 fresh jalapeno, seeded and chopped
  • 4 Tablespoons (1/2 stick) unsalted butter
  • 1 tablespoon Dijon mustard
  • 2 cloves garlic, minced or pressed
  • 1 bay leaf
  • 2 teaspoons salt
  • 1 teaspoon white pepper
  • 1 teaspoon paprika
  • 1 teaspoon dried thyme leaves
  • ½ teaspoons dried basil
  • ¾ teaspoon black pepper
  • ½ teaspoon cayenne pepper
  • 1 can tomato paste
  • 3 cups fresh “Creole” tomatoes, chopped
  • 2 teaspoons sugar

Peel and rinse shrimp, and refrigerate until needed. Add the shrimp shells to a quart of water and bring to a boil. Chop onions, celery, bell and jalapeno peppers and garlic keeping one cup of onions separated. Add all the vegetable trimmings to the shrimp shells along with a pinch of salt and let simmer while you sauté the vegetables.

Heat the vegetable oil over medium heat in a large pot. Add one cup of the onions and cook over high heat for 3 minutes, stirring frequently. Lower the heat to low and keep stirring, until the onions have caramelized to a rich brown color, but not burned, another 3-5 minutes. Add the rest of the onions, celery, green peppers and butter. Cook over high heat, stirring occasionally, until celery and pepper become tender, roughly 5 minutes.

Next add the mustard, garlic, bay leaf, all the spices, hot sauce, ½ cup of the stock, and diced tomatoes (basically add everything but the tomato sauce, sugar and the rest of the stock) and increase the heat back to medium. Cook stirring and scraping the pan bottom well for 10 minutes. Then add the tomato sauce, sugar and remaining 2 cups stock and simmer for about 15-20 minutes, stirring occasionally.

If you are making the sauce ahead, cool and refrigerate without adding the shrimp. If serving immediately, turn the heat off and add the shrimp. Cover and let sit for 5-10 minutes, or until the shrimp are just plump and pink and not overcooked. Serve immediately by placing a mound of rice in the center of a plate and ladling a generous portion of shrimp creole sauce around the rice.


Yum

Thursday, July 11, 2013

Salted Lemon Buttermilk Givré

Givré, French for "frozen," is also the name given to the dessert of sorbet or sherbet in a frozen fruit shell. This statement educes the question of the difference between sorbet and sherbet. Sorbet is a frozen dessert made of sweetened fruit juice, while sherbet is made with fruit syrup and milk (or other dairy product) which is whisked until smooth and opaque and frozen.

Sounds easy, right? Yes. It really is about the simplest dessert you’ll ever make. The hardest thing you have to do is grate some lemon zest and juice a few lemons to make this light, refreshing treat. The best part for me was that I did not have to make another trip to the grocery store since we had buttermilk leftover from making pancakes.

Although its name implies that it is high in fat, buttermilk contains no butter and is traditionally low in fat. According to the California Milk Advisory Board, the name "buttermilk" stems from the original method of making buttermilk: buttermilk was the milk left over after churning butter. Light, refreshing and low in fat: awesome!

Lemon Buttermilk Sherbet
  • 1/2 cup water
  • 1 cup sugar
  • Zest of one lemon, preferably unsprayed
  • 3 cups buttermilk (lowfat or regular)
  • 1/3 cup freshly squeezed lemon juice (about 3 lemons)
  • Large-Grain Salt (like Red Alaea or Hiwa Kai) for serving

In a medium saucepan, combine the water and the sugar. Grate the lemon zest into the pan. Heat, stirring frequently, until the sugar has dissolved. Remove from the heat and let it come to room temperature, then place the syrup into the fridge until thoroughly chilled.

Cut the lemons in half and juice, reserving the outer peel to use as the serving bowls. Put the lemon juice in the refrigerator to chill along with the simple syrup. Using a spoon remove any excess pulp and membranes. Cut the tops/bottoms just slightly so that the lemon “cups” sit flat. Dip the rims of the lemon cups in sugar and immediately place in the freezer.

Once the simple syrup is thoroughly chilled, whisk the buttermilk into the syrup. Following the manufacturer’s instructions, freeze the buttermilk mixture in an ice cream maker. Once frozen, remove the sherbet from the machine to a container and cover tightly with plastic wrap and then place in the freezer to firm up before serving.

To serve, remove the lemon cups from the freezer and scoop the sherbet into them. Sprinkle the top with good, large-crystal salt and serve immediately. Be prepared for everyone to want second (or even third) helpings!


Yum

Monday, July 8, 2013

Torrential Fried Green Tomatoes

We cannot imagine what our lifestyle would be like without tomatoes. Odd to think that one vegetable* could have such a huge impact on so many cultures around the world. Since their cultivation by the Aztecs and Incas as early as 700 A.D. and its introduction to Europe during the 16th century, the tomato has been a widely popular food item. Maybe this is why folks will stand in line at local farmer’s markets to pay $8.99 per pound (more than the price of NY strip steak at the local grocer) for farm-grown, vine-ripened tomatoes.

With the torrential rainfall that has made the Southeastern states more suitable for growing rice than tomatoes, we have been put in the position of picking the plump fruits before they ripen to their juiciest potential. Not being big fans of chowchow, the only logical alternative is to fry them up.

It wasn’t until 1987, when actress-turned-novelist Fannie Flagg titled her best-selling book “Fried Green Tomatoes at the Whistle Stop Café,” that the crispy-crusted tart medallions found on every dinner table south of the Mason-Dixon Line became a household name. While fried green tomatoes are typically considered a Southern dish, they can be found in northern homes prepared at the end of the season when the remaining fruit is harvested before the first frost. The northern version is more likely to be dredged in flour than in corn meal.

It is hard to describe the experience of biting into your first fried green tomato. The combination of hot, acerbic, juicy tomato encased in brittle fried cornmeal and flour is nothing short of exquisite despite its humble ingredients. We have found that tomatoes which have started to turn a light shade of pink work best for frying.

  • 2 medium green tomatoes
  • 1 egg, beaten
  • 1/2 cup cornmeal
  • 1/3 cup fine dry bread crumbs
  • 1/4 cup peanut oil (or vegetable oil)
  • Salt

Combine the cornmeal and breadcrumbs along with a pinch of salt in a small mixing bowl. In a separate bowl, beat the egg until it is frothy. Then, heat the peanut oil in a skillet over medium heat.

Cut unpeeled tomatoes into ¼-inch slices and pat dry on a paper towel. This is the real trick to a super crispy crust.  Dip the dried tomato slices in the beaten egg and then into the cornmeal-bread crumb mix.

In fairly shallow oil, about 1/4- to 1/2-inch deep, fry half of the coated tomato slices for 3-5 minutes on each side until golden, nutty brown. Remove the fried tomatoes to paper towels to drain before sprinkling thoroughly with salt.

After that, all you need is a fork, but the fried tomato patties make the wonderful platform for creamy, cool cheeses like Chèvre or another quintessential Southern favorite, pimento cheese. In New Orleans, fried green tomatoes are generally served with a spicy remoulade or a little Tabasco sauce.

*While botanically speaking, the tomato is a fruit, being that it is a pulpy plant that contains seeds, legally, it is a vegetable due to the 1893 U.S. Supreme Court ruling that made it subject to import taxes.


Yum

Thursday, July 4, 2013

America's Passion, Japanese Style

A majority of Americans celebrate our nation's day of independence with one of America's favorite pastimes: grilling. Most, however, do not realize that cooking over an open fire was integral to traditional Japanese life long before our country's foundation. Yakimono, literally meaning "grilled things,” is one of the focal points of Japanese cooking and one of the primary courses that comprise the multi-course kaiseki meal. Chicken remains the principal ingredient for yakitori, in fact, most old-school restaurants serve nothing else. But grilling isn't just for haute dining. The Japanese have traditionally cooked without an oven, relying instead on fire to caramelize and roast foods.

Most Japanese households prepared their meals on an irori, a square-shaped open fireplace which was built into the floor. These can still be found in houses with traditional hearths in the countryside, but in big cities like Tokyo, no one grills at home due to a lack of outdoor space for cooking.  Thus the grilling is left to professionals at yakitori restaurants, who specialize in grilled, skewered foods.

While you can achieve a reasonable facsimile of yakitori-style grilling on an American grill, a traditional Yakatori grill is small enough to use on the deck of an apartment or condo, is inexpensive to purchase, and can be used for small or large meals. Dom even commented recently that our newly purchased version will come in handy for cooking for two when the guys have other plans.

The maiden voyage of our newly-purchased Yakitori grill would involve skewered chicken thighs glazed with yakitori sauce. Surprisingly, it took much longer for the charcoal to get hot than a regular Weber grill, but when it did – Yowza! It was incredibly hot and stayed hot far longer than that same Weber grill.

4 boneless (about 1 ½ lbs.) chicken legs and thighs; skinned, boned and sliced
Salt
½ cup Yakitori Sauce

Cut the chicken with the grain into ½-inch-wide slices. Prepare the skewers by folding each slice in half (or thirds depending on length) and skewering. Make sure that the folded sides of the chicken slices are aligned, for aesthetic reasons. As you work, turn the skewer in a screwing motion to make it easier to pierce the meat.

Each skewer should hold about 5 chicken slices, covering about 4 inches of length of skewer. Based on our experience, we would highly recommend using flat bamboo skewers as opposed to the more common round variety. With the uneven weight of the skewered chicken, the round sticks tend to roll rather than stay in one place. When the skewers are ready, gently press down on each one with the heel of your hand to compact the meat and lightly season all sides with salt.

Preheat the grill to medium-hot. Line up the skewers in a row over the hot coals. Turn the skewers every minute or so as they brown. Use tongs to turn the skewers; be careful not to burn the chicken. Switch the skewers around if you notice some skewers browning faster than others. Shifting skewers cooking over hot spots to spots that are less hot will help ensure the chicken cooks evenly. The chicken will take about 8 minutes in total to grill.

So you may have noticed that we haven’t coated the chicken with the yakatori sauce yet. That is because the secret to the perfect yakitori is partially grilling the chicken before coating it with the sauce. In this way, you grill the chicken and then the sauce which produces a double-caramelized charred crust.


So when the chicken is lightly browned and seared, after about 6 minutes of cooking, brush the yakitori sauce on top. Continue grilling skewers for about 2 minutes more, turning about every 30 seconds and brushing on more sauce as needed. The chicken should turn a rich auburn brown. Transfer the skewers to a platter, and drizzle more sauce on top, and serve immediately.


Yum

Monday, July 1, 2013

Cannelloni-Style Baked Squash Blossoms

In the event that you are tired of hearing us wax obsessed about squash blossoms, too bad! We have another squash blossom extravagance to share. While we usually stuff, batter and fry the delicate flowers, we wanted to try a lighter recipe that was less labor intensive.

Squash blossoms provide the perfect vehicle for holding fillings similar to the pasta tubes used to make cannelloni or manicotti. So following that line of thinking, we decided to try a ricotta-based filling in the blossoms that could be baked by the dozen, rather than fried in batches of three or four.

We have also noticed recently that several traditional Italian recipes combine crab meat and mild cheeses like mozzarella or ricotta. Having a bit of crab meat left from a recent crab cake feast, we decided to add it to the filling. The resulting blossoms held their shape, the filling was firm yet creamy, the flavors were complimentary and not overpowering; in other words, well, amazing! Proving yet again that in the Romeo repertoire, squash blossoms reign supreme.


  • 12 squash blossoms
  • 1 cup whole milk ricotta cheese
  • ¼ cup grated Parmesan
  • 1 egg yolk
  • ¼ cup chopped fresh parsley
  • 2 tablespoons chives
  • ¼ teaspoon salt
  • ¼ teaspoon white pepper, freshly ground
  • ½ cup crabmeat (optional)
  • 2 eggs, beaten
  • ¾ cup breadcrumbs
Preheat the oven to 400 degrees F. Prepare the blossoms by removing the pollen-dusted stamen from each before stuffing. Line a baking sheet with parchment paper and set aside.

In a large mixing bowl, beat together ricotta, egg yolk, herbs, salt and pepper. Once combined, gently fold in the crab meat without breaking it up. Using a pastry bag fitted with a large pastry tip, pipe the filling into each blossom about 2/3 full.

Put the remaining 2 eggs in a bowl and whisk until frothy, and place the breadcrumbs in a separate bowl. Loosely twist the petals together to close before dipping each stuffed squash blossom in the egg, and then in the breadcrumbs before transferring to a parchment-lined baking sheet.


Bake the blossoms for 10 minutes, until lightly browned and crispy. Remove from the oven and allow to cool for a few minutes before serving to allow the centers to set up a bit.


Yum

Thursday, June 27, 2013

Doc's Chopped Challenge: Bonito-Crusted Steak & Oat Polenta with Candied Mango Agrodolce

In the past, we have been involved with several food challenges which we have enjoyed immensely. It is always exciting to experiment with new ingredients or to invent new recipes. When our neighbors at Doc Chey’s Noodle House announced that they would be hosting a “Chopped Challenge,” we jumped at the chance to participate!

Two weeks ago, I stopped by the restaurant to pick up the bag of secret ingredients and was greeted by “Doc” himself, who seemed intrigued to see what the challengers would come up with. Resisting the urge to open the bag on the spot, I took the goodies home to find five challenge components: beautifully marbled flank steak, quick oats, bonito flakes, candied mango, and Chinkiang vinegar. The flank steak and quick oats were familiar. We also recognized the bonito flakes (dried, fermented and smoked skipjack tuna) as the main ingredient of the Japanese soup base, dashi. The candied mango seemed self-explanatory, but a little nip revealed that not only was it coated in sugar, but in a hint of chili pepper as well. And lastly, the Chinkiang vinegar was a complete mystery. A little research revealed that it is a dark, smoky, slightly sweet black rice vinegar originating from the city of Zhenjiang, China.

Instructional Video - See how we did it!

Our assignment was to create an original recipe using all five of the ingredients. The first step was to decide what type of meal to make. Following the adage “go with what you know,” we immediately thought of Italian cuisine. The dishes were not as obvious as one might suppose since three of the five ingredients are used to make traditional Chinese and Japanese dishes. Initially, we were worried that the Asian ingredients would not complement the ethnic flavors and spices typical of Italian fare, but we were pleasantly surprised with the results. We hope you will be too!

Quick Oat Polenta
1/2 cup quick-cooking oats
1/2 cup cornmeal
2 cups  water
Salt to taste (1/2 to 1 teaspoon)
1 bay leaf (optional)
1 tablespoon unsalted butter
¼ cup freshly grated Parmesan (optional)

In a saucepan, combine quick oats, cornmeal, water and a pinch of salt. Add the bay leaf if you are using one. Set pan over medium-high heat and bring to a boil. You will immediately notice the mixture thickening.  Reduce the heat to the lowest setting and allow to steam while the agrodolce reduces and you prepare the flank steak.

Candied Mango Agrodolce
2 tablespoons candied mango, chopped
¼ cup Chinkiang (Black rice) vinegar
¼ cup water
2 tablespoons honey
Pinch of salt

Chop the candied mango into ¼-inch pieces and add to a saucepan with the black vinegar and the water. Heat over medium-high setting an add the honey and salt to the pan. Stir well to dissolve the honey in the vinegar. Reduce heat to medium and allow to simmer until the liquid is reduced by half and resembles a syrup.

Flank Steak
1 lb. flank steak
3 tablespoons bonito flakes
2 teaspoons freshly ground black pepper
1 teaspoon olive oil (for coating pan)

The first step is to grind the bonito flakes into a powder. We used a small coffee grinder, but a mortar and pestle or small food processor. Because the bonito flakes are quite salty with a mild, earthy fish flavor, it will take the place of salt in this recipe. For those who are still hesitant about putting fish flakes on steak, remember that Italians frequently use anchovies and anchovy paste as a seasoning in savory dishes.

Remove flank steak from packaging and rinse under cold water before patting dry with paper towels. Lay on a plate or cutting board and dust the top with the bonito powder and freshly ground black pepper.  You only need to season one side.

Heat a heavy pan or skillet over high heat and add oil. Swirl the oil to coat the bottom of the pan and heat until tiny wisps of smoke appear above the pan’s surface. Lay the flank steak seasoned side down in the hot pan. Do not be surprised by how loud the sizzling will be. Let the meat sear until the pan side is a crusty-brown. Depending on the thickness of the meat, this should take from 3 to 5 minutes. Turn the meat over and sear the second side until a crust forms. You should not need to cook the second side as long. When seared on both sides, remove the steak from the pan and set aside for 5 minutes to allow the juices to retreat.

While the steak rests, remove the cover from the polenta and check the consistency. If you are adding the Parmesan cheese, now is the time to add it and stir to combine. If the polenta is not cooked to your desired thickness, turn the heat up to medium and cook uncovered until done, stirring constantly. If the polenta is too thick, you can add some more water to thin it to your desired consistency. Drop a pat of butter in and stir in before serving.

This is also the time to double check your agrodolce. As with the polenta, turn up the heat if the sauce is too thin or add a splash of water if it is too thick.

Slice the steak on the bias. Ladle polenta on to serving plated and arrange sliced flank steak on plate. Drizzle the agrodolce sauce over the steak. We chose to serve the candied mango pieces (because they are delicious!), but this is optional. Serve immediately and enjoy!!


We would love to hear how you would have used the secret ingredients. Please comment below with your ideas!


Yum

Sunday, June 23, 2013

A Cheesemonger's Book Club Meeting

There is a book club for readers of every interest. Being an avid foodie, I tend to read food-related books, so you can envision my delight when I found the Atlanta Food Literature book club devoted to food memoirs, food science and food anthropology. For my first meeting, we read Cheesemonger by Gordon Edgar.

The prospect of a memoir from the world of artisanal cheeses might initially conjure visions of an insufferable snob waxing unreadable about the truffles of a lifetime, but happily, none of that is true of Cheesemonger. Instead, it is a funny, big-hearted crash course on the subject of cheese from barn to store to table, this book is also about other things: punk rock, political activism, and the distinctive bond between a grocery store and the community it's rooted in.

What makes Cheesemonger unique is that it's part memoir, part food reference. He weaves a great tale of how he went from a punk rocker and activist to being a "cheesemonger," all while peppering in his cheese knowledge and well-told anecdotes of loopy customers, shady salespeople, and urban foodies. Gritty, opinionated and pragmatic, Edgar discusses the politics of land trusts, the romance and reality of artisan cheese makers, the snobbery that keeps people from exploring cheese and the storytelling that has become a part of the foodie movement where every meal has a back story. Although there is specific information about cheese sprinkled throughout, along with a solid appendix in the back of the book, this is much more than a cheese primer.

And what would a book club be without the accompanying food? Given the topical nature of the monthly book, everyone brought cheese! Along with sliced almonds in honey and fresh grapes, our club’s cheese board included:
  • Pierre Robert – France; aged pasteurized cow’s milk cheese, very soft paste; creamy and faintly sour with a little “sting” at the end.
  • Hervé Mons St. Nuage Brie – France; triple-cream cow; decadent richness with a soft, whipped texture, stinky yet refined balance of flavors.
  • Fourme D’Ambert Lameme – France; pasteurized cow inoculated with Penicillium roqueforti; very mild bleu with creamy texture and a clean finish.
  • Cave-aged Gouda – Holland; pasteurized cow; sharp-caramel taste, almost smoky, but not quite with a little “crunch."
  • Scarmoza – Italy; pasteurized cow, stretched curd; elastic, dense and mild with less moisture than mozzarella.
  • Six-month-aged Manchego – Spain; unpasteurized sheep; firm and creamy with a slight piquancy.
  • Humboldt Fog – California; goat’s milk; edible mold and ash rind are is fairly tasteless; creamy, light, and mildly acidic with a stronger flavor near the rind.
  • Cowgirl Creamery Mt. Tam – California; unpasteurized cow, triple cream; pungent, smooth and buttery with hints of white mushroom.
  • Caly Road Creamery Little Epiphany – Georgia; Crottin-style aged cow; sharp and sour notes with a bright finish.
  • Rogue Oregon Bleu – Oregon; unpasteurized cow; clean, briny flavor, notes of sweet cream and veins of mellow, earthy blue molds.
Since the best book club meetings have a guest speaker or an interview with the author, we are including a video interview with the author, “Gordonzola” Edgar for your viewing pleasure.


And, lastly it wouldn’t be a book club without the questions. So please share with us your favorite cheese in the comments section.


Yum

Tuesday, June 18, 2013

The Long-Awaited Stuffed Squash Blossom Recipe

This is by far the most intimidating post that I have written to date because it is the most anticipated recipe by those who have sampled these transcendent indulgences. Capturing the precise nuances of the process has not been an easy endeavor. For 10 years, Dom has been perfecting his recipe and techniques for preparing fiori di zucca ripieni di formaggio. These mozzarella-and-anchovy-stuffed squash blossoms are our summer addiction. In fact, for the last three years we have planted 15-20 zucchini plants solely to harvest the blossoms with the actual zucchini squash crop as an added bonus.

Prior to transforming our backyard into a large garden plot, we would head to the Morningside Farmer’s Market during the pre-dawn hours on Saturdays to stand at the head of the line to fuel our squash blossom habit for the week. As it happens, one of these mornings Dom was asked by a fellow customer what he was planning to purchase, fully expecting that like everyone else in line, his response would be “Oh, the heirloom tomatoes, of course.” So when he answered, “squash blossoms,” he was met with an avalanche of chatter with one woman telling the line of customers within earshot that “there was a guy who painstakingly stuffed each blossom with cheese and sardines and then dipped them in a magic mixture to fry them.” The woman then turned to Dom and asked him what he was going to do with HIS blossoms, to which he replied, “Umm, I’m the ‘guy.’ And, they are stuffed with mozzarella and anchovies, not sardines,” at which point he stepped up to purchase every blossom in sight before walking home.

There are several secrets to making the fragile, radiantly-orange flowers into an other-worldly delicacy. The first trick is to harvest the male blossoms as soon after they open as humanly possible. Another is to remove the pollen-dusted stamen before stuffing the blossom. This is easiest to do when they are first picked. The blossoms should be immediately refrigerated because they begin to wilt very rapidly. If you will not be using the blossoms the same evening, consider stuffing them and placing them back in the refrigerator for the next day. Fresh blossoms seldom last more than two days.

1 1-lb. package of mozzarella cheese, whole-milk or part-skim
1 small can anchovies packed in oil
Tempura elixir (Below)
Oil for frying

To stuff the blossoms, cut the mozzarella into rectangular pieces (like Jenga blocks) that are about ¼-inch thick and roughly the same approximate length as the blossoms. Fresh mozzarella is not recommended for this recipe because the moisture level is too high.

Next, cut one or two of the anchovy fillets in half lengthwise and again into thirds or fourths. Place one of the anchovy slivers on the end of each block of cheese and place anchovy-side-down into each zucchini flower. Many people simply ignore the anchovy, however, they add a salty, earthy note that enhances the subtle squashy flavor of the blossoms. If you have anchovy-averse diners, make sure you designate the anchovy-free flowers from the anchovy-full ones as they are impossible to differentiate after frying. We suggest a toothpick in the stem, but this hasn't always been foolproof as the toothpick sometimes comes out during frying. (If you come up with a good suggestion, PLEASE include in the comments so we can benefit from your expertise!)

The blossoms can be stuffed in advance. Arrange in a single layer on a plate, cover with plastic wrap and refrigerate until ready to use.

Dom’s Magic Tempura Elixir
1 cup all-purpose flour
½ cup cornstarch
1 tablespoon baking powder
½ teaspoon salt
1 ½ cups VERY cold seltzer water

To make tempura mix, combine flour, cornstarch, baking powder, and salt in a mixing bowl. Whisk the dry ingredients together then stream in one cup of cold seltzer water and whisk lightly just to mix. You can use still water if seltzer is not available. The critical thing is that the water be COLD.

At this point check the consistency, it should be relatively thick like waffle batter (not as thick as cookie dough.) It is better for the batter to be thicker at this point because you may need to add some ice later that will thin the batter some. Use the remaining water to adjust the consistency as needed. Set the bowl of batter in the refrigerator or over a bowl of ice and let sit for 10 minutes or so.

While the batter rests, preheat a large heavy skillet over medium-high heat. Add the oil and heat until tiny wisps of smoke start to appear on the surface. Because olive oil has a very low smoking point, Dom uses a mixture of olive oil and canola oil. The olive imparts a nice flavor while the canola oil has a higher smoking point which gives the battered blossoms a less greasy, extremely crispy coating.

To batter the blossoms, remove the batter from the fridge and give it a good stir. Add a couple of ice cubes to ensure it is hyper-cold. Gently submerge a blossom in the batter and drag it through from stem to petal allowing any excess to drip back into the bowl. Using the same dragging motion, lay the battered blossom in the heated oil. Repeat this process laying battered blossoms at least an inch apart in the oil.

Keep an eye on the first blossom, occasionally peaking underneath with a pair of chopsticks, and turn when the cooked side is light brown; 2-3 minutes and cook until the bottom is light brown; another 2-3 minutes. Do this for each of the remaining blossoms.

Once cooked, drain blossoms on paper towels and sprinkle lightly with kosher or sea salt. (Dom actually dusts them with superfine popcorn salt.) Serve the ultra-crisp flowers piping hot as they tend to get soggy if they get too cool and do not reheat well; (this is an understatement). A chilled glass of crisp Chardonnay, Prosecco or even champagne is the perfect accompaniment.


Yum

Friday, June 14, 2013

Grilled Pecan Pie for Dad's Day

This post was originally written for inclusion on the Virginia-Highland Civic Association website on June 14, 2013:

Given all that our fathers have endured over the years; endless games of catch, Christmas Eves spent assembling a variety of gifts (with instructions in German), forced politeness toward dates with odd hairdos, and teaching us how to parallel park, Dad clearly deserves royal treatment. So on his day, let's give him what he really wants: the chance to relax, have fun and, to top it all off, enjoy a big juicy steak that he has grilled to his exact preference.

So what better Father’s Day gift than grilling tools or even better a new grill. And, what better place to shop for grills and accessories than our neighborhood Intown Hardware? With a selection of Weber grills and grilling equipment, there is something for every Dad. Intown Ace Hardware also carries the full line of Big Green Egg cookers and accessories. Resident grillmaster, Phillip Ramsey, is a proponent of the Big Green Egg for its versatility; “You can cook almost anything on an Egg. You have the ability to control the temperature far better than any other grill on the market.” An added benefit to cooking on a Big Green Egg is that you don’t heat up your kitchen on a hot summer day. His favorite example of the Egg’s flexibility is a grilled chocolate pecan pie:

  • 1 cup dark corn syrup
  • 3 large eggs, beaten
  • 5 tablespoons unsalted butter, melted
  • 1 cup firmly packed light brown sugar
  • ¼ cup bourbon
  • 2 tablespoons all-purpose flour
  • 1 cup semi-sweet chocolate chips
  • 1 cup chopped pecans
  • 1 (9-inch) pie shell

Set the Egg for indirect cooking with the Plate Setter, legs down. Preheat the BGE to 400°F.

Using a wooden spoon, mix the com syrup, eggs, butter, brown sugar, bourbon, and flour in a medium bowl until combined. Add the chocolate and pecans and blend well. Pour the filling into the pie shell.

Place the pie plate on the Plate Setter. Close the lid of the BGE and bake for 45 minutes, or until the filling is set and the pie is golden brown. Remove the pecan pie from the grill and let cool completely, and then refrigerate.


Don’t have a Big Green Egg? Don’t despair! You can bake the pie in a traditional oven for your Dad or you can try pecan hand-pies that can be cooked on a traditional grill.

For tips on selecting the perfect grilling equipment for Dad, head over to Intown Hardware and chat with Phillip or  visit the Ace Hardware’s online Guide to Grills and Outdoor Cooking.


Yum
Powered by Blogger.

footer social

ShareThis