Friday, May 18, 2012

Johnny Rockets Returns To Phipps Plaza

Johnny Rockets 2001
After Nic’s first visit to see Santa Claus, with packages in hand (and Nic in a backpack), Dom and I stopped at the Johnny Rockets in Phipps Plaza and ordered classic thick shakes and a plate of fries to nibble on, before continuing the holiday march. At eight months old, the fries were the perfect toddler nosh. Dom offered some of his chocolate milkshake to wash them down and that was the end of the beginning! Since that Christmas season, it has been our tradition to visit Santa, do some last minute shopping and stop at Johnny Rockets for lunch on the weekend before Christmas.

Johnny Rockets 2012
So you can imagine our excitement when we were invited to the preview Party at the newly reopened Johnny Rockets on the third floor of Atlanta’s Premiere Shopping Mall – Phipp’s Plaza. They join more than 80 specialty and anchor stores, an AMC movie theater, four other award-winning restaurants and the latest attraction; the new Legoland Discovery Center that opened in March 2012. The newly renovated Johnny Rockets, known for its classic diner theme is mere feet from their former location. The space features a 1,123-square-foot restaurant with its retro styling, red-and-white counter seating, brilliant neon lights, counter top jukeboxes, and a sparkling new seating area.

Franchise owner Steve Snyder, who also operates the Underground Atlanta and Georgia Aquarium Johnny Rockets locations, agrees, “With the new Legoland Discovery Center, the timing of our newest restaurant couldn't be better. Parents and children can enjoy our classic American food, timeless music, and family-friendly atmosphere before or after they experience all that the new Lego center has to offer."

Our evening started with a backpack filled with Johnny Rockets gear including a T-shirt, mousepad and coupon for a free meal on a return visit. We were seated in the new dining area with 1950s-style booths reminiscent of Arnold’s of Happy Days fame. We almost expected to see Richie Cunningham and his pals Potsie and Ralph Malph enjoying malteds in the next booth.

As French fries were served, we were all asked to join in a ketchup-art contest. Nic won another bag of JR goodies with his retro rocket design. While waiting for our food orders to be served, we were all challenged to a Johnny Rockets Trivia quiz and enjoyed the watching the wait staff  twist to the “Hippy Hippy Shake."

Then what we had been waiting for… Sonny ordered the “manly” bacon-cheese fries and a #12, Nic ordered the chili-cheese fries and Smoke House Double, and I had onions rings and a Philly Cheesesteak sandwich. Not only was the food just as delicious as we remembered, but quite plentiful. Sonny and I both needed go-boxes. We were offered samples of new milkshake flavors as we said our farewells. Nic and Sonny were already making plans to meet friends for burgers over the summer break. “I definitely see some milkshakes in my near future” added Sonny.

Now, for all those anxious to check out the new Johnny Rockets, make plans to head over to the Grand Reopening Celebration on Saturday, May 19th! Planned activities include menu sampling, prize giveaways, photo opportunities, and a host of other fun, interactive events designed to maximize guest engagement and officially welcome Johnny Rockets back to the Phipps Plaza shopping community.

Schedule of events:
11:00am: Free Johnny Rockets ketchup-smiley face t-shirt for first 100 Guests (One t-shirt per guest, while supplies last) to visit the new third floor restaurant!

2:00pm to 4:00pm: Dining with the Stars: Snap a photo with popular celebrity impersonators while you enjoy your meal in the new third floor dining area!

2:00pm to 5:00pm - Monarch Court in Phipps Plaza Mall:
  • Shake Sampling: Savor a sample of one of our delicious Shakes
  • Ketchup Art Station: Take a photo against our Johnny Rockets backdrop after completing your ketchup art masterpiece
  • Interactive iPad Quiz: Find out which Johnny Rockets hamburger most closely fits your personality.  Offer cards will be distributed to those who take the quiz!
  • Photo opportunities: Grab a photo with our Johnny Rockets Shake and “Johnny” (of “Johnny & the Rockets,” our newest characters for kids)
The new Johnny is open from 11:00am to 9:00pm, Monday through Saturday, and from 11:00am to 6:00pm on Sunday. With their signature hamburgers, American fries, shakes, classic music and dancing servers, you are sure to be entertained and most importantly full.
Johnny Rockets on Urbanspoon

Yum

Monday, May 14, 2012

Technique of the Week: Puréeing

Purée is a term used for cooked food that have been ground, pressed, blended, and/or strained to the consistency of a soft creamy paste or smooth, thick liquid. In 13th century France, the term meant “purified” or “refined.”

Purées can be made in a food processor or a blender, by forcing the food through a sieve or strainer, or with special equipment such as an immersion blender, potato masher or ricer. Purées are generally cooked to improve flavor and texture and reduce their water content. Vegetable purées thinned with water or stock are usually used as a base for soup or eaten as a side dish. Tomato purée, used for sauces and soups is made by removing seeds from blanched tomatoes and straining the pulp. Fruit purées are used to make sauces, mousses, soufflés and other preparations. Purées can also be made from anchovies, chicken livers, shrimp or salmon, and used as a filling for canapés.

Specific foods that have been puréed of are often known by their ingredients such as mashed potatoes or apple sauce. Purées overlap with other dishes with similar consistency, such as thick soups, custards and gravies although these terms often imply more complex recipes and cooking processes. The term “puree” is not commonly used for paste-like foods prepared from cereal flours, such as gruel or muesli; nor with oily nut pastes, such as peanut butter.

Some of our recipes that include the technique of puréeing:
     

Yum

Friday, May 11, 2012

Blissful Banana Bisque with Cinnamon Croutons for Mom

When I pregnant with our oldest, Dom and I decided that we wanted to know the gender of the baby (which was good thing because otherwise we wouldn’t have been able to bring the video of the ultrasound home with us!) I even remember the exact date (December 5, 1993) that I learned that I was carrying a baby boy. I also remember the hormonal meltdown that came shortly thereafter. How could I possibly be a good mother to a little boy? I had no brothers and knew nothing of cars, sports, or dinosaurs. Dom’s reassuring “you’ll learn” did nothing to quell the torrent.

But, he was right; I became an expert on pre-historic creatures of the Mesozaic era, became proficient (relatively speaking) in the nuances of football and have come to terms with the fact that I will never master the world of automotive identification, mechanics, or (according to Dom) operation (which was the source of much amusement for the clerks at Pep Boys the last time I went in to purchase replacement parts.)

Don’t get me wrong, I absolutely love being a “Boy Mom,” and would not trade for anything. I have become accustomed to low maintenance haircuts (C’mon Mom, it’s time to GO!), being called “dude,” testosterone-induced horse play and smelly athletic socks, but there are times when a gal needs some frilly, pink indulgences like a relaxing bubble bath, a tiny fuzzy kitten or a gorgeous, fragrant bouquet of star-gazer lilies.

The day after tomorrow represents the one day of the year when we Mom’s get to indulge our girly-sides and enjoy being a bit spoiled by our progeny. With that in mind, here is the perfect kid-friendly, no-cook recipe for spoiling Mom on her special day.

While the term “bisque” commonly refers to smooth, creamy, highly-seasoned soups made of crustaceans, it is also used to describe cream-based soups that do not contain seafood, in which pre-cooked ingredients are pureed.

Cold Banana Bisque:
  • 2 medium bananas, peeled and sliced
  • 1 cup half and half
  • ½ teaspoon sugar
  • Pinch of cinnamon

Combine peeled and sliced bananas, milk, and light cream and blend them thoroughly in a blender. Add sugar and a dash of cinnamon and blend the mixture again.

Chill the soup until ready to serve and garish with cinnamon croutons before surprising Mom with this special treat.

Simple Cinnamon Croutons:
Cut the crust off of several ½” slices of bread and toast in a toaster until golden brown. Brush lightly with melted butter and cut the toast into cubes. Place the toasted, buttered cubes in a mixing bowls and dust with cinnamon sugar. Toss cubes to fully coat and then add to the prepared banana bisque.


Yum

Thursday, May 10, 2012

Sub-Zero Wolf With Bourbon Peach Glacé

Former Atlanta Mayor Sam Massell, along with other city and county officials, were on hand to commemorate the ribbon cutting of the new Sub-Zero/Wolf Appliance showroom located on the second floor of the Terminus building on Thursday afternoon.

The expansive showcase area with its sprawling floor-to-ceiling windows was built to display the latest Sub-Zero and Wolf products to provide architects, designers and consumers an opportunity to view and test-drive their dream kitchens. The showroom which officially opens to the public on May 14th is equipped with a live demonstration kitchen as well as a large common area where guests can relax and enjoy the space in a non-retailing environment.
 
Sub-Zero, Inc., is the leading manufacturer of American-made luxury refrigeration, freezers and wine storage units, while Wolf Appliance, Inc. is the nation’s premier maker of ranges, ovens, cook tops, and grills. The 11,000-square-foot installation joins the list of other Sub-Zero and Wolf showroom spaces in New York and Chicago.

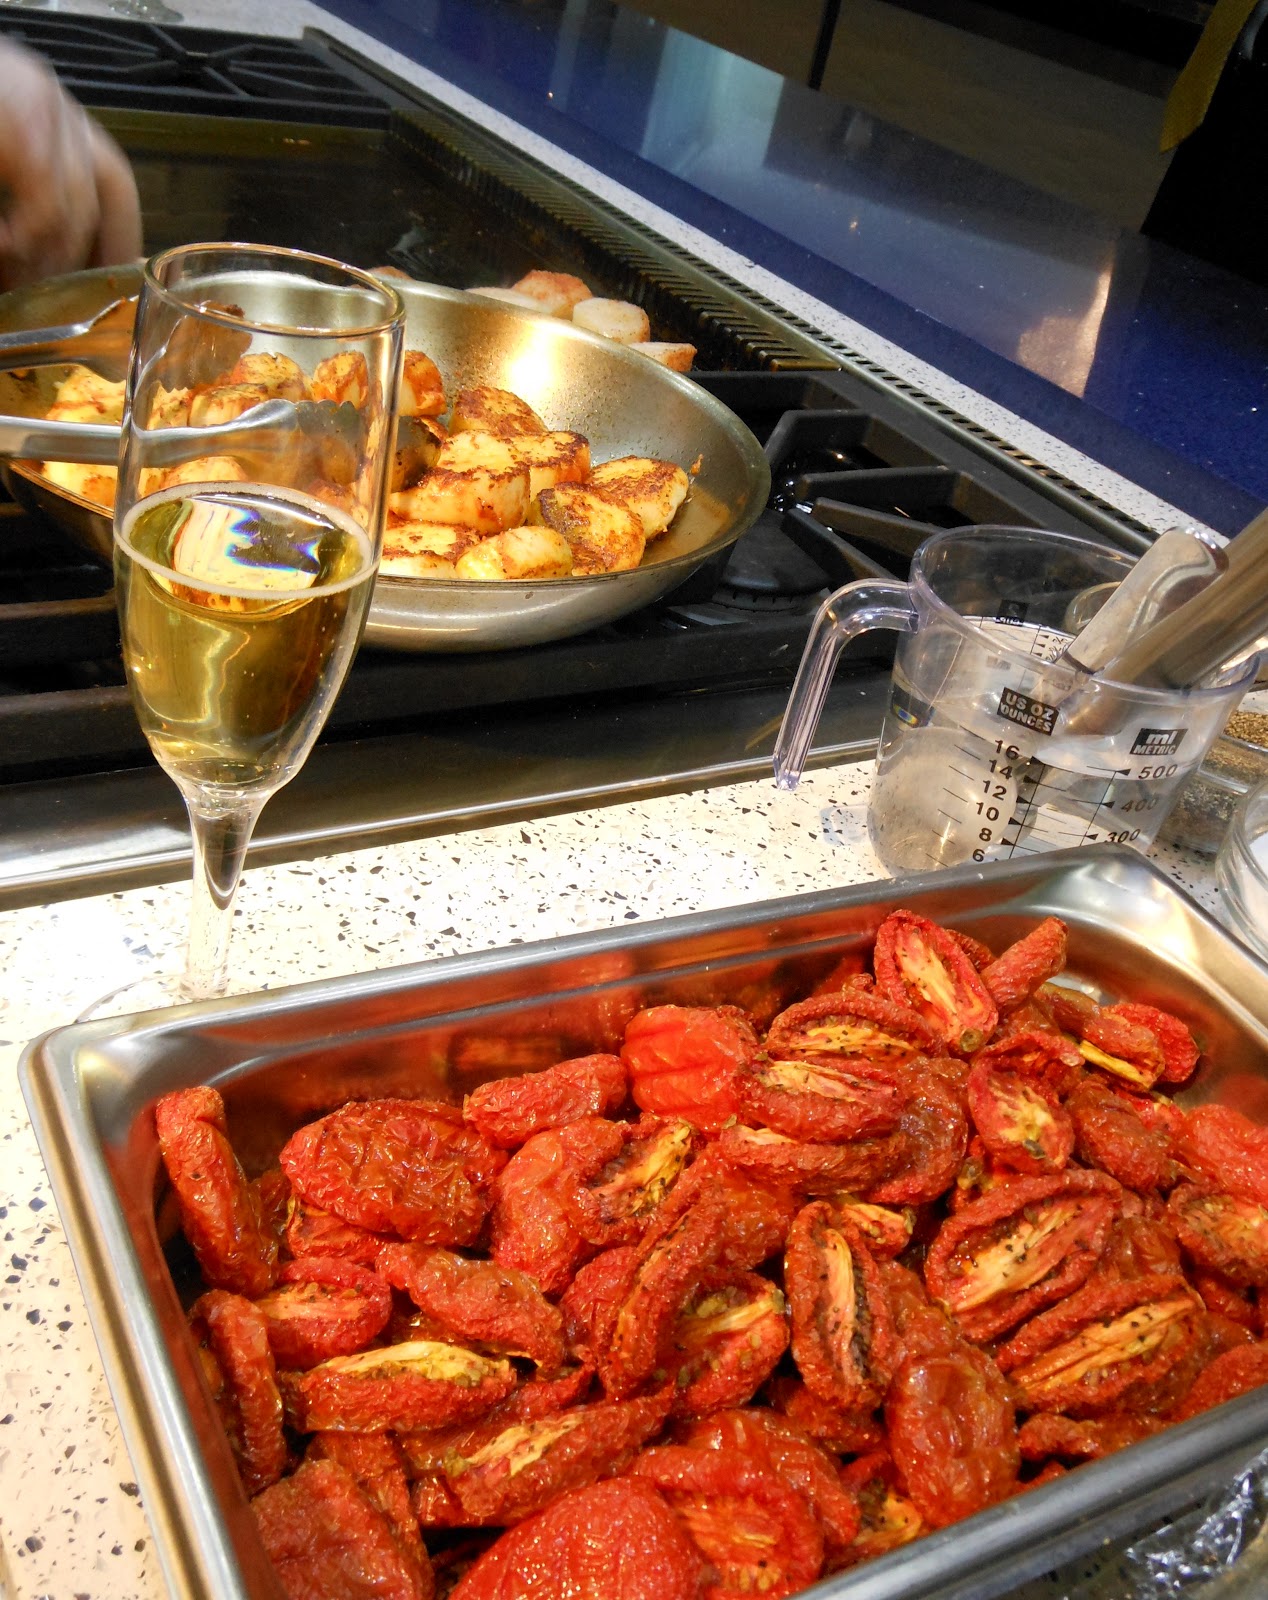
In addition to a tour of the sparkling $4 million facility, two corporate chefs were on hand preparing dishes for dazzled guests. Chef Will Ratley, who normally works in the Orlando area, prepared fontina lavender mashed potatoes with blackened day boat scallops garnished with a roasted corn pico de gallo plated an “overnight tomato” (which according to Chef Ratley can ONLY be made in a Wolf oven) and an apple cider gastrique. Chef George Laudun, who will serve as the Executive chef of the new Atlanta showroom, served Charleston-style grits topped with thinly sliced sweet-pepper-marinated venison and pork tenderloin and topped with a bourbon peach sauce and a fresh sage leaf.

Both tastings were stunning examples of the range of cooking techniques that can be accomplished with the equipment on hand in this new facility. While both chefs worked diligently to ensure the food was hot and beautifully presented, they took a few minutes to chat with me about their methods and recipes: the scallops were lightly coated in Cajun spices before being seared, the mashed potatoes were infused with lavender blossoms, the incredibly rich grits were simmered with heavy cream and the peach bourbon sauce was made by flambéing the peaches in bourbon and adding beef demi-glacé to make a thick gravy.

Bourbon Peach Glacé
1 tablespoon butter
1 large shallot, diced
¼ cup dried peaches, chopped
½ cup bourbon
1 cup veal demi-glacé
1 bay leaf
Salt and freshly ground black pepper to taste

Melt butter in a pre-heated medium saucepan over medium heat and sauté the onion for 2-3 minutes until translucent. Add peaches and then cook for another minute or so.

Turning the heat to high,  pull the pan 2 feet  away from open flame and add the bourbon.  Return the pan back to the flame and ignite the bourbon swirl the pan until the flame goes out to burn off alcohol. Add demi-glacé and bay leaf, bringing to a boil and simmering until the sauce thickens up enough to lightly coat the back of a spoon. Adjust the flavor with salt and pepper. Use as a chunky marmalade or puree and serve over grilled meat.

Join Chef George Laudun for an evening of food and fun with a side-dish of information at one of the monthly Wolf product demonstration and learn to cook with power, finesse, and surprising ease. To enjoy a gourmet meal and explore all of your appliance options, click here for event details and to register.


Yum

Tuesday, May 8, 2012

Technique of the Week: Slicing

Slicing is the cutting of food into thin, relatively broad slices. Slices may be used as they are or processed further to produce other specialty cuts such as rondelles, diagonals, obliques, and lozenges. Slicing may be accomplished by hand or machine. A mandolin slicer greatly increases both the speed and uniformity of slices. Mechanical slicers include rotary slicers (smaller versions of those found in a delicatessen) and food processors with a slicing attachment.

To slice ingredients with a knife, angle the tip of the knife down toward the cutting board and place the food underneath the knife tip. Hold the food in place with your opposite hand, keeping fingers curled so that only the knuckles come into contact with the side of the knife. Move the knife down and forward to slice through the food. Finish the cut with the heel of the knife flat against the cutting board. To continue with the second slicing stroke, raise the heel of the knife and pull the knife back, placing the food again toward the tip of the knife. Continue this motion, making sure that your slices are uniform and the desired thickness is achieved. This method produces what is known as a “straight slice.”

The second most common type of slice, the diagonal (also known as bias cutting) slice uses the same technique as straight slicing, but you hold the food at a 30-degree angle. This method is commonly used when preparing vegetables for Asian dishes. The diagonal slice results in a slightly larger slice and adds a bit of artistic flair to any meal.


Yum

Sunday, May 6, 2012

Pike's Garden-to-Table Soup and Fresh Salads

There are few things better than spending a beautiful Spring day playing in the dirt, but Pike Nurseries added to the fun by teaming up with Concentric Restaurant Group to create a one-of-a-kind, gardener-meets-foodie experience. This Garden to Table Chef Event was held at all Atlanta-area Pike Nurseries and featured presentations by gardening associates from Pike Nurseries on vegetables and herbs and how to plant them. These instructional sessions were followed by cooking demonstrations by local chefs from Concentrics Restaurants like One Midtown Kitchen, The Spence, and Room at Twelve.

At the Toco Hills location of Pike Nurseries, Ian Winslade, Executive Chef of Murphy’s in the Virginia-Highland neighborhood, made a quick fresh vegetable soup with handmade basil oil. His easy-going manner and charming British accent added to the allure as he casually chopped vegetables and explained how he makes his basil oil, “First I blanch the basil leaves, shocking them in ice water after a few minutes in the boiling water. Then I squeeze the leaves to remove as much water as I can and put them in a blender with olive oil and blend for 5 minutes until hot.” He is a huge proponent of “farm-to-table” cuisine as evidenced by his healthy and easy recipe for garden fresh vegetable soup.


Garden Vegetable Soup:
  • 1 tablespoon olive oil
  • 1 medium onion, diced
  • 2 carrots, finely diced
  • 1 stalk of celery, diced
  • 1 red bell pepper, diced
  • 1 Yukon Gold potato, diced
  • 1 yellow squash, diced
  • Sea salt
  • 1 quart vegetable or chicken stock
  • ½ cup white wine (heated and reduced by half)
  • Fresh beet leaves, Swiss chard, or kale, julienned
  • 1 bouquet garni
  • Basil oil for drizzling

Carefully wash and peel vegetables. Heat olive oil in a saucepan and begin sweating the onions, carrots, and celery. Then add potatoes, bell pepper and squash and simmer until tender.

Season lightly with salt and then pour in stock and infuse with an herb bouquet (fresh herbs tied with kitchen twine and steeped in the soup like a tea bag).

Simmer for about 10 minutes and then remove the herbs and add the white wine reduction stirring to mix well. Remove pan from heat and add julienned greens. Serve into soup bowls and drizzle lightly with basil oil and serve immediately.


Several miles away, Cameron Thompson, Executive Chef of popular Midtown restaurant TWO urban licks, was preparing his signature Yellow Tomato and Watermelon Salad at Pike Nurseries’ Lindbergh location. Even in the mid-day sun while wearing a black chef uniform, he looked as cool as his salad as he showed on-lookers how to emulsify a chili vinaigrette. He then demonstrated his technique for slicing and preparing fresh zucchini carpaccio. Both recipes are perfect for warm-weather antipasti or summer salads.


Zucchini Carpaccio:
3 medium zucchini, very thinly sliced
Kosher salt
Freshly ground black pepper
Olive oil for drizzling
Freshly-squeezed lemon juice
Parmesan-Reggiano, grated
Mint leaves, finely julienned

Using a mandolin, slice the zucchini squash into thin rounds. Place zucchini slices in a bowl and lightly salt and pepper, then drizzle with olive oil and fresh lemon juice. Mix very gently, just enough to coat each zucchini slice, and let sit for 5-10 minutes. Once softened, remove each slice and lay it gently on the serving plate, overlapping slightly. Sprinkle a bit of grated Parmesan over the zucchini and garnish with julienned mint leaves.

Chili Vinaigrette:
5 oz. Ancho chilies, toasted and ground
2/3 cup sugar
3 tablespoons rice wine vinegar
1 teaspoon Dijon mustard
1 teaspoon salt
2/3 cup vegetable oil
Up to 1 cup water

Place chili pepper and sugar in a blender and blend together. Add vinegar, mustard and salt with a ¼ cup of the water and blend to mix. With the blender running slowly add oil and another ½ cup of the water until fully incorporated. Check the dressing; it should have the consistency of Heinz 57 sauce. If the dressing is too thick, slowly add the remaining water until the right consistency is achieved.

Tomato and Watermelon Salad with Chili Vinaigrette:
2 cup yellow tomato, diced
2 cup watermelon, diced
Chili vinaigrette (recipe above)
¼ cup feta cheese, crumbled
Fresh mint leaves, julienned

Place diced tomatoes and watermelon in a mixing bowl, then add ½ cup of chili vinaigrette and toss to coat. Add more dressing as needed (or desired) to coat well. Top the salad with crumbled feta cheese and julienned mint leaves.

With these amazing recipes it should be easy to enjoy the fresh fruits of Spring!
Two Urban Licks on Urbanspoon


Yum

Thursday, May 3, 2012

Derby Day Lamb with Mint Julep Gastrique

The Kentucky Derby is the annual Grade I stakes race for three-year-old Thoroughbred horses, held annually in Louisville, Kentucky on the first Saturday each May. A number of traditions play a large role in the Derby atmosphere especially the mint julep; an iced drink consisting of simple syrup, mint and bourbon. Kentucky burgoo (a variation of the traditional French cassoulet,) is also a popular Kentucky dish during Derby week.

The mint julep originated in the southern United States, probably during the eighteenth century. The first mention of a mint julep in print came in a book by John Davis published in London in 1803, where it was described as "a dram of spirituous liquor that has mint steeped in it, taken by Virginians of a morning.” The term 'julep' is generally defined as a sweet drink, particularly one used as a vehicle for medicine. U.S. Senator Henry Clay of Kentucky introduced the drink to Washington, D.C., at the Round Robin Bar in the illustrious Willard Hotel during his residence in the city. It later became the official drink of Churchill Downs in association with the Kentucky Derby in 1938.

Gastrique is a sweet and sour sauce that also begins with a simple syrup which is caramelized, deglazed with vinegar (white, cider, red wine or balsamic dependent on your flavor profile) and flavored with herbs, spices, berries or fruit juices. The flavoring of a gastrique should be based on the protein it is being served with. For example, a rich blackberry gastrique would enhance fattier red meats like duck or beef, while a more delicate herbed citrus sauce would complement fish or chicken dishes. The flavor combination of mint and bourbon are the perfect accompaniment to one of our favorite meals: grilled lamb.

So whether you enjoy an icy liquid mint julep or lamb drizzled with our mint julep gastrique to celebrate this year’s 138th running of the “Run for the Roses,” we hope you’ll be cheering “I’ll Have Another!”

Mint Julep Gastrique
  • ½ cup sugar
  • 2 tablespoons water
  • ½ cup white vinegar
  • Pinch salt
  • 30 (about ½ cup) fresh mint leaves, torn
  • 1 tablespoon bourbon

Mix sugar and water in the bottom of a medium, heavy-bottomed saucepan; the mixture should resemble wet sand. Heat the sugar mixture over medium-high heat until the sugar granules completely dissolve and bubbles form. The tip of a spoon pulled through the mixture should leave a trail.

Watch as the sugar begins to caramelize. It will turn blonde at first. If you plan on making a delicate gastrique to pair veal or fish stop at this stage. For a more concentrated taste, continue to let the sugar caramelize to a deep, golden color; the darker the caramelization, the deeper the flavor. Swirl the pan gently to help it cook evenly. Remember not to use non-heat-proof utensils or to get the molten sugar on your skin because it is extremely hot.

When you've reached the desired level of caramelization, add the vinegar (in equal proportion to the sugar). This step can be intimidating, as the sugar mixture is very hot. To keep the splattering to a minimum, pour the vinegar into the caramel quickly rather than adding it little by little. It will make a loud sizzling sound and left off a good deal vinegary steam.

The sugar will immediately coagulate at the bottom of the pan, this is normal even though it looks like a mess. Continue to cook the sauce until the sugar re-dissolves, taking the mixture back to a liquid state. This is your basic gastrique which will continue to caramelize as it simmers.

This is the stage to add the torn mint leaves and allow to simmer for about 10 minutes. Once the gastrique has reached a thick syrup, remove from the heat. Strain the syrup through a sieve to remove mint leaves and add one teaspoon of bourbon. Remember the sauce will continue to thicken as it cools.

Drizzle the mint julep gastrique over sliced lamb and serve immediately. The gastrique can be made ahead and reheated just before serving. Five to one odds you’ll have a winner dinner!


Originally published May 3, 2012

Yum

Wednesday, May 2, 2012

Technique of the Week: Caramelizing

Caramelization is the process of browning of sugars. This is a culinary phenomenon that occurs when carbohydrates like sugar are heated to temperatures of 300°F or higher, volatile chemicals are released which produce a characteristic brown color and caramel flavor. Caramelization is related to the Maillard reaction, where proteins in meat turn brown when heated and like the Maillard reaction, caramelization is a type of non-enzymatic browning. Other examples of caramelization include toasted bread and pale white potatoes turned into crispy, golden French fries.

Caramelizing sugar for flans, sauces or ice cream topping is relatively easy.  The technique varies on what you're using the caramel for, so care should be taken to note in your recipe what kind of caramel is called for. For example, the caramel needed for caramel candies is much less cooked than what's needed for spun sugar.

Always caramelize sugar in small batches, starting with no more than 2 cups of sugar. The recipe below is the correct amount for making flan. It is important to keep a close watch on the pan as the caramel cooks. Remember not to use non-heat-proof utensils or to get the molten sugar on your skin because it gets extremely hot.

1 cup granulated sugar
2 tablespoons water
Drop of fresh-squeezed lemon juice, optional

Combine sugar, water, and drop of lemon juice (the lemon juice keeps the mixture from hardening) in the bottom of a medium, heavy-bottomed saucepan; the mixture should resemble wet sand. Heat the sugar mixture over low-medium heat until the sugar granules completely dissolve and bubbles form. We find that by maintaining a lower heat gives control over the caramelizing process, since it is really easy to burn. Sugar melts at about 320°F and will turn to a clear liquid at that temperature.

After sugar dissolves and syrup is simmering, cook for approximately 8 to 10 minutes, without stirring. At this point, the tip of a spoon pulled through the mixture should leave a trail. Bear in mind, boiling times will vary according to different stove tops and other factors so keep a close watch.


The liquid will turn blonde at first. Swirl the pan gently to distribute color and help sugar cook evenly. As the sugar continues to caramelize, the color will go from golden to a deeper light brown; the darker the caramelization, the deeper the flavor. Watch the changing of the color carefully, it can go past the light brown stage quickly and burn. If it is close close to being done and you are scared of burning it, remove it from the heat and it will continue to cook due to the residual heat.

Unless your recipe tells you to do otherwise, remove pan from the heat and set aside and let cool. To stop the caramel from cooking, some recipes have you dip the bottom if the pot in ice water for 10 seconds.

For making a caramel sauce, use care when adding cream or other liquid, this should be done very carefully, as the liquid will hiss and sputter. Add the liquid at the edge of the pan, slowly, and stirring constantly as it is added.

If you are using the caramel for flan, immediately remove the pan from the heat and pour into individual ramekins or custard dishes, coating the bottoms evenly (tilt the dishes so that the caramel coats the bottom).


Yum

Tuesday, May 1, 2012

Soul Mate Squid-Ink Pasta with Parsnips & Pancetta

Guest Post by Foodie PenPal, Kristina Scaviola

Food memories are powerful.  My husband and I have built many memories around food, and perhaps one of the more pivotal moments happened when I was a freshman in college.

I decided I wanted to do something special for Mike as a Christmas present; we both watched the food channel, but as college students we were limited in our gastronomical adventures. Time, money, and lack of real kitchens kept most of our food exploration to limited restaurant experiences.  So I sat in my wooden chair, in my tiny shared dorm room, wracking my brain.  Mike’s favorite chef was Mario Batali, so I began by ordering the Babbo cookbook. Unsatisfied, I went to the Babbo website to see just what type of commitment it would be to eat there.  I began to read reviews that said that to secure a reservation that you had to call exactly one month prior to the date that you desired, and repeatedly dial until you could speak to a person.  I picked a reasonable date over our Christmas break from college, sat down, and through my lunch hour from the moment the reservation line opened dialed again, and again, and again, until I secured our reservation:  6:15 p.m. on January 4th, 2003.

This was a revelatory dinner to say the least.  A 7-course pasta tasting menu, at Babbo, at age  18.  We ate many signature pastas:  Angel’s pyramids, boar ragu, sweet breads- but perhaps the most memorable, due to color and our relative lack of dining experience was the squid ink tagliatelle with parsnip coins and pancetta: simple, startling in color, yet comforting flavor.  This dish has been with us culinarily for many years.

It debuted at our very first dinner party, given in Mike’s college apartment in 2004.  The reaction of our college friends to the deep black pasta with the caramelized parsnips, the porkiness of the pancetta, and a luxurious sprinkling of real Parmigiano was priceless.
 
The best part?  The dish is incredibly simple to make.  We spent much of 2003-2004 cooking through the Babbo cookbook- learning that a few simple ingredients, combined with care, can create an awesome experience.  During this time we made our first Bolognese, duck ragu, homemade pasta, an intense lasagna (still an all-day production) and fed several people for several days with each experiment!

We now make our own squid ink pasta.  Married, with a kitchen-aid and a pasta rolling attachment, a house and real kitchen, things are a little easier than the various college apartments we both lived in.  What follows are my adaptations of Mario Batali’s recipes for both squid ink pasta and the accompanying parsnips and pancetta.

Squid Ink Pasta
3 ½-4 cups of flour (or, ½ semolina and ½ flour-  Semolina is slightly more difficult to work with, but very rewarding)
4 eggs
2 packets (or 2 tablespoons) of Squid Ink  (available on Amazon.com)

Method:
On a large, clean work surface create a mound with the flour.  In the center of the mound create a well for the eggs; crack the eggs into the center of the well.  Add the squid ink, and with a fork break up the eggs as if you were preparing scrambled eggs.  As you are breaking up the yokes, begin to draw in some of the flour from the sides of the well.  You may have egg that runs over the side, volcano-style- this is OK, simply keep working in the flour.  You will reach a point where the fork becomes pointless- this is when you switch to your clean (ring-less) hands.  Do not try to work every last bit of flour in; the crunchy flour will not add anything to the texture of your pasta.  When it forms dough, begin to knead the pasta.  Batali’s recipe calls for 6 minutes of kneading;  I find that there is a certain change that happens when the glutens have fully developed:  the dough will be smooth and elastic, and almost have a snap to it.  If you are unsure if it has been kneaded enough, kneed it some more.  The pasta’s final texture is quite dependent on this step.

Allow the dough to rest, covered, for at least 30 minutes at room temperature. After resting, you can begin rolling the pasta.  This is honestly easiest if you have a pasta rolling apparatus; but if you don’t, you can use a rolling pin and hand-roll all of the pasta.  If you are choosing this method, I would recruit a partner, since your arms will be dead by the end!  To do this, mimic the below method; folding the pasta over and progressively rolling it thinner and thinner.

Machine method:
Cut the dough into usable chunks. Beginning on the largest setting, send a chunk of the dough through the machine several times, folding the pasta over on itself before putting it back through the machine (at least 6 passes at the thickest setting, maybe more depending on the texture- semolina dough often needs more passes).  Bump the machine to the next setting, repeating the process.

Continue bumping one setting at a time, folding the pasta over with each pass.  As the dough gets thinner, less passes through the machine become necessary; at setting 4 on my kitchen-aid the pasta usually only needs to go through 2-3x.  Do not be discouraged by ripping or tearing; simply send the pasta through again.  This is not pie dough where you are afraid to work it-  the more the flour is worked, the more you develop the glutens.  Repeat this process with the rest of your dough chunks.

At this point you can cut the pasta yourself, or send it through pasta cutters if you have them.  Be ready with areas all over the kitchen for drying the pasta strands-  we have a nice rack made of dowels that helps this; if you do not have  a rack to dry the pasta on, paparadelle is a nice alternative to tagliatelle and requires less drying room!

Squid Ink Pasta with Parsnips and Pancetta (adapted from Mario Batali’s Babbo cookbook)
~serves 4 generously


  • ¼ lb. Pancetta or slab bacon, cut into ½ inch cubes
  • 1 tablespoon unsalted butter
  • ½ lb. parsnips, cut thinly into half- moon shapes. (The original recipe calls for ½" thickness, but we have found that 1/8” - 1/4” works best.)
  • Fresh cracked pepper
  • ¼ cup flat leaf parsley, roughly cut or torn
  • Parmigiano-Reggiano, or Pecorino Romano, for serving
  • 1 lb. of fresh squid ink pasta, cut into tagliatelle (Dry squid ink pasta is available at gourmet food stores and Amazon.com and is a perfectly acceptable substitution! Cook the pasta according to package directions)

Method:
1.    Bring at least 6 quarts of heavily salted water to a boil.

2.    In your largest sauté pan (at least 12-14 inches) cook the pancetta (or bacon) over relatively high heat until all of the fat has been rendered out and you have been left with browned, crisp cubes of pancetta.  Remove the pancetta with a slotted spoon and place on a plate lined with a paper towel.  Set aside.

3.    Add the butter to the rendered fat; when it has melted add the parsnips to the pan.  Over moderately high heat, and without shaking or stirring the pan, caramelize the parsnips in the fat.  If you stir and shake the pan too much the parsnips will cook, but the sugars will not form the  all-important crusty caramel layer that is vital to this dish.  The recipe says this takes 5-6 minutes; I have found it can take double this time due to a lack of copper core pans and BTUs on our stove!

4.    Cook the tagliatelle in the boiling water until al dente.  Reserve some of the cooking water (I usually pull out about a cup just before draining the pasta). Fresh pasta only takes 2 or so minutes; be ready with a spider or fork to fish the pasta out of the water, or drain the pasta into a large colander in the sink. 

5.    Add the hot pasta directly to the sauté pan, and toss the hot pasta with the parsnips over high heat.  Add the pancetta back to the pan, and toss some more. If the pasta appears too dry, add a little of the pasta cooking liquid at a time.

6.    Taste a little of the pasta; season with a little salt (keeping in mind that you will be adding salty cheese, so do not overdo it), and course fresh cracked pepper.

7.    Divide among 4 bowls or plates, topping with freshly grated cheese and parsley.

8.    Enjoy!

Wine recommendation:  This is a bacon-y dish, with some sweetness from the parsnips- I find that it pairs very well with a white wine that is slightly off-dry such as a Viognier or Pouilly-Fuisse.  Look for a wine with decent minerality and a muscat nose for the full effect!


Yum

Monday, April 30, 2012

Happy Reveal Day! Goodies Galore!

Last month while drooling over some of our favorite food blogger friends’ creations, I stumbled upon Foodie Penpals hosted by Lindsay at  The Lean Green Bean. Never being one to turn down the opportunity to try new food items, I immediately signed up.

The Lean Green BeanEarlier in the month, I received the name of the pen pal I would be mailing goodies to, while somewhere in the foodie universe someone had gotten my name (kind of like a Secret Santa in April!) I couldn’t wait to go shopping! A day after I sent out my box, one arrived in the mail addressed to me.

A few days before our goodie box arrived, I received and email from my Foodie Penpal Kristina letting me know the box was on the way and an added bonus – a guest blog post explaining one the items she had included in the box. Not being one for delayed gratification, it was with great torture that I waited until the box arrived to read the post she had sent.

It is such a beautiful story and one very similar to ours. Kristina’s writing style is akin to mine as well. I must admit I got a little misty eyed reading the post (which I will share tomorrow for your reading pleasure!).

Oh! I suppose you would like to know what Kristina sent us… Without further ado, our box included a bottle of honey from Jarek Apiary for which Sonny called dibs.  He uses honey on everything, especially his toasted waffle each morning for breakfast because he doesn't prefer maple syrup.

The next item was Dr. Gonzo’s “Garlicmash No. 4;” a pulpy concoction of pureed garlic, olive oil, cayenne pepper, salt and sugar. We can't wait to dive into that jar! We use copious amounts of garlic in all of our food and this will certainly be a huge hit.

It was truly as though Kristina had a crystal ball. All the items she sent are household favorites including her homemade specialty of spicy caramel popcorn. All four of us adore caramel corn in any form (kettle corn, Fiddle Faddle, Cracker Jack), so as you can well imagine, the two Ziploc bags-full disappeared in record time.

And the pièce de résistance, a four-pack of squid ink. Yes, squid ink! Now I know what you are thinking; why would anyone be so excited about receiving squid ink in the mail?

When Dom and I were dating, we would go to this quaint, romantic little Italian restaurant that has since gone out of business called Lindy's Café in Atlanta’s Peachtree Hills neighborhood. They made squid ink pasta with calamari that was his favorite dish. We have always wanted to try to make it at home. As most of our readers know, we frequently make our own pasta and have always wanted to try to make fresh squid ink pasta. We have been searching for squid ink in a package designed for home use, but have only seen it in expensive, industrial-sized amounts. We are thrilled to have some to try and to know where we can get more!! We will definitely share the results when we have the opportunity to try it out.

Do you want to be a Foodie Penpal? You don't even have to be a blogger - just someone who loves food and trying new treats! Visit Lindsay’s blog for program details and to sign-up. And stay-tuned for next month’s Reveal Day!


Yum

Tuesday, April 24, 2012

Technique of the Week: Tossing

To mix the ingredients of a recipe, such as salads or pasta, by using a light lifting and fluffing gesture. The food is gently turned over and mixed together enabling sauces and food items to be seasoned with the flavors of each item without breaking them apart.

Tossing can also refer to the technique of pan tossing in which the ingredients of a sauté pan are quickly mixed in a very efficient action without the use of utensils. This basic culinary technique involves using your wrist to flick ingredients into the air and change the placement of them within a pan. This method is used to combine, coat and distribute ingredients, such as vegetables, spices and sauce. Tossing ensures that the contents of the pan cook evenly and do not stick to the bottom. Tossing saves time and reduces clean-up by eliminating the need for cooking utensils.

To achieve a good toss, grip the handle of the pan and shake the ingredients back and forth to prevent sticking. Holding the handle of the pan, lift the pan about 3 inches above the flame. Tilt the pan slightly toward you and flick your wrist in an upward motion while pulling your arm backward to toss the ingredients to the opposite side of the pan. This gently propels the ingredients into the air and back into the pan. The ingredients in the pan should be tossed every 2 to 3 minutes to provide even cooking of the dish.

Editor's Note: Tossing has several other meanings with regard to consumption, predominantly as it relates to refreshing adult beverages. It can also refer to the inevitable bodily reaction when too many adult beverages have been "tossed" back.


Yum

Thursday, April 19, 2012

Epically Hectic Pepperoni Noodles

Hectic is a relative term. When our sons were toddlers, I would grouse about being busy with laundry, preschool and play dates. Once they were school age, the pace increased with bus schedules, homework, soccer practices and games, Sunday school, and more play dates. Regardless of how eventful our lives were, we made every attempt to eat dinner as a family every night. As the guys entered middle school, life got even more frantic with more difficult homework, karate practice 4 days a week, Debate and student government meetings, intramural sports, church activities and young ladies with blooming figures, (and believe it or not we also have activities outside our parenting duties.)

I can recall a particularly bad day when the boys were very little; my next-door-neighbor gave some sage advice. She said, “Don’t worry; this is just a phase which will be over soon. The next phase may be better or it may be worse, but at least it will be different.” We have reminded ourselves of that guidance many times over the years, but it did nothing to prepare us for the rigors of high school (and we’re not referring to the curriculum which is rigorous as well.)

Both of our guys are now in high school with REAL homework, high stakes tests, track practice every day, Latin club, Art club, tutorials, driving lessons, marathon track meets, Confirmation classes, SAT prep, AP study groups, research papers, Prom drama, and teenage angst. As you can imagine, our evening meals together can be quite difficult to arrange. On those nights when a quick supper is in order, the guys have only one request: pepperoni noodles.

There is nothing fancy about the title nor is there anything fancy about the dish; they simply love it. The first time I made this spicy pasta was when the boys were about three and five years old. On a frantic evening with little in the pantry, I fashioned a meal out of a pound of linguine, some diced pepperoni and Parmesan cheese. Little did I know that it would become a mainstay of their diets for the rest of their lives. My sister even commented recently, "you were making pepperoni noodles the last time I called, and I think the time before that." What can I say? It's been hectic around here! Coincidentally, it is the one meal that I know both will be able to duplicate once they are on their own.

  • 1 lb. pasta
  • 2-3 tablespoons olive oil
  • 1 clove of garlic, minced
  • ½ cup pepperoni, finely diced
  • 1 mound of Parmesan cheese, grated

In a sauté pan, heat olive oil over medium heat and add minced garlic and cook until lightly brown. Do not overcook garlic or it will taste bitter and ruin the flavor of the oil. Add diced pepperoni and toss around the pan to fully coat with olive oil and to heat the pepperoni through. You do not need to cook the pepperoni for more than a few minutes as it is already fully cured.

Cook pasta in a large pot of boiling salted water which should take about 10-12 minutes. Drain pasta in a colander, remembering to save some of pasta water to help hydrate the pasta if needed. Transfer the cooked pasta to a mixing bowl.

Picture taken pre-cheese and fork to protect all limbs & appendages!
Once the pepperoni is heated (and the olive oil is a fluorescent orange color,) pour over the cooked pasta and toss thoroughly to ensure noodles are fully coated with the flavorful (disturbing-looking) oil. Serve in large bowls with generous amounts of grated Parmesan cheese and be sure to remove your hands quickly else they get gobbled in the ensuing eating frenzy.


Yum

Tuesday, April 17, 2012

Technique of the Week: Simmering

Simmering is a food preparation technique in which foods are cooked in hot liquids kept at or just below the normal 212°F boiling point of water. Simmering provides for a milder action than boiling to prevent foods from breaking apart or toughening up. Simmering is usually a rapid and efficient method of cooking. The technique of simmering is frequently used when making stocks or soups, and starchy items like potatoes or pastas. Food that has simmered in milk or cream instead of water is referred to as creamed. Allowing sauces and soups to simmer even for a short time helps flavors to fully unite before being served.

To keep a pot simmering, bring a pot of liquid to a boil and then reduce the heat to a point where the formation of steam bubbles has almost completely stopped. You should see minuscule bubbles forming and gently rising to the surface of the water, but the water is not yet at a full rolling boil. This typically occurs at a water temperature between 180°F to 205°F. Bear in mind that if you simmer with a lid on the pan, the temperature inside the pan will rise and a simmer can very easily turn into a boil.

Tips and tricks:

  • Your liquid is at a simmer when small bubbles appear (especially around the edges of the pan) but not at a full, rolling boil.
  • Simmering is a good application for making soups as it cooks items slowly which allows flavors to develop without over-cooking, especially proteins.
  • Simmering the liquid for a long period of time breaks down tough fibrous textures such as large, tougher cuts of meat and vegetables like collards or mustard greens.
  • Season with salt after the ingredients are already cooked through and the liquid has reduced to the desired thickness. Seasoning at the beginning is recommended only for dried herbs and spices or add a sachet. Salt and can become overwhelming when the liquid reduces and is difficult to correct after the fact.


Yum

Friday, April 13, 2012

At The Beach With Elizabeth David & Tunny Fish

As mentioned in a recent post, we spent a week on Amelia Island during this year’s Spring Break. While the guys were off fishing, I spent time walking along the shore and enjoying some quiet beach reading. My usual reading stock is comprised of innocuous formulaic crime novels, but on a whim I had grabbed a copy of Elizabeth David’s Italian Food which had been unceremoniously dismissed by hubby because he felt the tone was too patronizing and imperious.

Admittedly, the book is not an easy read. The tenor is one of condescension and disdain, but given her vast experiences in the world of Mediterranean and Arabian cuisine during a time when many of the ingredients she used in her recipes were hardly known in Britain, it is understandable that she would be frustrated at the lack of available ingredients. The book was published in 1954 when there was still war-time rationing in England and most readers could only dream of trying out the crisply instructive recipes. In fact, during that time, olive oil was sold in pharmacies as a treatment for ear maladies. Garlic, eggplant, zucchini and basil were unheard of amid the austerity of 1950s Britain.

Elizabeth David was the British equivalent to America’s Julia Child and her influence went beyond mere ingredients to include her Provencal-style kitchen and its “newfangled” equipment: cast iron pans, terracotta and earthenware pots, peasant pottery bowls of eggs, and artfully arranged fruit and vegetables. Until that point, kitchens had been purely utilitarian and hidden from view. So great was her influence that Le Creuset introduced its cast-iron pans in “Gauloise blue” inspired by the color of her favorite brand of cigarettes. She also changed the way food was depicted in magazines. Mashed potatoes no longer masqueraded as ice-cream. The photographs were taken of the actual food she had cooked; not the food stylists’ replications.

Unlike the cookbook formats we have become accustomed to, each section of the book begins with an essay sometimes with definitions and descriptions and other times with history or opinions which are followed by collections of recipes on a particular topic. With 24 recipes devoted to “tunny fish,” it is clear that this was Ms. David’s preferred ingredient. Tunny fish referred to canned “tuna” or tonno, which prior to industry regulation, could have been any of several varieties of true tuna or tuna-related species. This recipe for a rolled tuna loaf was the most intriguing of the collection.

POLPETTONE DI TONNO (Polpettone of Tunny Fish)

2 small tins of tunny fish of 150 grammes (approx. 7 oz.) each, 2 eggs, a tablespoonful of capers, pepper.

Put the contents of the tins of tunny fish through the food mill with the oil from the tin, or mash the fish if it is easier. Beat in the 2 eggs, season with pepper (and salt if necessary, but it probably won’t be), and stir in the capers so that they are evenly distributed. On a floured board form the mixture into a fat sausage.

Flour a cloth or a piece of butter muslin (doubled), roll the sausage up in it, and tie it with string, as salame sausages are tied, but not too tightly. Lower the marcel into a pan of boiling water. The pan must be large enough to accommodate the sausage lengthwise, or the size of the sausage must be adjusted to the size of the pan. Simmer gently for an hour or a little more. Unwrap the polpettone only when it is cold. Serve on a long dish, cut into thin slices. A potato salad makes quite a good accompaniment.


Tasting Notes:
This tuna loaf was nothing like I had imagined. Once sliced, it looked watery and grainy, so I drizzled some olive oil over the top and added a few capers. Even with the addition of olive oil the end result was watery and very fishy. Perhaps post-war standards were a bit lower than they are today or tunny fish was better in those days, but I will not be adding this recipe to the family recipe cache.


Yum

Monday, April 9, 2012

Technique of the Week: Deveining

Generally speaking, deveining is the process of removing veins from meat. It can also refer to the removal of fibrous or inedible “veins” of vegetables such as peppers or celery. Nikkur is the procedure of removing the sciatic nerve and any forbidden blood vessels and fats from the hindquarters of slaughtered animals to make meat kosher. In Yiddish, this process is called “traibering.”

Goose or duck livers (foie gras) also have veins that are classically removed prior to cooking although some chefs prefer not to devein the foie gras, as the veins can help preserve the integrity of the fatty liver. To remove the veins, unwrap the liver and blot it with a paper towel. The liver should be pale beige in color.

Each liver consists of two lobes, one slightly larger than the other. Remove any pieces of thin, white membrane clinging to the outside. Gently pull apart the lobes with your hands, noting that they are connected by a vein through the center of the two lobes. Cut this vein with a sharp knife. Hold one lobe firmly in your hand and with a pair of flat-end tweezers, grasp the end of the vein that was severed. Gently pull with a slow, even motion. In the best case, the gentle pull will cause the rest of that portion of vein hidden inside the liver to pull free.

Deveining is also a technique used to prep shrimp for cooking which has actually nothing to do with veins. Deveining a shrimp means removing the black threadlike digestive tract that runs along the back of the crustacean. Removing the harmless tract is not necessary but makes the shrimp more aesthetically pleasing especially when larger shrimp are being used. While there are several deveining tools on the market, you can easily make do with a paring knife. Peel the shrimp first, run the tip of a sharp knife along the shrimp's back, and then lift out the delicate black vein, removing any pieces that break off with your fingers.

Recipes that feature deveining:

Yum

Friday, April 6, 2012

View (Almost) of Savannah Red Rice

We spent a week on Amelia Island, Florida for Spring Break this year which is a stone’s throw from the Georgia coast. With a ready supply of fresh shrimp, Savannah red rice was quickly added to our vacation menu.

Savannah red rice is a cultural and gastronomic legacy that has been around for nearly 300 years. This traditional Southern favorite is an adaptation of a similar dish made all over West Africa called “Jollof rice.” Also known as Carolina perlou, similar variations of rice pilaf with tomatoes appear in the earliest cookbooks from Charleston and Savannah. Red rice is a part of every great Southern cook's repertoire which can be served as an entrée (with shrimp, chicken or sausage) of as a side dish (without). On occasion we have made this for pot luck cookouts and it is always the first empty dish on the buffet table!

Making a reputable red rice can be challenging and tricky. The best recipes start with a good quality bacon. The use of long grain rice, which at one time could have been exclusively Carolina Gold rice, is essential to the uniqueness of this dish in that hearty long grain rice absorbs the smoky flavor of the bacon and keeps the rice grains from sticking together too much. 

Carolina Gold rice which originated in Africa and Indonesia, was the basis of the antebellum economy of coastal Carolina and Georgia. Considered the grandfather of long grain rice in the Americas, was first produced in diked wetlands in the Charleston area and eventually planted throughout the South. It was exported worldwide by 1800, and by 1820, over 100,000 acres were producing Carolina Gold Rice.

No red rice should be started without “trinity:” equal parts of chopped celery, bell pepper and onion. High quality tomatoes are imperative as well. We use Italian crushed tomatoes, which have a little bit more texture than a puree, and have a good rich red color. We also add a tablespoon of paprika to enhance the red.

The actual cooking of red rice, on top the stove or in the oven, seems to be the source of much of the debate around what makes a good red rice. A true Savannah Red Rice, as opposed to perlou or New Orleans Jambalaya, is prepared on top of the stove, but finished in the oven where each grain of rice is able to absorb the liquid and fat but still retain its shape.

  • 10 slices bacon, diced
  • 2 cups chopped onions
  • 1 ½ cups chopped green bell peppers
  • 1 cup chopped celery
  • 2 ½ cups uncooked long grain rice
  • 1 (16-ounce) can tomatoes, chopped or crushed
  • 1 teaspoon minced fresh garlic
  • 2 bay leaves
  • 5 cups chicken stock
  • 1 lb. fresh shrimp, peeled and deveined (optional)
  • ¼ cup finely minced fresh parsley

  • Seasoning Mix:
  • 2 tablespoons dark brown sugar
  • 2 teaspoons salt 
  • 2 teaspoons paprika
  • 1 ½ teaspoons white pepper
  • 1 ¼ teaspoons dry mustard
  • 1 teaspoon black pepper
  • 1 teaspoon onion powder
  • 1 teaspoon garlic powder
  • ½ teaspoon dried thyme leaves
  • ½ teaspoon ground cumin

Combine the dry seasoning ingredients thoroughly in a small bowl and set aside. Place the bacon in a heavy 5-quart pot, cover, and cook over high heat until the bacon starts to brown, about 5 to 6 minutes. Add the bay leaves, onions, bell peppers, and celery, cover, and cook, stirring occasionally, until the onions and bacon are golden brown, about 14 to 15 minutes.

Stir in 5 tablespoons of the seasoning mix and then add in the rice. Cover and cook, occasionally scraping up the crust that forms on the bottom of the pot, until the rice is golden, about 5 minutes. Stir in the tomatoes, then add the garlic and the remaining seasoning mix, cover, and cook for 2 more minutes. Add the stock and scrape the bottom of the pot, then cover and bring to a boil. Reduce the heat to low, and simmer for about 25 minutes. Do not lift the lid (not matter how tempted).

The true trick to getting perfect red rice every time is to remove the cover after 25 minutes of cooking, fluff the rice with a fork, remove the bay leaves, replace lid, and let it "dry out" in a preheated 350-degree oven for 10 more minutes before serving. This ensures the rice won't be too wet or sticky. If you are adding shrimp to your rice, stir peeled and deveined shrimp in with the fluffed rice before covering and finishing in the oven.

Remove the rice from the oven and allow to rest for about 5 minutes before serving. This will allow the shrimp to steam and the rice to absorb any remaining liquid. Top with chopped parsley and serve piping hot. A crisp white wine and a view of Georgia’s Golden Isles certainly enhances the meal too!


Yum

Tuesday, April 3, 2012

Technique of the Week: Kneading

This technique is used in bread making. The dough is kneaded to develop the gluten in the flour so that it will hold its shape while rising. The dough is pummeled on a lightly floured board until it is smooth and elastic. Kneading involves a particular technique that uses the heal of the hand to pull and stretch the dough. Kneading can be quite also be quite therapeutic. Kneading can also be done in a free-standing mixer using a dough hook.

Lightly dust your hands with flour to keep the dough from sticking to you. Kneading can be messy, so you should consider wearing old clothes or an apron to prevent flour from getting all over your clothes.

Always keep a measuring cup of flour beside your work area to prevent the dough form sticking to your counter or kneading board.

Place your dough on a well-floured work surface. Grab the side of the dough furthest away from you and fold it toward yourself using your body weight to push the dough into itself. The beginning of the kneading process might require a lot of flour. Be generous to start, but try not to add more than the dough can easily incorporate, or you will throw off the flour-yeast-water-salt ratio.

Pay attention to table/counter height to avoid straining your back. Use a counter or tabletop that allows you to extend your arms to knead the dough while not making you hunch over the table.

When you knead, you will use only the heels of your hands. Push down on dough with your hand heels. Give the dough a quarter turn (90 degrees). Grab the other side and fold it in half. Again, with a lot of weight behind it, push the newly folded half into itself. Repeat this process until the dough is smooth, silky, and elastic, about ten minutes or more. Don't worry about over-kneading your dough by hand, you have to really work to break down the gluten structure.

A well-developed dough should be very smooth, with small air bubbles just below the surface. When you've finished kneading, shape the dough into a loose ball. Place the dough in an oiled bowl, turning it over to coat the surface lightly with oil, and let it rest smooth-side up. Cover the dough with a damp kitchen towel or plastic wrap to keep the surface from drying out.

Most bread recipes call for the dough to be “punched down” after it has risen to twice its size. Punching down means to lightly press the dough to express some of the gas. You don't have to fully knead the dough again between the first and second rise. The best method is to use the fingers of one hand and give the dough a few good pokes. Then replace the damp kitchen towel or plastic wrap and let rise until ready to shape and bake.


Yum
Powered by Blogger.

footer social

ShareThis