Tuesday, November 19, 2013

Cornmeal Commemoration Hasty Pudding

Cornmeal occupies a prominent place in American culinary history. It has been praised by native reporters and poets, berated by foreign writers no less illustrious than Charles Dickens and Alexandre Dumas. Cornmeal cookery provokes considerable regional controversy, and consequently occupies considerable space in a vast number of our cookbooks. Variations in a corn bread recipe, for example, may cause small-scale domestic warfare. Arguments arise between one town and another over the correct name for a mere lump of meal, and names may vary even within a small town. Cooks become wildly possessive about their "definitive" versions of spoon bread or corn sticks, and disputes still arise over the superiority of yellow or white meal in certain dishes.

For "corn bread" one dialect dictionary lists as synonyms; scratchback, hoecake, ashcake, journeycake, johnnycake, and corn dodger, explaining that all are corn breads in their simplest form and as truly American as corn itself. "In their simplest form" implies a "bread" of meal, water, and sometimes salt. Simple fare indeed, but a lifesaver to the first Colonists, who learned basic preparation from the Indians. The maize that the Indians cultivated was a spectrum of red, blue, pink, and black kernels, as well as the more common white and yellow. Indians also supplied popcorn for the first Thanksgiving meal. In fact, "Indian" or "Injun" was the early American name for cornmeal, distinguishing it from wheat, which was (and still is) often called "corn" by the British. Rye -n' injun was a bread devised by the Pilgrims, who found that with its low gluten content, cornmeal had to be mixed with other grains to rise with yeast.

The hundreds of varieties of corn grown in America fall into five main families: flint corn, a fine but easily damaged strain that grows in cool regions; flour corn or soft corn, the predominant type grown in Andean regions and favored by the Indians; dent corn, the main commercial variety: sweet corn, the sort that is eaten fresh off the cob or canned; popcorn, the mainstay of the movie industry and the only poppable kind. White and yellow meals from dent are most favored today, and those obtained from water-powered stone-grinding, as opposed to the more common dry milling, are generally considered superior in taste and texture. Water-ground meal retains the germ, which makes it not only more flavorsome but also more perishable, hence the prevalence in markets of the germless, long-keeping variety.

Almost all cornmeal dishes can be made with either yellow or white meal, but the finished product will vary slightly: color, when indicated in the recipe, should therefore be observed. In baking, white meal gives a pleasantly uneven texture, a crisper outside, and a softer inside, whereas yellow meal gives a drier, more even-textured, slightly granular result. Lovers of cornmeal, however, tend to be rather fierce in their preferences. Below Mason and Dixon’s line, it is widely considered that white corn is for folks and yellow for critters. Indeed, stone ground white cornmeal is the keystone to soul food, and white meal is also the only type considered suitable for the Rhode Island specialty; johnnycakes.

Because it was such an important part of the Colonial diet and because it was unique to the Americans, corn became an informal symbol of our country. The literature of America is filled with chat of homely hot mush, but no one can match Joel Barlow's all-time commemorative to this dish. In 1796, Barlow wrote an extended hymn to cornmeal appropriately dedicated to Martha Washington and tracing corn from its planting through the preparation of what he considered to be its most perfect form “The Hasty-Pudding," the poem's title.

Hasty pudding is simply sweet cornmeal mush (cornmeal and water), the staple of every corn-growing people. Cooked until "thick enough to stand a pudding-stick," it was known variously as loblolly, stir-about pudding, cornmeal porridge, and samp.  The popular New England dessert is mentioned in the original "Yankee Doodle” and included in Amelia Simmons's American Cookery which was the first cookbook written in the United States (and published the same year as Barlow’s tribute.) Sweetened with molasses or syrup and perhaps enriched with eggs and milk, corn mush becomes a tempting dessert.

  • 2 cups whole milk
  • 2/3 cup yellow cornmeal
  • ¼ cup butter
  • 2/3 cup brown sugar
  • 1 tablespoon maple syrup (or molasses)
  • ½ teaspoon salt
  • ¼ teaspoon cinnamon
  • ¼ teaspoon nutmeg
  • ¼ teaspoon ginger
  • pinch of allspice
  • pinch of cloves
  • 1 egg, beaten
  • ¼ cup dried fruit or nuts (optional)

Preheat oven to 325°F.  Grease a quart-sized baking dish or 4-6 ramekins with cooking spray or butter.

In a heavy skillet, heat milk until is scalds.  Stirring continuously with a wooden spoon, gradually sprinkle in cornmeal.  Keep stirring rapidly to keep lumps from forming.  Bring mixture to boil.  Reduce heat and keep stirring until it starts to thicken.

Remove the skillet from the heat and stir in the butter.  Once the butter is melted, add the brown sugar, molasses, spices, dried fruit or nuts if desired.  Continue to cool for about 5 minutes.

Beat the egg in a small bowl and stir into the pudding mixture. Pour pudding into the baking dish(es) and place in a bain marie (water bath) and add boiling water to within an inch of the rim of the baking dishes. Bake for 50-60 minutes or until the pudding is firm. Serve with warm bourbon sauce, if desired.

Since Bourbon is another American specialty made from distilled corn mash, this bourbon sauce makes for the perfect accompaniment to Hasty Pudding:
1 cup granulated sugar
6 tablespoons butter, melted
1/2 cup buttermilk
1 tablespoon (or more) bourbon (or vanilla)
1/2 teaspoon baking soda
1 tablespoon maple syrup
1 teaspoon vanilla

In a sauce pan mix all ingredients. Bring to a boil for 1 minute. Serve warm over hasty pudding.


Yum

Friday, November 15, 2013

Cooks' Hot Holiday Gadgets 2013

This morning before most folks had finished their first cup of coffee, twelve faithful foodies were seated The Cook’s Warehouse indulging in a delicious repast at the Third Annual Blogger Breakfast hosted by owner Mary Moore and her amazing staff.

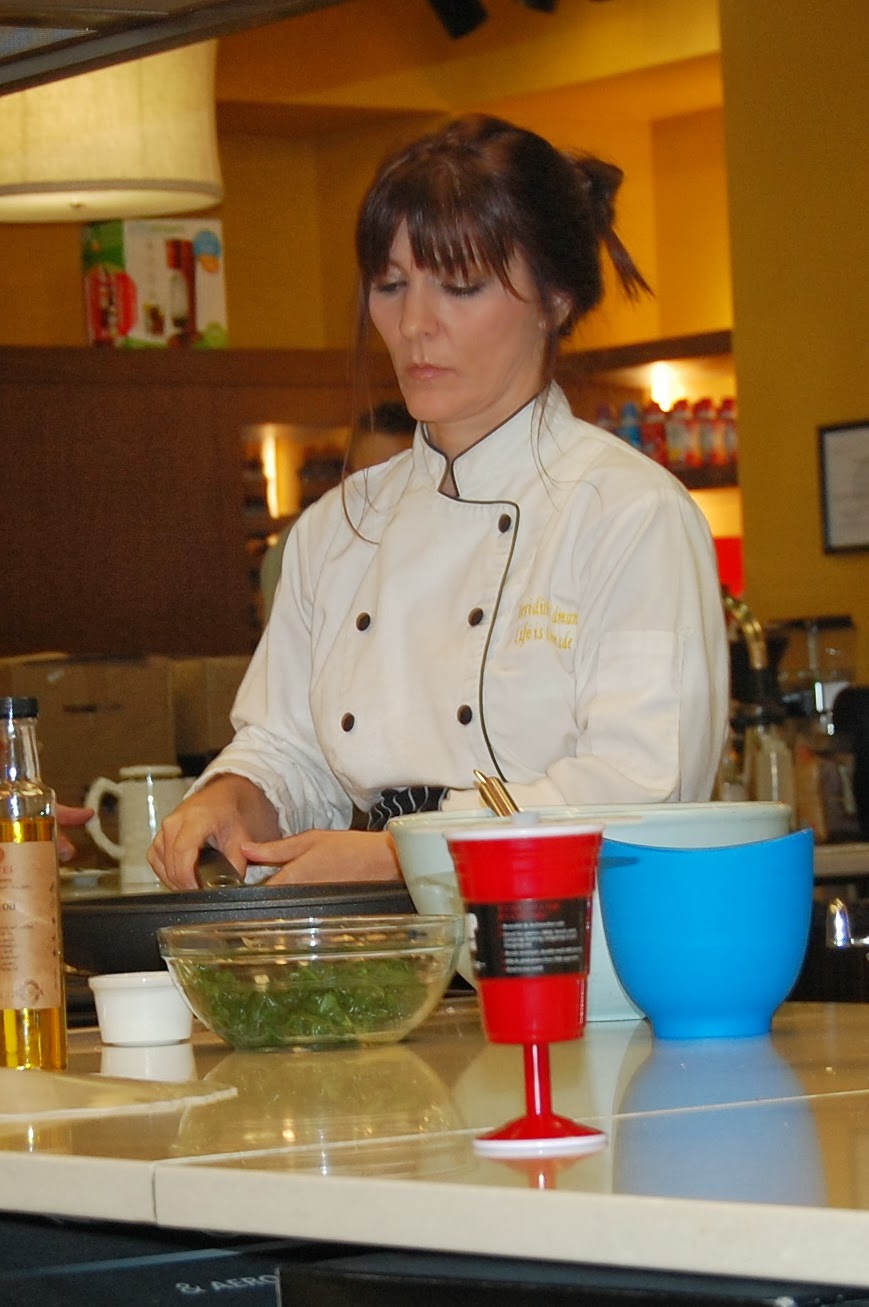
Meridith Ford, pastry chef, instructor and former dining critic/food writer for the AJC, was in the test kitchen using the new Kenwood Cooking Chef Mixer to make and proof the dough for her cinnamon rolls and demonstrating the Woll Diamond Nonstick Saute Pan to make a “massive” spinach frittata.

While we nibbled on biscuits, cinnamon rolls and frittata, and sipped orange juice, Thrive Farmers Coffee, and Bloody Marys made in a Mason Jar Cocktail Shaker, Mary regaled us with her Baker’s Dozen (+1) Hot Holiday Gadgets 2013:

After breakfast, Lania from The King of Pops shared seasonal flavored pops such as sweet potato soufflĂ©, pumpkin pie and my choice of Herbs de Provence.  We said our goodbyes and were invited to wander through the TCW flagship store to view many more gift ideas before it opened to the public.


Yum

Monday, November 11, 2013

Drunken Chestnuts for Martinmas

This eleventh day of the eleventh month, is known in many countries of the world as St. Martin's Day or "Martinmas." During the Middle Ages, Saint Martin was the most popular and charismatic saint. In France, he is still a major religious figure whose tomb attracts people who come to be healed as at Lourdes. He became the patron saint of the French monarchy and also of churchgoers, innkeepers, grape growers, and winemakers, and in some places he is also the protector of drinkers. Many stories about him involve wine.

Perhaps the most famous tells of his rescuing a drunken man by taking his own cape from his shoulder, cutting it in half, and then wrapping the man in it to protect him from the cold. That same night he dreamt of Jesus wearing the half-cloak he had given to the poor man and thanking him for his compassionate gesture. It is also said that at the moment he shared his cloak, the sun came out. I am sure many of you have heard the term Indian summer before when referring to a spell of warmer than normal temperatures accompanied by sunshine and dry and hazy conditions. In Italy, these mild days are called “Estate di San Martino.”

St. Martin’s Day marks the end of winter preparations and is the beginning of the natural winter. It is also the time when newly produced wine is ready for drinking. As a result, St. Martin's Feast is much like the American Thanksgiving; a celebration of the earth's bounty. Because it also comes before the penitential season of Advent, it is considered a time of "carnival," with feasting and bonfires before a period of fasting.

In some countries, Martinmas celebrations begin exactly at the eleventh minute of the eleventh hour of the eleventh day of the eleventh month. In others, the festivities commence on St. Martin's Eve with children carry lanterns in the streets after dark, singing songs for which they are rewarded with candy. Bonfires are built and folks make merry drinking mulled wine and eating magosto which are chestnuts that roasted under the embers of the bonfire. Magosto are often left out at midnight as homage to deceased family members to “eat.”

In Piedmont, people celebrated with seasonal produce of chestnuts and wine for San Martino. St. Martin is credited with a prominent role in spreading wine-making throughout the Touraine region and facilitating the planting of many vines. Martin is also credited with introducing the Chenin blanc grape varietal, from which most of the white wine of western Touraine and Anjou is made.

What better way to honor St. Martin than with a recipe for Castagne Ubriache (Drunken Chestnuts) that incorporates both chestnuts and wine. This traditional Tuscan treat is delicious served with artisanal cheeses and Vin Santo or another dessert wine.

  • 2 ½ lbs. fresh chestnuts
  • 1 cup dry red wine
  • ¼ cup granulated sugar
  • Pinch of salt


To roast the chestnuts, preheat the oven to 350°F, and with a sharp knife, make a slit on the rounded side of each chestnut. Arrange the chestnuts in a single layer in a baking pan. Place in the oven and bake for 30 minutes. Remove the chestnuts from the oven.

While they are still warm, remove the hard outer shells and the furry inner skins. In a saucepan over low heat, combine the wine and sugar and stir to dissolve the sugar. Add the chestnuts and cook until the wine is reduced to a thick syrup, about 30 minutes. Transfer the chestnuts to a serving dish and serve hot.


Yum

Tuesday, November 5, 2013

Heritage Chocolate Pecan Pie

Although November isn’t officially “National Pie Month,” it should be. Many Americans look forward to eating pie rather than turkey or green bean casserole. Whether it is sweet or savory, just about every combination of meats, vegetables, fish and fruit imaginable has been baked between two layers of pastry. Of course, no traditional Thanksgiving meal is considered to be complete without the customary pumpkin pie and if you live in the South, pecan pie is also an essential addition to the Thanksgiving table.

Pecans were an important part of the diet of Native Americans before the arrival of the European settlers. Cultivation of the pecan tree was very successful, so much so that the pecan tree is the official state tree of Texas and has official status in New Mexico, Louisiana, Mississippi, Georgia, and Florida as well. Even though pecans have a fairly high fat content, they are composed of 87% unsaturated fatty acids and may actually help to lower blood cholesterol levels. Pecans are also a good source of potassium, thiamine, zinc, copper, magnesium, phosphorous, niacin, folic acid, iron, and vitamin B6, and are a good source of fiber.

Originally historians believed that the French created pecan pie soon after settling in New Orleans, after being introduced to the nut by Native Americans. However, attempts to trace the origin of this dessert have not found any recipes earlier than 1886 when it first appeared in Harper’s Bazaar magazine. Better known cookbooks such as Fannie Farmer and The Joy of Cooking did not include versions prior to 1940. Since the process for refining corn sugar was not developed until the 1880s, early settlers of New Orleans most likely used cane syrup, which was a widely used sweetener of the time. There is no doubt that the producers of Karo corn syrup popularized the dish, and many recipes specify Karo syrup by name as an ingredient.

This recipe for chocolate pecan pie was shared by our friend Amanda and is as easy as it is delicious. Pecan pie lends itself to many variations and flavoring options including maple, bourbon or even bacon. Experiment to find your favorite!

3 eggs
1 cup dark corn syrup
1 cup sugar
½ cup (1 stick) butter, melted
1 teaspoon vanilla
1 cup pecans
¾ cup semi-sweet chocolate chips
Pinch of salt (or more to taste)
Recipe for one deep dish pie shell

Preheat oven to 350 degrees F. Slightly beat eggs and add corn syrup, sugar, butter and vanilla. (Amanda’s tip: spray your measuring cup with cooking spray before measuring, this will allow the corn syrup to drain from the cup without sticking.) Stir the mixture until well blended. Fold in pecans and chocolate chips are stir to thoroughly coat with syrup without breaking up pecans too much.

Prepare your crust and arrange in pie plate. Pour the mixture into the pie shell. (If you have extra syrup, you can pour it into a small baking dish or ramekins for a nice little treat.) Bake the pie for 50-60 minutes. The pecan will rise to the top of the pie forming a caramel coating and the finished pie should be firm, and not giggly. Allow the pie to cool completely and the filling to fully set before cutting. Serve the pie with whipped cream laced with a little bourbon for the perfect Southern delicacy.

Thanksgiving is all about tradition and while you may love your Gram's pie recipes, you may want to try something new and create your own tradition. For some new ideas download the FREE eCookbook, Delicious Thanksgiving Desserts: 11 Easy Pie Recipes from TheBestDessertRecipes.com which includes a wide variety of homemade pie recipes that everyone your family will love. And, be sure to check out page 17 which features our own Sweet Potato Pie!

Everyone has a favorite pie that makes them nostalgic for a special moment in their life. What is yours? Please feel free to share in the comments section.


Yum

Thursday, October 31, 2013

Happy Celtic New Year Barmbrack

Barmbrack is a traditional Celtic bread served during Samhain which is the first day of the traditional Celtic year and also the first day of winter. Samhain, pronounced "sah-win" or "sow-in," is celebrated halfway between the autumnal equinox and the winter solstice from sunset on October 31st to sunset on November 1st.

The name “barmbrack” (or Bairin Breac,) originates from the Irish word bairĂ­n for "yeasted loaf" and breac for "speckled," hence a speckled loaf. To make a traditional barmbrack, trinkets and charms are always added into the mixture. Upon cooling, pieces of the cake are carefully cut and eaten and the charms discovered. As you can see the meanings are somewhat outdated (and downright gloomy and disheartening if you ask me), but the charms for Barmbrack traditionally included:

Gold ring: Marriage
Bean or pea: Won’t be married
Button: Bachelorhood
Thimble: Spinsterhood
Matchstick: Unhappy marriage
Coin: Wealth
A small piece of cloth: Poverty

Naturally, your own charms and meanings can and should be utilized as a part of your own Samhain traditions. Each charm should be wrapped carefully in parchment paper and placed in equal intervals through the bread before its final rise. Remember, when choosing to add charms to your Barmbrack, be certain to warn your guests before consuming. What might work a little better is to follow the method used by makers of Southern bridesmaids’ cakes. Each charm is attached to a little ribbon, and inserted after baking. The guests then choose a ribbon and pull it from the bread. No cheating and less chance of a lost charm choking someone. Even the most depressing charm would be better than a trip to the ER!

  • 1 cup of brewed tea
  • 1 cup raisins
  • 1 cup dried fruit
  • 1 package of yeast
  • 1 teaspoon white sugar
  • 1 1/4 cups warm milk
  • 4 cups white flour
  • 1/2 cup brown sugar
  • 3/4 teaspoon ground cinnamon
  • 1/4 teaspoon nutmeg
  • 1/4 teaspoon allspice
  • Pinch of salt
  • 1/2 stick butter
  • 1 egg, beaten

In a cup of hot tea, steep the dried fruit and raisins and allow to soak overnight.  I prefer to use an Orange Pekoe tea for a wonderful flavor, but any black tea can be used. Drain the excess liquid from the fruit before adding to the dough.

Proof the yeast by a teaspoon of sugar to the warm milk and adding yeast. The yeast should begin to bubble and get foamy.

In a large mixing bowl, whisk together flour, brown sugar, spices and salt and then cut in the butter. Pour the rest of the warm milk and the beaten egg into the yeast mixture and combine with the dry ingredients. Beat well and knead until the batter is stiff but elastic.

Knead in the tea-soaked fruit a little bit at a time until fully incorporated. Cover the bowl with a damp cloth and leave in a warm place until the dough doubles in size. Knead again for another 2 or 3 minutes and divide into two round loaves.

Preheat oven to 350 degrees F. If using, wrap the charms in parchment or waxed paper and then roll them in the dough at equal intervals. Cover again and let the dough rise for another 30 minutes to an hour while the oven preheats. Bake for about an hour, until the tops of the loaves are nicely browned and the bread sounds hollow when thumped.

The barmbrack is wonderful served warm with a bit of fresh butter or cream cheese. It should keep for about a week in a sealed container. Stale barmbrack makes delicious French toast or bread pudding too.

HyperSmash.com

Yum

Monday, October 28, 2013

Sonny's Spicy Roasted Pepitas

While most kids look forward to carving pumpkins for the resulting scary decoration, Sonny is all about the roasted seeds. Dom and Nic plan out the jack-o-lantern designs and Sonny formulates the perfect spice mixture for his annual batch of pepitas.

Pepitas are sold all over Mexico from carts on the street and bags in the store. Unlike sunflower seeds with an outer shell you must remove before eating, you can just pop ‘em in your mouth and eat ‘em whole. Pumpkin seeds have long been valued as a source of the mineral zinc. To maximize zinc consumption, it is best to eat the seeds unshelled.


  • Fresh pumpkins seeds 
  • 1 tablespoon olive oil
  • 1 teaspoon salt
  • ½ teaspoon ground cumin
  • ½ teaspoon white pepper, ground
  • ½ teaspoon smoked paprika
  • Pinch cayenne pepper
  • Pinch ground allspice

As you gut the pumpkin, keep all the seeds in a bowl. Toss seeds in a colander and rinse them under cold water, pulling away any chunks of pulp as you go. Spread the rinsed seeds out on a baking sheet. Don’t use paper towels or the seeds will stick.

Allow the seeds to dry several hours or overnight. When they are nicely dried, preheat the oven to 350 degrees F. Toss the dried seeds with olive oil and spice mix and spread them back out in a single layer on the baking sheet.

Toast them in the oven for 15 to 20 minutes, until the seeds are a light golden brown.  Pepitas should be stored in an airtight container if they last beyond the first day.


Yum

Saturday, October 26, 2013

Happiness Hacks for Life In and Out of the Kitchen

Every now and then we get a request to share our tips and tricks; “kitchen hacks” if you will. I finally starting writing a few in my journal and have compiled a list of 20 of the best. Clearly it is not comprehensive, but you may find a few helpful. Some of these gems have been around for several lifetimes, and a few come directly from our kitchen to yours.

1. There are some things that will always make you happy if you have them in your home: flowers, good olive oil, an excellent knife and a cat.

2. When you’re sad, don’t fight it - accessorize it. Get a fancy handkerchief, pour some gin and play Edith Piaf until the CD player overheats.

3. Knowing how to roast red peppers will impress more people than you'd think.

4. Take the time to actually read recipes through before you begin.

5. Recipes are only guidelines, not hard and fast rules. Get comfortable replacing ingredients with similar ingredients that you like.

6.  Unless it’s a recipe for cake or bread, then don’t make substitutions and measure accurately. There are no shortcuts in pastry: It's a science.

7. You can substitute white wine for vermouth in a martini.

8. Everything tastes better when served by candlelight.

9. If your plates and glasses don’t match, no matter. It’s just another reason for the candlelight.

10. Take your shoes off, put on some Coltrane, pour a glass of your favorite beverage and enjoy your time in the kitchen.

11. Do not try to order in French at a French restaurant unless you are French.

12. After making an omelet, deglaze the pan with sherry, then drizzle the sauce over the top to add another dimension to the dish.

13. Never try a new recipe and a new ingredient at the same time.

14. The cheap caviar is still quite good.

15. If you must leave a party and you don't have a good excuse, spill something on yourself.

16. Cook pasta 1 minute less than the package instructions and cook it the rest of the way in the pan with sauce.

17. When you make a mistake, own it.

18. Fix it, or deal with it, but stop whining about it

19. Clean as you go. Sounds obvious, but people rarely do it.

20. The best way to end a conversation is "I'm sorry to let you go."

I'm sure there are many, many, many more. So far, these have worked for us. Please feel free to share your simple rules for life, happiness and cooking in the comments section. We would love to hear them!


Yum

Tuesday, October 22, 2013

Nuclear Fission “Hots” Pepper Relish

With temperatures expected to dip into the upper 20s this evening, we picked a ginormous amount of green cayenne peppers before they could freeze overnight. Which begs the question, what in the world do we do with them all?

Normally on a hot summer day, the guys would toss some wieners on the grill and load them up with mustard and some freshly chopped chilies and onion, so why not preserve that combo in an all-in-one relish. A little research revealed that this is not a new custom. Apparently in Baltimore, Maryland, when you order a sandwich in a sub shop, a specialty called “hots” is offered along with the usual array of condiments. I imagine this relish would be amazing on scrambled eggs, on tortilla chips like salsa, or served over grilled pork and chicken.

Although pepper of the same variety are supposed to have the same level of heat units on the Scoville scale, in our experience green cayenne peppers seem hotter than their riper (and redder) brethren. As a result, this relish with the under ripe peppers, onion and mustard gave off napalm-like vapors while simmering and a tiny nibble brought tears to my eyes – just the way my guys like it! I would recommend exercising caution when using this relish, even sparingly.

  • 1 pound (about 3 cups) hot green peppers, stemmed
  • 1 medium (about 1 cup) yellow onion, roughly chopped
  • 2 tablespoons kosher salt
  • 1/2 cup cider vinegar
  • 1/4 cup sugar
  • 1 teaspoon mustard seed

Roughly chop onion and hot peppers (any combination of cayenne, serrano, jalapeno) removing seeds if you prefer to reduce the heat a bit. Place peppers and onions in work bowl of a food processor fitted with steel blade. Pulse until peppers and onion are finely chopped. Add in salt and toss to coat.

Transfer the pepper mixture to a fine mesh strainer set inside a bowl and let sit for 2-3 hours. Rinse the peppers under cold water and drain. Press the peppers in the strainer to remove as much water as possible.

In a medium saucepan, bring vinegar and sugar to a boil over medium high heat, stirring to dissolve to sugar. Add in pepper mixture and mustard seed, reduce heat to medium-low, and simmer for 10 minutes, stirring occasionally.

If you prefer to can the relish, ladle hot pepper relish into sterilized jars and follow directions to hot pack the condiment. Otherwise, the relish is ready to use once it has cooled completely. Transfer the relish to an airtight container and store in the refrigerator for up to a month.


Yum

Thursday, October 17, 2013

Pumpkin Spice Caramel Popcorn and Pepitas

The nights are getting cooler and the store aisles are filling up with holiday merchandise. While some head straight for the ornaments and decorations, I cannot resist the shelves of holiday treats: chocolate-covered almonds, gingerbread, peppermint bark and caramel popcorn. Nowadays, caramel popcorn comes in a wide variety of flavors unlike the Cracker Jack of my youth. Also, unlike Cracker Jack, gourmet caramel popcorn is a pricey treat when bought at department stores!

Well worth the price to avoid the messy, finger-scorching caramel and the sticky, cemented aftermath? Not anymore apparently. A little internet searching turned up several recipes that recommended making the caramel in the microwave and using the same to finish the popcorn in a paper bag. Seriously? The microwave?

Yes, I was skeptical, but the urge to try some was too strong to repel. So, instead of tediously hovering over the saucepan to make sure the caramel reaches the perfect candy consistency, so it doesn't crystallize after coating the popcorn, I made some popcorn, loaded my caramel ingredients into a large mixing bowl and found a big paper bag. The entire time I muttered to myself, “There’s no way this is going to work,” “I’m gonna end up with a bag of popped goo,” and “What was I thinking?” Trying to convince myself with, “If you think about it, shaking the caramel corn in a bag should provide astounding uniformity, rather than pouring the caramel over the popcorn in a roasting pan, and then trying to mix the gloppy mass with a wooden spoon.”

After removing the paper bag filled with caramel corn from the microwave and dumping it out on parchment paper, it was torture to wait for the corn to cool enough to taste. The result? “Ah -{crunch, crunch, crunch}-mazing!!” I couldn't believe it! And I couldn't stop eating it… It is a good thing it is so easy to make because now I needed to make more for the guys!


Place the popped popcorn in a large brown paper grocery bag and set aside.

Combine the corn syrup, butter, spice, vanilla and sugar in a large microwave safe bowl and microwave on high for 2 minutes. Stir the caramel-to-be and microwave for another 2 minutes. You may see that the butter is not fully incorporated – don’t worry. Add in the baking soda to the caramel mixture and stir vigorously. The syrup will foam up quite a bit, so be careful!

Working quickly, pour the syrup over the popcorn in the paper bag and shake the bag enthusiastically. Roll down the top of the paper bag and place the popcorn - bag and all - in the microwave and microwave on high for 45 seconds. Remove the bag from the microwave and add the pepitas and again shake the bag enthusiastically.

Microwave the bag of popcorn for another 45 seconds and shake. Repeat this one more times (making three total 45-second bursts), and then pour the popcorn out onto cookie sheets to cool. Let the popcorn cool a bit before separating the clumps into smaller morsels. Please use caution; the molten caramel can cause serious burns.

The popcorn is best on the day it's made. Seal any leftovers (Ha ha ha! As if!!) in an air tight bag or container. Over time, the sugar will begin to soften, making the popcorn more chewy than crispy (which makes it a perfect topping for ice cream, yogurt, cupcakes or cookies.)


Yum

Wednesday, October 9, 2013

Oh My Darling Lemon Thyme Marmalade

When life gives you lemons, instead of making lemonade, we make marmalade. Homemade preserves and jams with farm-fresh fruit are the essence of rural Italian cuisine. Every family has its own cherished recipes for making jams and jellies. In the spirit of Italian orticoltura, we have nurtured a Meyer lemon tree for several years and enjoy the fruits of our labor (sorry, couldn’t resist that pun!)

I am a huge fan of marmalade and making a batch of marmalade has been on my agenda for over 2 months now. My preferred method of consumption is slathering the tangy, syrupy conserve on a toasted and buttered English muffin, but it makes the perfection addition to glazes, barbecue sauce and even as an addition to specialty cocktails. Its unique, slightly tart aftertaste is also a fabulous contrast when paired with sharp or creamy cheeses, crackers, and a sparkling white wine.

  • 7 (about 2 lbs.) lemons, preferably Meyer
  • 2 cup cold water
  • 2 cups granulated sugar
  • 2 sprigs of fresh thyme
  • Pinch of salt

Scrub the lemons and trim the ends, and then using a vegetable peeler, peel strips of zest off the lemons. Thinly julienne the peel strips into thin strips about two inches long. Put these into a small pot, cover with cold water, and bring to the boil. Allow the zest to blanch for about one minute and then shock by rinsing with cold water. Strain the peels and set aside.

Using a sharp knife, peel all the skin and pith off the fruit. Removing all the pith will create a lovely clear marmalade that is not as others I have tasted. It's flecked with large lumps of fruit, as well as the julienned zest which turns into lovely candied goodness. Prepare the fruit by holding the peeled lemons over a small bowl and cutting the segments free from the membranes. Discard seeds. Capture the segments and juice in a bowl and place the membranes, pith in a small saucepan and cover with cold water. Bring these to a boil and allow to simmer for 2-3 minutes. Remove skins and reserve boiling liquid.

In a small saucepan, bring one cup of boiling liquid, sugar, and salt to a boil over medium-high heat for about 2 to 3 minutes, stirring until the sugar completely dissolves. Add the julienned peels, lemon segments, juices and thyme sprigs, and return to a boil. Reduce the heat to low and skim any foam from the surface. Simmer very gently until the mixture breaks down and thickens, 40 to 60 minutes, checking frequently to prevent scorching or overcooking.

To test, dip a wooden spoon into the marmalade and allow the mixture to drip. When two drips merge on the end of the spoon instead of running off the spoon, the mixture will set on cooling. Alternatively drop a spoonful onto a chilled plate, run your finger through it and if your trail remains there, it's reached setting point.

Remove the thyme sprigs if you prefer (I leave them in). Take off the heat and let the mixture set for 15 minutes to help evenly distribute the peel. Using a sterilized spoon, carefully spoon the marmalade into sterilized jars leaving ample head room. Screw on lids and set aside to cool.
Oh My Darling Lemon Thyme Marmalade on Punk Domestics
You can water-process the jars at this time if you want to extend the shelf life of the marmalade. Remember to wipe down the outside of jars with a wet cloth, label and date and then store in a cool, dark place.


Yum

Friday, October 4, 2013

Hunka Burnin' Love Hot Pepper Jelly

Our family’s burning love for hot peppers (all pun intended) is well documented. Like many natives of the South, I grew up with peppers, lots of them. The hot, muggy climate seems to make for the perfect growing conditions for a wide variety of capsaicin-laden peppers.

Sweet, tart, and spicy, hot pepper jelly is nearly irresistible to those of us raised in the South.  Most frequently ladled over goat cheese or cream cheese, this jelly adds a serious kick to a simple grilled cheese sandwich and makes a great glaze for chicken wings, pork loin or even grilled quail.

You can use whichever kinds of peppers you wish (or that are plentiful.) For this batch, I used a combination of poblano, cayenne, cow horn and a few mild cherry peppers ranging from 1,000 to 50,000 on the Scoville Scale which is the measurement of the spiciness of chili peppers or other spicy foods containing capsaicin. While the cayenne peppers have a robust flavor, they are very fiery.

Not a fan of the heat?  It is fine to use mild, sweet peppers.  I would, however, recommend using peppers that are all the same color (red or green) else you will end up with a murky-brown jelly that will not look very appealing.

  • 2-2 ½ cups peppers, seeded and coarsely chopped
  • 5 cups sugar
  • 2 cups distilled white vinegar
  • Pinch of salt
  • 1 (3-ounce) envelope of liquid pectin

Be sure to wear latex gloves when working with hot peppers. If you want your jelly hotter, include a few seeds. Pulse the chopped peppers in a food processor (and seeds if desired) in food processor until finely minced, 12 to 15 pulses, scraping down bowl every 5-6 pulses.

Combine peppers, sugar, and vinegar in large saucepan and bring to vigorous boil over medium-high heat. Stir the mixture to ensure that the sugar is completely dissolved. Keep a close eye on the pot so it doesn't boil over.  Having made this mistake, I can tell you the mess is epic.

Add the liquid pectin and return to vigorous boil, stirring constantly, for about 10 to 15 minutes until the temperature registers 221 degrees F on a candy thermometer.  Using large spoon, skim any foam from top of jelly.

Ladle the jelly into sterilized jars with tight-fitting lids. Let the jars cool to room temperature and then cover and refrigerate. Let jelly set in refrigerator for 12 to 24 hours. Jelly can be refrigerated for at least 2 months. The jar can also be processed in a hot water bath for longer term storage.

This jelly will be a wonderful condiment addition to your Thanksgiving table; in fact I plan to mix some in with my homemade cranberry sauce this year. Come to think of it, this would be a wonderful hostess gift for the upcoming holiday season!


Yum

Monday, September 30, 2013

Marcella-Inspired Ribollita (Tuscan Soup)

Italians are legendary for being able to feed hoards of family and friends having spent little or no money. Frugal homemakers grow their own tomatoes and peppers, gather mushrooms and arugula growing along roadsides, and prepare cuts of meat (offal) that in other cultures would be discarded. Italians are also masters of making two or even three meals from one. In fact, we are often surprised at how many dishes in Italian cuisine are made with leftovers.

Take for example arancini; a specialty made with leftover risotto filled with cheese and then deep fried. Not to mention the thousands of recipes that call for stale bread: mollica, panzarella, and Marcella Hazan’s favorite, ribollita. Hazan, the queen mother of Italian cooking in America, was quoted as saying, “I’d be loathed to order pasta in a Tuscan trattoria when a ribollita or any soup with beans or ‘kale’ is on the menu.” Ribollita is a hearty vegetarian stew made with leftover beans, greens, broth and is fortified with the addition of other vegetables such as potatoes, carrots and celery. This is one of Tuscany's most revered dishes. Freshly made, this is a hearty, brothy soup, but when reheated the next day, it becomes a deeply flavorful, porridge-like stew.

What better way to celebrate the life of the famous Italian cook than by using the leftovers from a Saturday antipasti supper which consisted of greens, Tuscan white beans, grilled sausage, Caprese salad and a fresh loaf of ciabiatta to make a meatless- Monday dinner. On Thursday, it doubles back as antipasti again served on crostini.

  • ¼ cup extra-virgin olive oil
  • 1 medium yellow onion, peeled and chopped
  • 1 carrot, peeled and chopped
  • 2 ribs celery, trimmed and chopped
  • 1 large russet potato, peeled and diced
  • ½ cup chopped canned Italian plum tomatoes
  • 1½ cup greens (kale, collards, chard, cabbage), cooked
  • 2 cups vegetable (or chicken) broth
  • 1-2 sprigs of fresh herbs (rosemary, sage, oregano, etc.)
  • 1 bay leaf
  • 1 ½ - 2 cups of Tuscan white beans, cooked
  • 2 thick slices day-old country white bread, cubed
  • Salt and freshly ground black pepper

Heat 2 tablespoons of the oil in an earthenware casserole over medium-low heat. Add onions, and cook until soft, about 20 minutes. Add carrots, celery, potatoes stirring until mixed. If you are using fresh greens, you will need about 3 cups rinsed and chopped greens since they shrink incredibly. Add them to the vegetable mixture and toss to coat with oil. You may need to add the greens in batches until they all fit in the pan. Next add the tomatoes, cover the pot, and cook until the greens are completely wilted, about 20 minutes.

Add the stock, bay leaf and herb,s and then simmer with the lid on until all the vegetables are soft, about 1 hour. Add the cooked beans and cubed bread stirring gently and cover. Return the soup to a simmer, and cook until bread begins to soften, about 10 more minutes. Season the soup to taste with salt and pepper, and serve with a drizzle of olive oil. Remove the bay leaf and refrigerate any leftover soup.

The next day, preheat oven to 375ÂşF and heat the leftover soup in the casserole in the oven, uncovered, stirring occasionally, until heated through, about 1 hour. For the last 30 minutes, do not stir; let soup brown lightly. Drizzle with another ¼ cup oil, and serve topped with a sprinkling of grated Parmesan cheese.

If preferred, you can use the cold leftover stew as a bruschetta topping served atop crusty, toasted bread with a smattering of cheese or Denise's peppers.

As you might imagine, this is not exact recipe and varies with each batch that you make. It is also contingent on how much you have in the way of leftovers in the beginning. We have even on occasion used leftover rice in place of bread. You can add or subtract, reduce or increase any of the ingredients to your taste.


Yum

Friday, September 20, 2013

The Pulled Pork Definitive

Home cooks seeking flavorful meals that require minimal effort and time in the kitchen should look no further than pulled pork, the ultimate meal solution. Pulled pork has seen a recent surge in popularity, as home cooks and chefs alike discover new ways to prepare and serve this savory favorite. It's not just the flavors that make a dish, but the layering of textures. We love pulled pork because of the contrast between the crispy exterior and the succulent, almost-melting inside.

We start with a pork butt which is a cheap, but flavorful cut with a good amount of fat that renders out during cooking and bastes the meat adding to its caramelized crust. The pork shoulder is the entire front leg and shoulder of a hog. In your grocery store you will usually find this divided into two cuts, the Boston butt and the picnic ham. Contrary to what most of us believe, the butt comes from the upper part of the front shoulder. While a picnic ham is a good option, a Boston Butt is easier to work with, uniform in shape, and contains the right ratio of fat to lean. You should look for a Boston Butt that is rectangular in shape with a layer of fat on one side. The color should be a rich pink to purple and the meat firm to the touch. The key is to start with a cut that has ample marbling and connective tissue so it softens as it slowly cooks, becoming so tender that it easily pulls apart.

Once you have selected your meat, trim off any loose fat and skin. These won't aid the pork much and will tend to just get in the way. With the meat ready, apply a rub to flavor the meat while it smokes and help it produce a crusty surface called “bark.” A typical pork rub will have sugar, salt, pepper (any combination of black, white, or red), and herbs. Work the rub deep into the meat and let it sit on the meat for about an hour to sink into the meat and form a moist paste on the surface. Now you're ready to smoke.

Fill a smoker or kettle grill with charcoal and light.* When the coals are mostly white, spread them out with tongs. Spread ½ cup of the wood chips over the coals (use 1 cup for a kettle grill). The smoke of pulled pork is provided by hickory and/or oak. While you can use any mild wood these are the traditional woods. You will want an even temperature around 225°F. You should try to keep the smoker temperature below 265°F no matter what.  If the temperature is too high, it will make the meat tough. You want to smoke your pork roasts for about 1 to 1½ hours per pound. This means you will be cooking your pork for a long time; low and slow.

Place the pork fat-side down on a rack (over the water pan if possible) in the smoker or on the grill, cover and cook, rotating the pork every hour or so. Add additional coals and water as needed to maintain the temperature and moisture in the smoker. We do not add wood after the first 2 hours of smoking because we think too much smoke gives the meat a bitter taste. You can remove the pork from the heat once it reaches an internal temperature of 165°F, but it won't be ready. You will want to continue cooking at a temperature around 190°F until you can easily shred the meat with a fork. [Of course, if you have trouble maintaining a grill for this long you can use alternative cooking methods after a few hours. Wrap the pork tightly in foil and place it in your oven at 225°F until it is finished.]

When done, remove the meat from the grill and wrap completely with foil. Let stand for 20-30 minutes to redistribute the juices and cool enough to handle. Transfer the pork to a rimmed baking sheet (you'll want to catch all the flavorful juices) and shred by inserting two forks into a chunk of meat and pull in opposite directions to get long, thin shreds. Repeat with remaining meat. Pile the shredded pieces on a platter and pour any juices from the baking sheet on top.

Now the fun begins! You can use this juicy meat in any manner of dishes from traditional pulled pork sandwiches to smoky pork tacos. Try some pulled pork in a spicy Cuban-style wrap or stacked on a salad with grilled peaches and torn fresh mozzarella. The possibilities are endlessly delicious!

*If using a gas grill, preheat to high on one side; put soaked wood chips in a smoker box. Once smoking, reduce the heat to maintain a temperature of about 250°F and cook the pork, covered, on the cooler side of the grill.


Yum

Saturday, September 14, 2013

Brownies: Historically Delightful

A chocolate brownie is a flat, baked square or bar developed in the United States at the end of the 19th century. The brownie is a cross between a cake and a cookie in texture. Brownies come in a variety of forms. They can be either fudgy or cakey, depending on their density and they may include nuts, chocolate chips, or can be frosted. Brownies are a common lunchbox addition and are popular in restaurants, where they can be found on many dessert menus served warm with ice cream (Ă  la mode), topped with whipped cream or sprinkled with powdered sugar. The earliest published recipes for both cakey- and fudgy-style chocolate brownies have been traced to The Boston Cooking-School Cook Book, edited by Fannie Merritt Farmer in the late 1890s.

Nineteenth century changes in chocolate form, taste and availability encouraged experimentation in cooking and baking. Boston-based chocolatier Walter M. Lowney debuted the first American-made chocolate bars at the Columbian Exposition held in Chicago, Illinois, in 1893. Many culinary historians believe that it was also at the Columbian Exposition that brownie was introduced. As the story goes, wealthy socialite Bertha Potter Palmer asked her chef to create a dessert that could be tucked into a box lunch for ladies to eat while attending the Columbian Exposition.The resulting treat was a super-rich, fudgy-chocolate confection topped with walnuts and an apricot glaze that was the predecessor to the modern-day brownie.

Regardless of their origin, it is clear where brownies are going… into the mouths of three of their biggest fans. A full batch of brownies rarely lasts a full day in the Romeo house! While I no longer need to refer to this recipe, we are sharing our family’s version is hopes it will become a favorite in your house.

  • 1/2 cup (1 stick) butter, melted 
  • 1 cup sugar 
  • 1 teaspoon vanilla extract 
  • 2 eggs 
  • 1/2 cup all-purpose flour 
  • 1/3 cup cocoa powder
  • 1/4 teaspoon baking powder 
  • 1/4 teaspoon salt 
  • 1/2 cup chopped nuts (optional) 
  • 1/2 cup chocolate morsels (optional)

Pre-heat oven to 350°F. Grease 9-inch square baking pan. Using an electric mixer, cream together butter (or margarine), sugar and vanilla in bowl. Add eggs and beat well. Mix dry ingredients of flour, cocoa, baking powder and salt together and gradually add to egg mixture, beating until well blended.

Stir in nuts and morsels, as desired. Spread batter evenly into a greased baking pan.  Bake 20 to 25 minutes or until brownies begin to pull away from sides of pan.

They are done when a toothpick pricked into the center comes out clean with no batter. Cool completely in the pan on a wire rack. Cut into squares small or large and watch them disappear!


Yum

Wednesday, September 11, 2013

Chicken Paillard in Creamy Mustard Sauce

Chicken Paillard is a classic dish of boneless chicken breasts that have been thinned out using a mallet, rolling pin or merely “butterflied.” The mallet breaks down the fibers in the meat, making it more tender, while the thinner cutlets cooks faster with less loss of moisture. This recipe uses a creamy mustard sauce which complements the flavor of the tenderized chicken perfectly. It goes well with any number of fresh sides like a crisp salad, steamed vegetables or baby new potatoes.

  • 2 chicken breasts, pounded to ¼’ thick
  • 1 tablespoon butter
  • 1 tablespoon olive oil
  • ¼ cup white wine
  • 1 tablespoon whole grain mustard
  • 2/3 cup chicken stock
  • 1/3 cup heavy cream
  • Salt and pepper to taste

Place the chicken breasts between 2 sheets of waxed paper or plastic wrap and hit with glancing blows, working from the center to the edge using a meat mallet or a rolling pin to flatten the cutlets to ¼” thickness.

In a large sauté pan over medium-high heat, melt the butter with the olive oil until almost smoking. Add the chicken and cook, turning once, until golden brown and cooked through, about 4 minutes per side; add more butter and oil to the pan if needed. Transfer the chicken to a warmed plate and cover loosely with aluminum foil.

Reduce the heat to medium and add the wine and deglaze the pan stirring to scrape up the browned bits.  Add stock and mustard and cook until the sauce begins to thicken, 3 to 5 minutes. Stir in the cream and season with salt and pepper and cook until smooth with the consistency of thick gravy.

Add the chicken back to the pan and fully coat the cutlets with sauce. Serve the chicken with additional sauce poured over the top as desired. The sauce is delicious ladled over a side of potatoes as well.


Yum

Friday, September 6, 2013

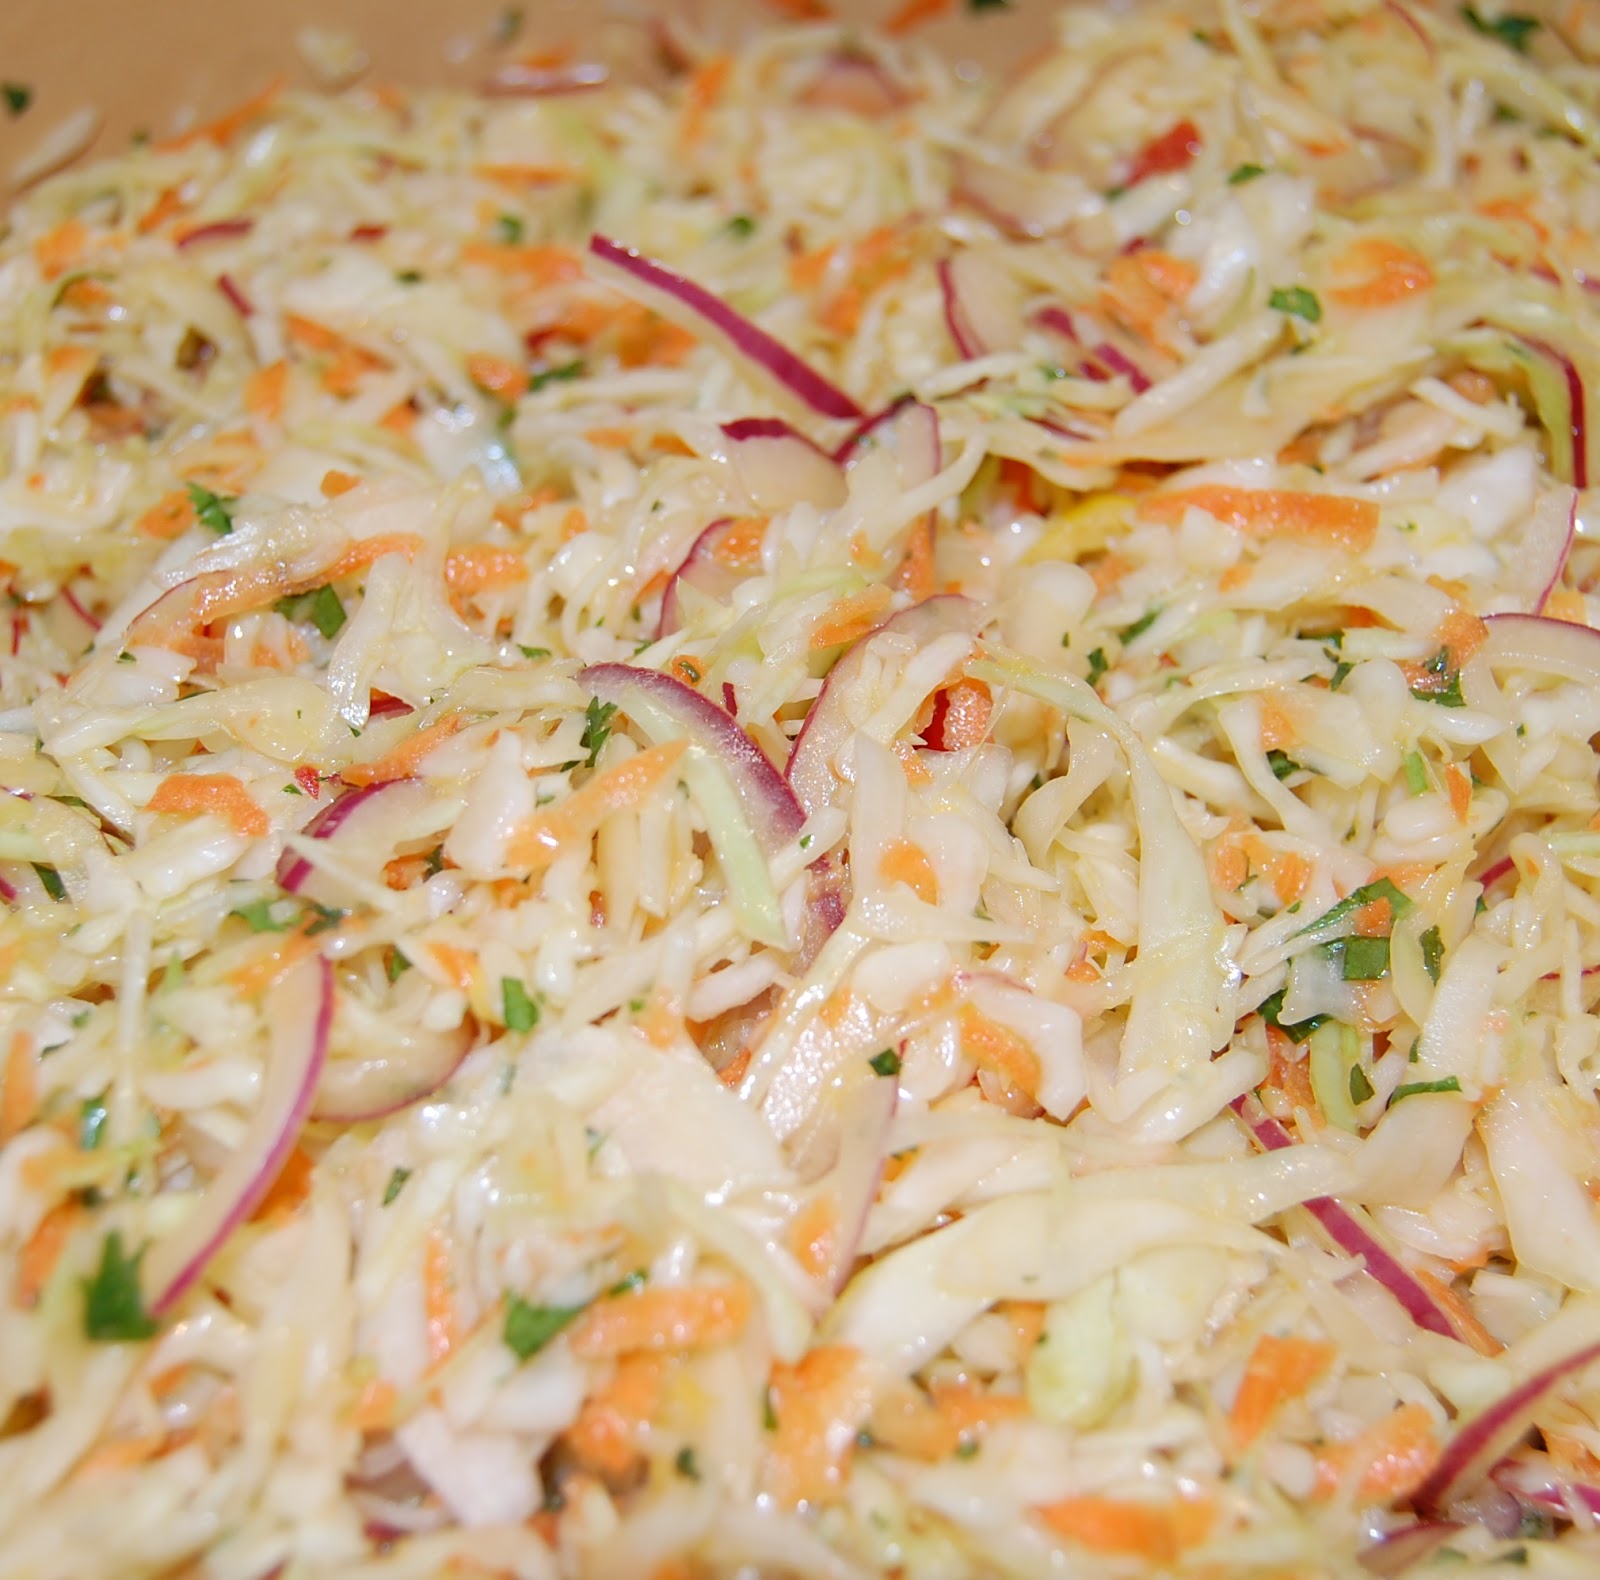
Harmonious Jalapeno Basil Coleslaw

When it comes to food, people have very definitive opinions about how certain dishes should be prepared; the most controversial among these are pizza, barbecued ribs, potato salad and cole slaw. With the latter, it seems there is even disagreement about the origin of its name. While some historian believe  the name comes from the Dutch kool sla for "cabbage salad," others contend that it is derived from kohl schlagl which is German for “cabbage chopped.”

For the purposes of this discussion, we shall define cole slaw (or coleslaw) to mean chopped or shredded cabbage covered in a dressing that includes at least a splash of vinegar. This is apparently where the friction begins. It seems that slaw purists add only dressing or mayonnaise (which technically is a dressing that contains vinegar), while others are adamant that carrots, raisins, pickles, relish, pineapple and even cheese be included.

Now to my way of thinking, celery seed is the greatest abomination to ever grace a spice cabinet not to mention a bowl of coleslaw, yet Dom is a fan - thus a minor example of the discord that slaw can cause. You all may also recall that Dom is NOT a fan of mayonnaise: this recipe is our matrimonial compromise. It is spicy and full of fresh herbal flavor (with no mayonnaise or celery seeds!)

  • 1 lb. (about 4 cups) red and/or white cabbage, shaved
  • 1/2 red onion, shaved very thin
  • 1-3 carrots, grated
  • 2 fresh jalapenos, seeded and sliced very tin
  • 1/2 cup cilantro leaves, chopped

  • Vinaigrette:

  • 1 cup loosely-packed basil leaves
  • 1 shallot, chopped
  • 2 garlic cloves, pan toasted to
  • 1/2 cup olive oil
  • 2 teaspoons honey
  • 1/4 cup Champagne vinegar
  • 1 teaspoon salt (or to taste)
  • 1/4 teaspoon black pepper (or to taste)

In a large bowl, place cabbage, carrot, jalapenos, and cilantro leaves. If the red onion is too sharp, rinse in cold water before adding to the cabbage mixture. Chill until ready to serve.

In a blender or food processor, place basil, shallot, toasted garlic, and oil. Blend until smooth. Add honey, vinegar, salt, and pepper and pulse to fully combine. Pour over slaw at least 5 minutes before serving. The slaw takes on a different texture (almost like kimchi) when it marinades in the dressing, in some cases we like it better this way. This gluten-free slaw is awesome served alone or with barbecued ribs, on pulled pork sandwiches, and in fish tacos!


Yum
Powered by Blogger.

footer social

ShareThis